
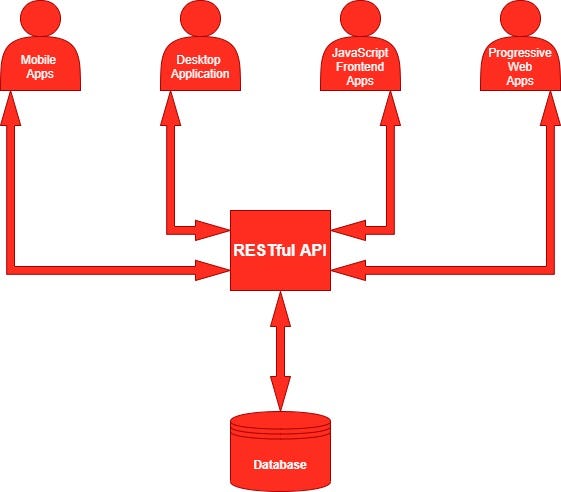
This tutorial would be the last part of our laravel-news application. We have already completed the migrations and models, relationships among models, and creating and consuming RESTful API. To create the user interface for admin users I have planned to use Jetstream, Livewire, Sanctum, and Tailwind.
The admin dashboard needs to be secure. Laravel comes with Laravel Jetstream which provides login, registration, email verification, two-factor authentication, session management, API support via Laravel Sanctum, and optional team management. Jetstream is designed using Tailwind CSS and offers your choice of Livewire or Inertia scaffolding.
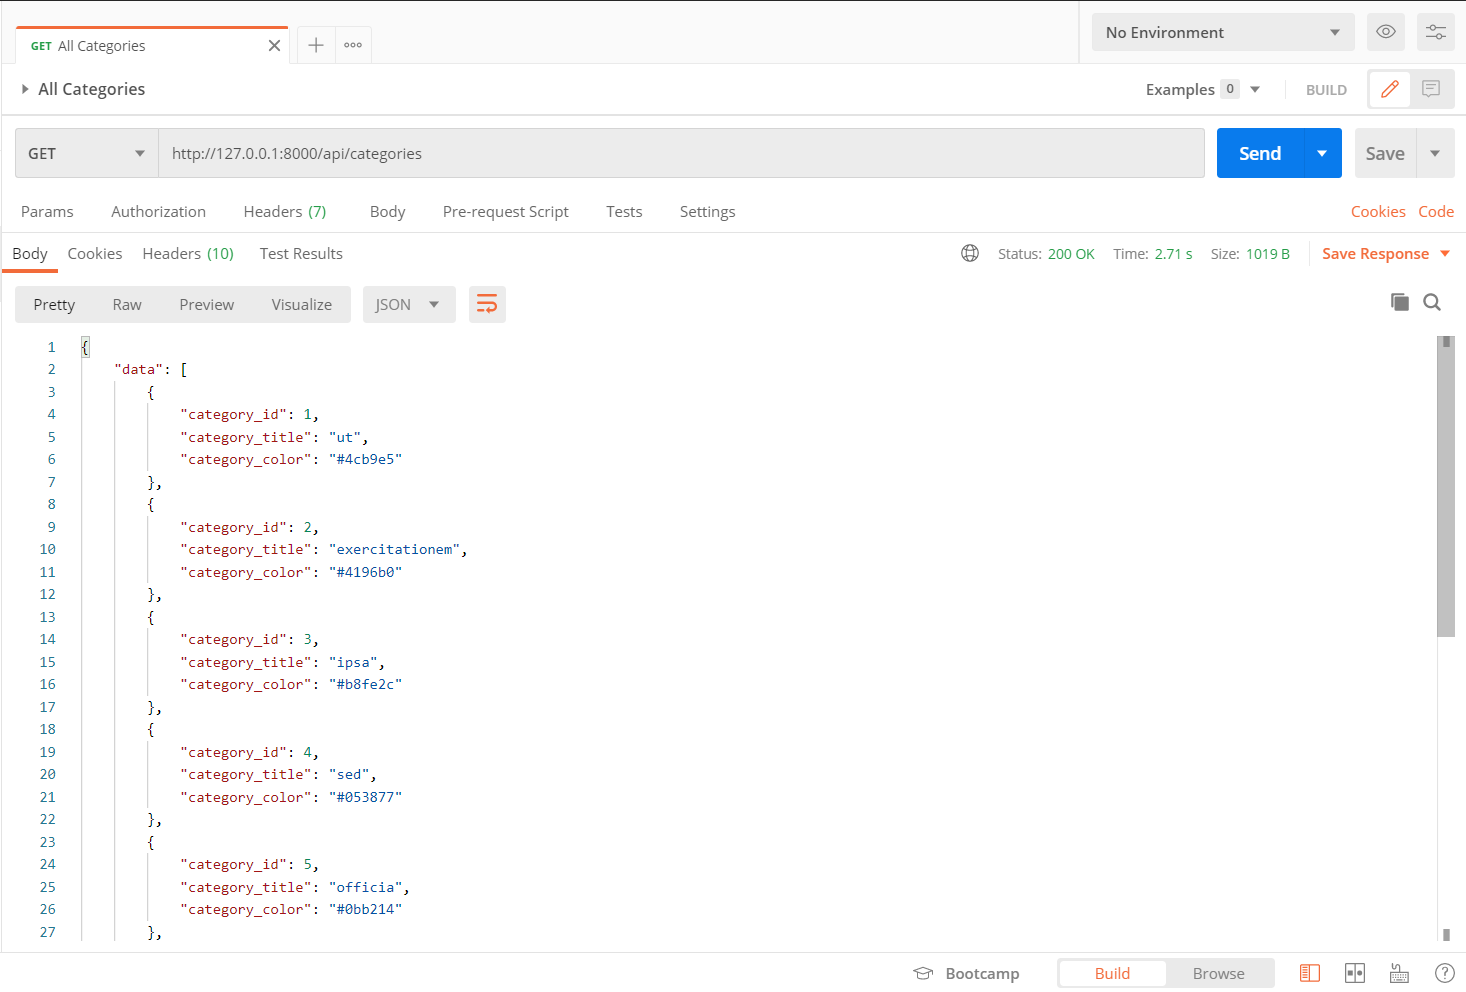
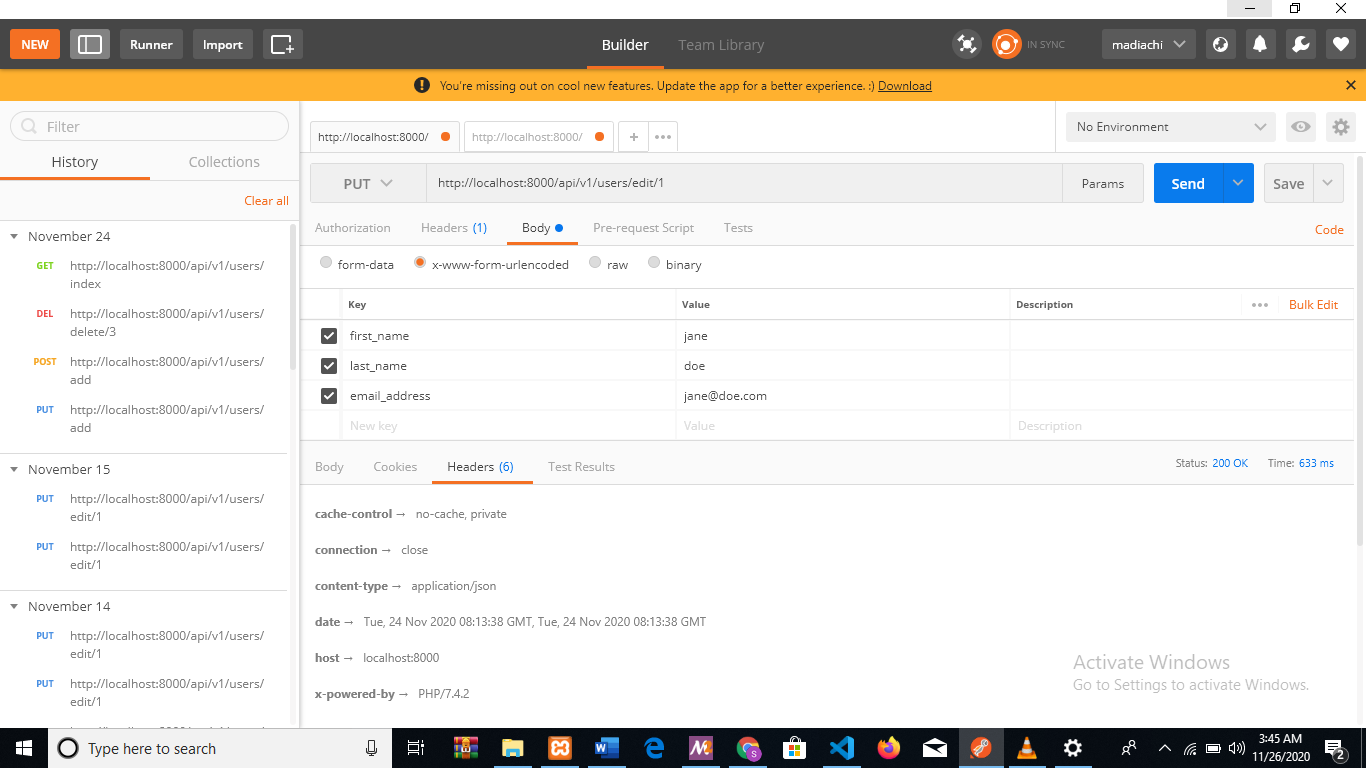
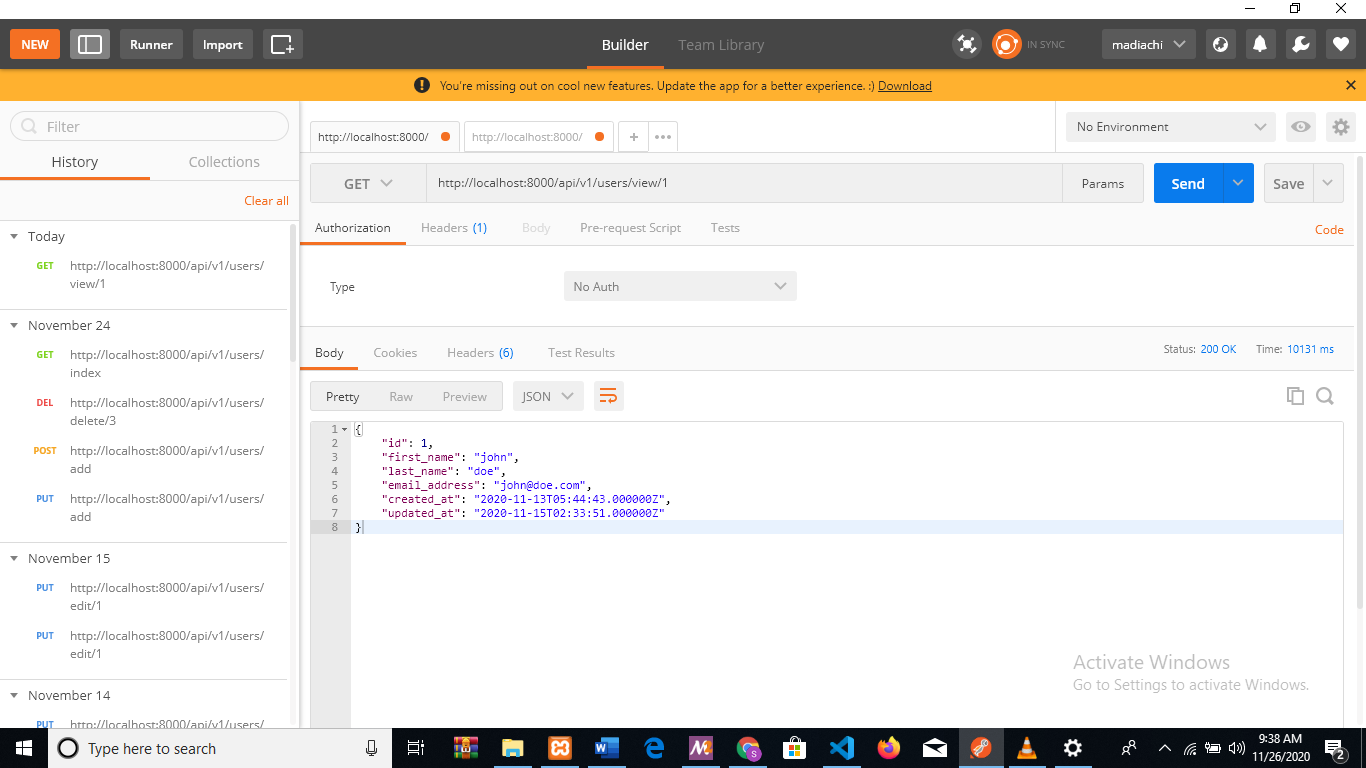
We have already used Laravel Sanctum to secure RESTful API in the previous tutorial.
If you like Vue.js as a templating language then choose the Inertia.js stack provided by Jetstream.
I am sticking to Blade as the templating language so I will use Livewire provided by Jetstream.
Laravel Livewire is a library that makes it simple to build modern, reactive, dynamic interfaces. When using Livewire, you may pick and choose which portions of your application will be a Livewire component, while the remainder of your application can be rendered as the traditional Blade templates you are used to.
Now let’s dive into code. There is make:livewire command which creates two files, one in app\Http\Livewire directory and another in resources\views\livewire directory.
Different versions of this command are as follows:
php artisan make:livewire foo
# Creates Foo.php & foo.blade.php
php artisan make:livewire foo-bar
# Creates FooBar.php & foo-bar.blade.php
php artisan make:livewire Foo\\Bar
php artisan make:livewire Foo/Bar
php artisan make:livewire foo.bar
# Creates Foo/Bar.php & foo/bar.blade.php
php artisan make:livewire foo --inline
# Creates only Foo.php
Before we start with our planned application, let us make few required edits in registration and profile update files provided by Laravel as there are first_name and last_name in our users table instead of the default name.
If you have not changed the default migration for users table then you may skip this step.
Open resources\views\auth\register.blade.php
<div>
<x-jet-label for="name" value="{{ __('Name') }}" />
<x-jet-input id="name" class="block mt-1 w-full" type="text" name="name" :value="old('name')" required autofocus autocomplete="name" />
</div>
and replace the above code with the following code
<div>
<x-jet-label for="first_name" value="{{ __('First Name') }}" />
<x-jet-input id="first_name" class="block mt-1 w-full" type="text" name="first_name" :value="old('first_name')" required autofocus autocomplete="first_name" />
</div><div>
<x-jet-label for="last_name" value="{{ __('Last Name') }}" />
<x-jet-input id="last_name" class="block mt-1 w-full" type="text" name="last_name" :value="old('last_name')" required autocomplete="last_name" />
</div>
Open resources\views\profile\update-profile-information-form.blade.php
<!-- Name -->
<div class="col-span-6 sm:col-span-4">
<x-jet-label for="name" value="{{ __('Name') }}" />
<x-jet-input id="name" type="text" class="mt-1 block w-full" wire:model.defer="state.name" autocomplete="name" />
<x-jet-input-error for="name" class="mt-2" />
</div>
and replace the above code with the following code
<!-- First Name -->
<div class="col-span-6 sm:col-span-4">
<x-jet-label for="first_name" value="{{ __('First Name') }}" />
<x-jet-input id="first_name" type="text" class="mt-1 block w-full" wire:model.defer="state.first_name" autocomplete="first_name" />
<x-jet-input-error for="first_name" class="mt-2" />
</div><!-- Last Name -->
<div class="col-span-6 sm:col-span-4">
<x-jet-label for="last_name" value="{{ __('Last Name') }}" />
<x-jet-input id="last_name" type="text" class="mt-1 block w-full" wire:model.defer="state.last_name" autocomplete="last_name" />
<x-jet-input-error for="last_name" class="mt-2" />
</div>
Then open app\Actions\Fortify\CreateNewUser.php and replace the create() with the following code:
public function create(array $input)
{
Validator::make($input, [
'first_name' => ['required', 'string', 'max:255'],
'last_name' => ['required', 'string', 'max:255'],
'email' => ['required', 'string', 'email', 'max:255', 'unique:users'],
'password' => $this->passwordRules(),
])->validate();return User::create([
'first_name' => ['required', 'string', 'max:255'],
'last_name' => ['required', 'string', 'max:255'],
'email' => $input['email'],
'password' => Hash::make($input['password']),
]);
}
After that open app\Actions\Fortify\UpdateUserProfileInformation.php and replace update() and updateVerifiedUser() functions with the following code:
public function update($user, array $input)
{
Validator::make($input, [
'first_name' => ['required', 'string', 'max:255'],
'last_name' => ['required', 'string', 'max:255'],
'email' => ['required', 'email', 'max:255', Rule::unique('users')->ignore($user->id)],
'photo' => ['nullable', 'image', 'max:1024'],
])->validateWithBag('updateProfileInformation');if (isset($input['photo'])) {
$user->updateProfilePhoto($input['photo']);
}if ($input['email'] !== $user->email && $user instanceof MustVerifyEmail) {
$this->updateVerifiedUser($user, $input);
} else {
$user->forceFill([
'first_name' => $input['first_name'],
'last_name' => $input['last_name'],
'email' => $input['email'],
])->save();
}
}protected function updateVerifiedUser($user, array $input)
{
$user->forceFill([
'first_name' => $input['first_name'],
'last_name' => $input['last_name'],
'email' => $input['email'],
'email_verified_at' => null,
])->save();
$user->sendEmailVerificationNotification();
}
At this point, we are ready to go with Laravel’s default registration and profile update functionality.
Now move on to create pages to manage Categories, Tags, and Posts of our News Application.
Our Category page will look like the following and have the functionality to list all categories, edit a category, show all posts of a category, delete a category, and create a new category.
To create this page follow the below-mentioned steps:
php artisan make:livewire Categories\\categories
It will create Component and View files as discussed before.
Open app\Http\Livewire\Categories\Categories.php and write the following code
<?php
namespace App\Http\Livewire\Categories;use App\Models\Category;
use Livewire\Component;class Categories extends Component
{
public $categories, $title, $color, $category_id;
public $isOpen = 0;public function render()
{
$this->categories = Category::all();
return view('livewire.categories.categories');
}public function store()
{
$this->validate([
'title' => 'required',
'color' => 'required',
]);Category::updateOrCreate(['id' => $this->category_id], [
'title' => $this->title,
'color' => $this->color
]);session()->flash('message', $this->category_id ? 'Category Updated Successfully.' : 'Category Created Successfully.');$this->closeModal();$this->resetInputFields();
}public function delete($id)
{
Category::find($id)->delete();
session()->flash('message', 'Category Deleted Successfully.');
}public function edit($id)
{
$category = Category::findOrFail($id);
$this->category_id = $id;
$this->title = $category->title;
$this->color = $category->color;
$this->openModal();
}public function create()
{
$this->resetInputFields();
$this->openModal();
}public function openModal()
{
$this->isOpen = true;
}public function closeModal()
{
$this->isOpen = false;
}private function resetInputFields()
{
$this->title = '';
$this->color = '';
$this->category_id = '';
}
}
In the above code all the public properties are available to the view returned by render() method. List of all categories are passed to categories view by $categories variable.
To create or update a category the store() method is wired in the view. In this method after validation a category is added or updated in the database and accordingly message is flushed.
To delete a category delete() method is wired to delete button of view. The id of category to be deleted is passed to delete method from view and the same is deleted and message is flushed.
The edit() method is wired to edit button of the view. It passes id of the category. Then the category data is fetched by this id and all the public variables are populted with that data which will now be available to model form.
Then open resources\views\livewire\categories\categories.blade.php and write the following code
<x-slot name="header">
<h2 class="font-semibold text-xl text-gray-800 leading-tight">
Categories
</h2>
</x-slot><div class="py-12">
<div class="max-w-7xl mx-auto sm:px-6 lg:px-8">
<div class="bg-white overflow-hidden shadow-xl sm:rounded-lg px-4 py-4">
@if (session()->has('message'))
<div class="bg-teal-100 border-t-4 border-teal-500 rounded-b text-teal-900 px-4 py-3 shadow-md my-3" role="alert">
<div class="flex">
<div>
<p class="text-sm">{{ session('message') }}</p>
</div>
</div>
</div>
@endif<button
wire:click="create()"
class="inline-flex items-center px-4 py-2 my-3 bg-gray-800 border border-transparent rounded-md font-semibold text-xs text-white uppercase tracking-widest hover:bg-gray-700 active:bg-gray-900 focus:outline-none focus:border-gray-900 focus:shadow-outline-gray disabled:opacity-25 transition ease-in-out duration-150">
Create New Category
</button>@if($isOpen)
@include('livewire.categories.create')
@endif<table class="table-fixed w-full">
<thead>
<tr class="bg-gray-100">
<th class="px-4 py-2 w-20">No.</th>
<th class="px-4 py-2">Title</th>
<th class="px-4 py-2">Color</th>
<th class="px-4 py-2">Action</th>
</tr>
</thead>
<tbody>
<?php $count = 1; ?>
@foreach($categories as $category)
<tr>
<td class="border px-4 py-2"><?php echo $count++; ?></td>
<td class="border px-4 py-2">{{ $category->title }}</td>
<td class="border px-4 py-2"><span style="background-color: {{ $category->color }};"> </span> {{ $category->color }}</td>
<td class="border px-4 py-2">
<button
wire:click="edit({{ $category->id }})"
class="inline-flex items-center px-4 py-2 bg-gray-800 border border-transparent rounded-md font-semibold text-xs text-white uppercase tracking-widest hover:bg-gray-700 active:bg-gray-900 focus:outline-none focus:border-gray-900 focus:shadow-outline-gray disabled:opacity-25 transition ease-in-out duration-150">
Edit
</button>
<a href="{{ url('dashboard/categories/'. $category->id .'/posts') }}" class="inline-flex items-center px-4 py-2 bg-gray-800 border border-transparent rounded-md font-semibold text-xs text-white uppercase tracking-widest hover:bg-gray-700 active:bg-gray-900 focus:outline-none focus:border-gray-900 focus:shadow-outline-gray disabled:opacity-25 transition ease-in-out duration-150">
Show All Posts
</a>
<button
wire:click="delete({{ $category->id }})"
class="inline-flex items-center justify-center px-4 py-2 bg-red-600 border border-transparent rounded-md font-semibold text-xs text-white uppercase tracking-widest hover:bg-red-500 focus:outline-none focus:border-red-700 focus:shadow-outline-red active:bg-red-600 transition ease-in-out duration-150">
Delete
</button>
</td>
</tr>
@endforeach
</tbody>
</table>
</div>
</div>
</div>
Create one more view resources\views\livewire\categories\create.blade.php which will act as model to create and edit the category
<div class="fixed z-10 inset-0 overflow-y-auto ease-out duration-400">
<div class="flex items-end justify-center min-h-screen pt-4 px-4 pb-20 text-center sm:block sm:p-0">
<div class="fixed inset-0 transition-opacity">
<div class="absolute inset-0 bg-gray-500 opacity-75"></div>
</div><!-- This element is to trick the browser into centering the modal contents. --><span class="hidden sm:inline-block sm:align-middle sm:h-screen"></span><div
class="inline-block align-bottom bg-white rounded-lg text-left overflow-hidden shadow-xl transform transition-all sm:my-8 sm:align-middle sm:max-w-lg sm:w-full"
role="dialog" aria-modal="true" aria-labelledby="modal-headline"><form>
<div class="bg-white px-4 pt-5 pb-4 sm:p-6 sm:pb-4">
<div class="">
<div class="mb-4">
<label for="exampleFormControlInput1" class="block text-gray-700 text-sm font-bold mb-2">Title:</label>
<input type="text" class="shadow appearance-none border rounded w-full py-2 px-3 text-gray-700 leading-tight focus:outline-none focus:shadow-outline" id="exampleFormControlInput1" placeholder="Enter Title" wire:model="title">
@error('title') <span class="text-red-500">{{ $message }}</span>@enderror
</div>
<div class="mb-4">
<label for="exampleFormControlInput2"
class="block text-gray-700 text-sm font-bold mb-2">Color:</label><textarea
class="shadow appearance-none border rounded w-full py-2 px-3 text-gray-700 leading-tight focus:outline-none focus:shadow-outline" id="exampleFormControlInput2" wire:model="color" placeholder="Enter Color"></textarea>
@error('color') <span class="text-red-500">{{ $message }}</span>@enderror
</div>
</div>
</div>
<div class="bg-gray-50 px-4 py-3 sm:px-6 sm:flex sm:flex-row-reverse">
<span class="flex w-full rounded-md shadow-sm sm:ml-3 sm:w-auto">
button wire:click.prevent="store()" type="button" class="inline-flex items-center px-4 py-2 my-3 bg-gray-800 border border-transparent rounded-md font-semibold text-xs text-white uppercase tracking-widest hover:bg-gray-700 active:bg-gray-900 focus:outline-none focus:border-gray-900 focus:shadow-outline-gray disabled:opacity-25 transition ease-in-out duration-150">
Save
</button>
</span>
<span class="mt-3 flex w-full rounded-md shadow-sm sm:mt-0 sm:w-auto">
<button wire:click="closeModal()" type="button" class="inline-flex items-center px-4 py-2 my-3 bg-white border border-gray-300 rounded-md font-semibold text-xs text-gray-700 uppercase tracking-widest shadow-sm hover:text-gray-500 focus:outline-none focus:border-blue-300 focus:shadow-outline-blue active:text-gray-800 active:bg-gray-50 transition ease-in-out duration-150">
Cancel
</button>
</span>
</form>
</div>
</div>
</div>
</div>
To show all the posts belonging to a category create app\Http\Livewire\Categories\Categoryposts.php file and write the following code
<?php
namespace App\Http\Livewire\Categories;use App\Models\Category;
use App\Models\Post;
use App\Models\Tag;
use Illuminate\Support\Facades\Auth;
use Illuminate\Support\Facades\DB;
use Livewire\Component;
use Livewire\WithPagination;class Categoryposts extends Component
{
use WithPagination;
public $title, $content, $category, $post_id;
public $tagids = array();
public $isOpen = 0;
public $cid;public function mount($id)
{
$this->cid = $id;
}public function render()
{
return view('livewire.posts.posts', [
'posts' => Post::where('category_id', $this->cid)->orderBy('id', 'desc')->paginate(),
'categories' => Category::all(),
'tags' => Tag::all(),
]);
}public function store()
{
$this->validate([
'title' => 'required',
'content' => 'required',
'category' => 'required',
]);$post = Post::updateOrCreate(['id' => $this->post_id], [
'title' => $this->title,
'content' => $this->content,
'category_id' => intVal($this->category),
'author_id' => Auth::user()->id,
]);if (count($this->tagids) > 0) {
DB::table('post_tag')->where('post_id', $post->id)->delete();
foreach ($this->tagids as $tagid) {
DB::table('post_tag')->insert([
'post_id' => $post->id,
'tag_id' => intVal($tagid),
'created_at' => now(),
'updated_at' => now(),
]);
}
}
session()->flash('message', $this->post_id ? 'Post Updated Successfully.' : 'Post Created Successfully.');$this->closeModal();$this->resetInputFields();
}public function delete($id)
{
Post::find($id)->delete();
session()->flash('message', 'Post Deleted Successfully.');
}public function edit($id)
{
$post = Post::with('tags')->findOrFail($id);
$this->post_id = $id;
$this->title = $post->title;
$this->content = $post->content;
$this->category = $post->category_id;
$this->tagids = $post->tags->pluck('id');
$this->openModal();
}public function create()
{
$this->resetInputFields();
$this->openModal();
}public function openModal()
{
$this->isOpen = true;
}public function closeModal()
{
$this->isOpen = false;
}private function resetInputFields()
{
$this->title = '';
$this->content = '';
$this->category = null;
$this->tagids = null;
$this->post_id = '';
}
}
In the above code we are doing pagination as there might be many posts belonging to a category. To do so use Livewire\WithPagination then use paginate() method to get paginated records.
In the above code block we have used mount() method, we use mount() method to intercept parameters. To get the id of category from URL we will use this method.
This time we are passing posts, categories, and tags to view so we will pass these as an array in the second parameter while returning view.
Rest of the code is mostly repetative. So I am ignoring for now.
Now lets work on Posts. Posts page will look like this:
Once again run make:livewire as follows:
php artisan make:livewire Posts\\posts
Open app\Http\Livewire\Posts\Posts.php file and paste the following code:
<?php
namespace App\Http\Livewire\Posts;
use App\Models\Category;
use App\Models\Image;
use App\Models\Post;
use App\Models\Tag;
use Illuminate\Support\Facades\Auth;
use Illuminate\Support\Facades\DB;
use Illuminate\Support\Str;
use Livewire\Component;
use Livewire\WithFileUploads;
use Livewire\WithPagination;class Posts extends Component
{
use WithPagination;
use WithFileUploads;
public $title, $content, $category, $post_id;
public $tagids = array();
public $photos = [];
public $isOpen = 0;public function render()
{
return view('livewire.posts.posts', [
'posts' => Post::orderBy('id', 'desc')->paginate(),
'categories' => Category::all(),
'tags' => Tag::all(),
]);
}public function store()
{
$this->validate([
'title' => 'required',
'content' => 'required',
'category' => 'required',
'photos.*' => 'image|max:1024',
]);// Update or Insert Post
$post = Post::updateOrCreate(['id' => $this->post_id], [
'title' => $this->title,
'content' => $this->content,
'category_id' => intVal($this->category),
'author_id' => Auth::user()->id,
]);// Image upload and store name in db
if (count($this->photos) > 0) {
Image::where('post_id', $post->id)->delete();
$counter = 0;
foreach ($this->photos as $photo) {
$storedImage = $photo->store('public/photos');
$featured = false;
if($counter == 0 ){
$featured = true;
}Image::create([
'url' => url('storage'. Str::substr($storedImage, 6)),
'title' => '-',
'post_id' => $post->id,
'featured' => $featured
]);
$counter++;
}
}// Post Tag mapping
if (count($this->tagids) > 0) {
DB::table('post_tag')->where('post_id', $post->id)->delete();
foreach ($this->tagids as $tagid) {
DB::table('post_tag')->insert([
'post_id' => $post->id,
'tag_id' => intVal($tagid),
'created_at' => now(),
'updated_at' => now(),
]);
}
}session()->flash('message', $this->post_id ? 'Post Updated Successfully.' : 'Post Created Successfully.');$this->closeModal();$this->resetInputFields();
}public function delete($id)
{
Post::find($id)->delete();
DB::table('post_tag')->where('post_id', $id)->delete();session()->flash('message', 'Post Deleted Successfully.');
}public function edit($id)
{
$post = Post::with('tags')->findOrFail($id);
$this->post_id = $id;
$this->title = $post->title;
$this->content = $post->content;
$this->category = $post->category_id;
$this->tagids = $post->tags->pluck('id');
$this->openModal();
}public function create()
{
$this->resetInputFields();
$this->openModal();
}public function openModal()
{
$this->isOpen = true;
}public function closeModal()
{
$this->isOpen = false;
}private function resetInputFields()
{
$this->title = null;
$this->content = null;
$this->category = null;
$this->tagids = null;
$this->photos = null;
$this->post_id = null;
}
}
The above code follows the same pattern as previous codes. Here I am uploading multiple files. To upload file use Livewire\WithFileUploads. Read more here about Livewire file upload.
Open resources\views\livewire\posts\posts.blade.php and paste the following code:
<x-slot name="header">
<h2 class="font-semibold text-xl text-gray-800 leading-tight">
Posts
</h2>
</x-slot><div class="py-12">
<div class="max-w-7xl mx-auto sm:px-6 lg:px-8">
<div class="bg-white overflow-hidden shadow-xl sm:rounded-lg px-4 py-4">
@if (session()->has('message'))
<div class="bg-teal-100 border-t-4 border-teal-500 rounded-b text-teal-900 px-4 py-3 shadow-md my-3"
role="alert">
<div class="flex">
<div>
<p class="text-sm">{{ session('message') }}</p>
</div>
</div>
</div>
@endif
@if (Request::getPathInfo() == '/dashboard/posts')
<button wire:click="create()" class="inline-flex items-center px-4 py-2 my-3 bg-gray-800 border border-transparent rounded-md font-semibold text-xs text-white uppercase tracking-widest hover:bg-gray-700 active:bg-gray-900 focus:outline-none focus:border-gray-900 focus:shadow-outline-gray disabled:opacity-25 transition ease-in-out duration-150">
Create New Post
</button>
@endif@if ($isOpen)
@include('livewire.posts.create')
@endif<div class="grid grid-flow-row grid-cols-3  gap-4">
@foreach ($posts as $post)
<div class="max-w-sm rounded overflow-hidden shadow-lg">
<div class="px-6 py-4">
<div class="font-bold text-xl mb-2">{{ $post->title }}</div>
<p class="text-gray-700 text-base">
{{ Str::words($post->content, 20, '...') }}
</p>
</div>
<div class="px-6 pt-4 pb-2">
<a href="{{ url('dashboard/posts', $post->id) }}"
class="inline-flex items-center px-4 py-2 bg-gray-800 border border-transparent rounded-md font-semibold text-xs text-white uppercase tracking-widest hover:bg-gray-700 active:bg-gray-900 focus:outline-none focus:border-gray-900 focus:shadow-outline-gray disabled:opacity-25 transition ease-in-out duration-150">
Read post
</a><button wire:click="edit({{ $post->id }})"
class="inline-flex items-center px-4 py-2 bg-gray-800 border border-transparent rounded-md font-semibold text-xs text-white uppercase tracking-widest hover:bg-gray-700 active:bg-gray-900 focus:outline-none focus:border-gray-900 focus:shadow-outline-gray disabled:opacity-25 transition ease-in-out duration-150">
Edit
</button><button wire:click="delete({{ $post->id }})"
class="inline-flex items-center justify-center px-4 py-2 bg-red-600 border border-transparent rounded-md font-semibold text-xs text-white uppercase tracking-widest hover:bg-red-500 focus:outline-none focus:border-red-700 focus:shadow-outline-red active:bg-red-600 transition ease-in-out duration-150">
Delete
</button>
</div>
</div>
@endforeach
</div>
</div>
<div class="py-4">
{{ $posts->links() }}
</div>
</div>
</div>
Then create file resources\views\livewire\posts\create.blade.php to be used as model for post create and edit and paste the following code:
<div class="fixed z-10 inset-0 overflow-y-auto ease-out duration-400">
<div class="flex items-end justify-center min-h-screen pt-4 px-4 pb-20 text-center sm:block sm:p-0">
<div class="fixed inset-0 transition-opacity">
<div class="absolute inset-0 bg-gray-500 opacity-75"></div>
</div><!-- This element is to trick the browser into centering the modal contents. -->
<span class="hidden sm:inline-block sm:align-middle sm:h-screen"></span><div class="inline-block align-bottom bg-white rounded-lg text-left overflow-hidden shadow-xl transform transition-all sm:my-8 sm:align-middle sm:max-w-lg sm:w-full" role="dialog" aria-modal="true" aria-labelledby="modal-headline">
<form>
<div class="bg-white px-4 pt-5 pb-4 sm:p-6 sm:pb-4">
<div class="">
<div class="mb-4">
<label for="title" class="block text-gray-700 text-sm font-bold mb-2">Title:</label>
<input type="text" class="shadow appearance-none border rounded w-full py-2 px-3 text-gray-700 leading-tight focus:outline-none focus:shadow-outline" id="title" placeholder="Enter Title" wire:model="title">
@error('title') <span class="text-red-500">{{ $message }}</span>@enderror
</div><div class="mb-4">
<label for="content" class="block text-gray-700 text-sm font-bold mb-2">Content:</label>
<textarea rows="10" class="shadow appearance-none border rounded w-full py-2 px-3 text-gray-700 leading-tight focus:outline-none focus:shadow-outline" id="content" wire:model="content" placeholder="Enter Content"></textarea>
@error('content') <span class="text-red-500">{{ $message }}</span>@enderror
</div><div class="mb-4">
<label for="category" class="block text-gray-700 text-sm font-bold mb-2">Category:</label>
<select name="category" id="category" wire:model="category" class="shadow appearance-none w-full border text-gray-700 py-3 px-4 pr-8 rounded leading-tight focus:outline-none focus:shadow-outline"><option value="" selected>Select Category</option>
@foreach ($categories as $category)
<option value="{{ $category->id }}">{{ $category->title }}</option>
@endforeach
</select>
@error('category') <span class="text-red-500">{{ $message }}</span>@enderror
</div><div class="mb-4">
<div x-data="{ isUploading: false, progress: 0 }"
x-on:livewire-upload-start="isUploading = true"
x-on:livewire-upload-finish="isUploading = false"
x-on:livewire-upload-error="isUploading = false"
x-on:livewire-upload-progress="progress = $event.detail.progress"><div class="flex">
<label for="photos" class="block text-gray-700 text-sm font-bold mb-2">Images:</label>
{{-- <div class="px-2" wire:loading
wire:target="photos">Uploading</div> --}}
<div x-show="isUploading" class="px-2">
<progress max="100" x-bind:value="progress"></progress>
</div>
</div>
<input type="file" multiple name="photos" id="photos" class="shadow appearance-none border rounded w-full py-2 px-3 text-gray-700 leading-tight focus:outline-none focus:shadow-outline" wire:model="photos">
@error('photos') <span class="text-red-500">{{ $message }}</span>@enderror
</div>
</div><div class="mb-4">
<label for="tagids" class="block text-gray-700 text-sm font-bold mb-2">Tags:</label>
<select multiple name="tagids[]" id="tagids[]" wire:model="tagids" class="shadow appearance-none w-full border text-gray-700 py-3 px-4 pr-8 rounded leading-tight focus:outline-none focus:shadow-outline">
@foreach ($tags as $tag)
<option value="{{ $tag->id }}">{{ $tag->title }}</option>
@endforeach
</select>
</div>
</div>
</div><div class="bg-gray-50 px-4 py-3 sm:px-6 sm:flex sm:flex-row-reverse">
<span class="flex w-full rounded-md shadow-sm sm:ml-3 sm:w-auto"><button wire:click.prevent="store()" type="button" class="inline-flex items-center px-4 py-2 my-3 bg-gray-800 border border-transparent rounded-md font-semibold text-xs text-white uppercase tracking-widest hover:bg-gray-700 active:bg-gray-900 focus:outline-none focus:border-gray-900 focus:shadow-outline-gray disabled:opacity-25 transition ease-in-out duration-150">
Save
</button>
</span>
<span class="mt-3 flex w-full rounded-md shadow-sm sm:mt-0 sm:w-auto">
<button wire:click="closeModal()" type="button" class="inline-flex items-center px-4 py-2 my-3 bg-white border border-gray-300 rounded-md font-semibold text-xs text-gray-700 uppercase tracking-widest shadow-sm hover:text-gray-500 focus:outline-none focus:border-blue-300 focus:shadow-outline-blue active:text-gray-800 active:bg-gray-50 transition ease-in-out duration-150">
Cancel
</button>
</span>
</form>
</div>
</div>
</div>
</div>
To show single post create file app\Http\Livewire\Posts\Post.php and paste the following code:
<?php
namespace App\Http\Livewire\Posts;
use App\Models\Post as PostModel;
use Livewire\Component;class Post extends Component
{
public $post;
public function mount($id)
{
$this->post = PostModel::with(['author', 'comments', 'category', 'images', 'videos', 'tags'])->find($id);
}public function render()
{
return view('livewire.posts.post');
}
}
Now create view for the single post resources\views\livewire\posts\post.blade.php and paste the following code:
<x-slot name="header">
<h2 class="font-semibold text-xl text-gray-800 leading-tight">
Post
</h2>
</x-slot><div class="py-12">
<div class="max-w-7xl mx-auto sm:px-6 lg:px-8">
<div class="bg-white overflow-hidden shadow-xl sm:rounded-lg px-4 py-4">
<div class="grid gap-4">
<div class="font-bold text-xl mb-2">{{ $post->title }}</div>
<div class="flex">
by <span class="italic">{{ $post->author->first_name . ' ' . $post->author->last_name }}</span>
in <a href="{{ url('dashboard/category/' . $post->category->id . '/posts') }}" class="underline">{{ $post->category->title }}</a> on {{ $post->updated_at->format('F, d Y') }}</div><div class="grid grid-flow-col">
@foreach ($post->images as $image)
<div class="px-6 py-4">
<img src="{{ $image->url }}" alt="{{ $image->description }}" width="300" height="200">
</div>
@endforeach
</div><div class="grid grid-flow-col">
@foreach ($post->videos as $video)
<div class="px-6 py-4">
<img src="{{ $video->url }}" alt="{{ $video->title }}" width="300" height="200">
</div>
@endforeach
</div><div class="text-gray-700 text-base">
{!! $post->content !!}
</div><div class="flex">
@php
$tags=$post->tags->pluck('id', 'title');
@endphp
@if (count($tags) > 0)
Tags:
@foreach ($tags as $key => $tag)
<a href="{{ url('dashboard/tags/' . $tag . '/posts') }}" class="underline px-1">{{ $key }}</a>
@endforeach
@endif
</div>@if ($post->comments->count())
<div class="text-base">
<p class="text-gray-900 pt-2 pb-4">{{ $post->comments->count() }}
@if ($post->comments->count() > 1) Responses @else Response
@endif
</p><div class="bg-gray-100 overflow-hidden shadow-xl px-6 pt-4">
@foreach ($post->comments as $comment)
<div>
<p class="text-gray-500 font-bold">
{{ $comment->author->first_name . ' ' . $comment->author->last_name }}</p>
<p class="text-gray-400 text-xs">{{ $comment->created_at->format('F, d Y g:i a') }}
</p>
<p class="text-gray-500 pb-4">{{ $comment->content }}</p>
</div>
@endforeach
</div>
</div>
@endif
</div>
</div>
</div>
</div>
{{-- https://www.php.net/manual/en/datetime.format.php --}}
This completes Categories and Posts. Now Tags and navigation menus are remaining. I will update that here very soon.
The source code is available at Github for you to refer to.
Read the previous part, Creating and consuming RESTful API in Laravel of this tutorial.
Twitter: kotagin
GitHub: mdutt247
E-mail: m.dutt@mditech.net


