Blog

  • How to test Laravel with Sanctum API using the Postman

    In the last part, we completed the Laravel Breeze API installation and validated the API using the Breeze Next front end.

    In this blog, we going to test the API using the Postman application.

    About Postman

    Postman is software used to test the API by sending and receiving the request with multiple data formats along with auth.

    Postman is an API platform for building and using APIs. Postman simplifies each step of the API lifecycle and streamlines collaboration so you can create better APIs — faster.

    Install Postman

    Click here and complete your Postman installation. After installation opens the Postman application.

    Create a new Postman Collection

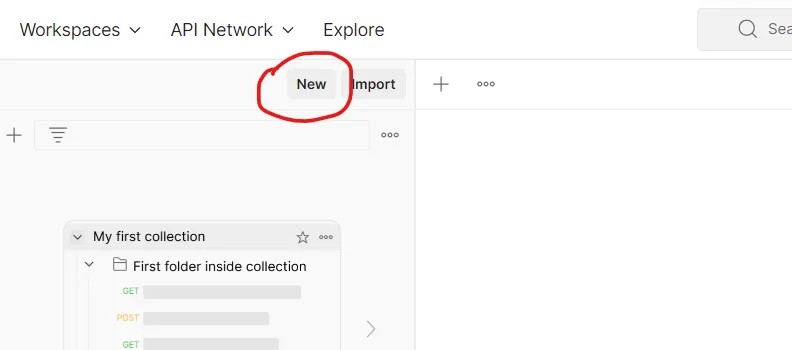
    Click the create new button

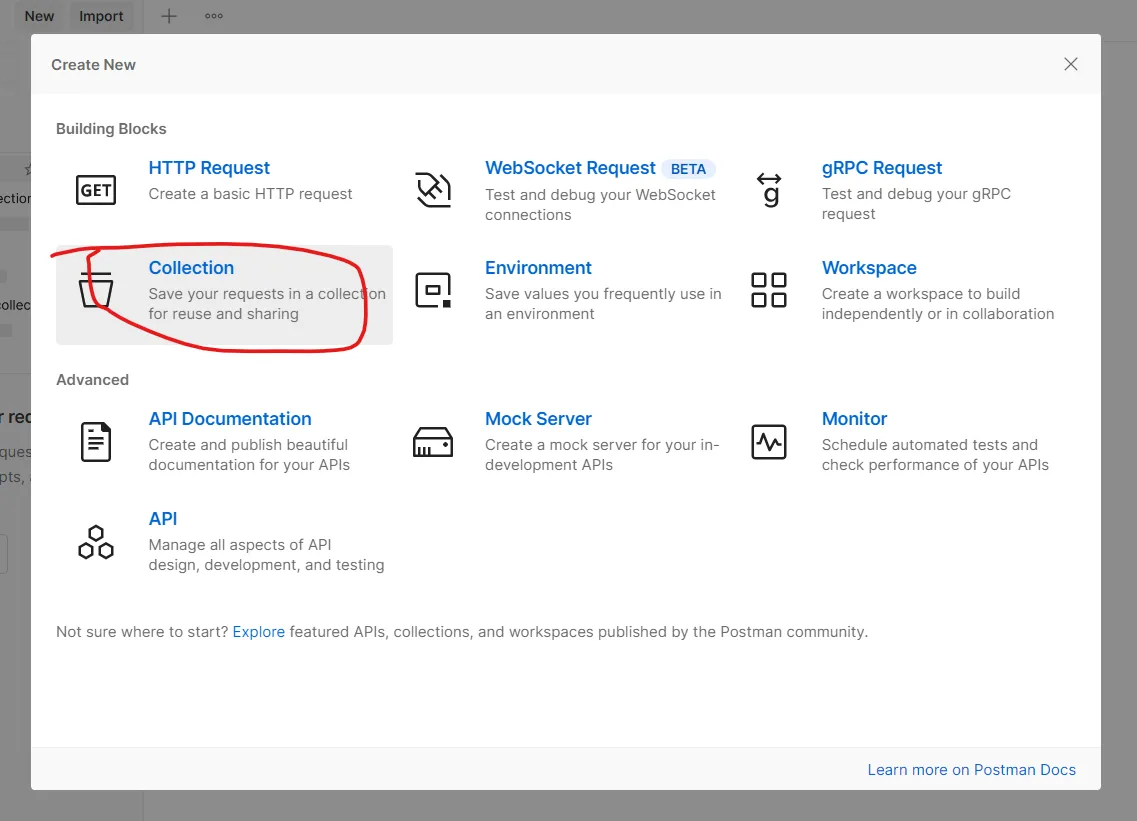
    In the popup window click the collections

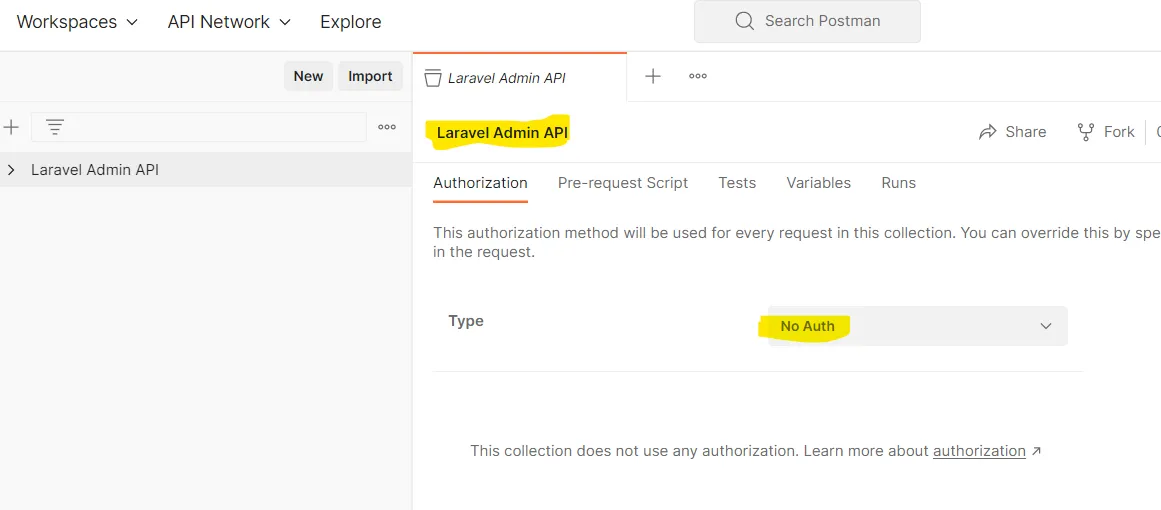
    Enter the name “Laravel Admin API” and select auth type that is No auth.


    Pre-request Script

    In the Laravel Sanctum, we used SPA authentication. So it works by using Laravel’s built-in cookie-based session authentication services. So, we need to set the cookie for all the requests in Postman.

    We can set the cookie by using the Postman Pre-request Script. Add the below code to Pre-request Script.

    pm.sendRequest({
        url: pm.collectionVariables.get('base_url')+'/sanctum/csrf-cookie',
        method: 'GET'
    }, function (error, response, {cookies}) {
        if (!error){
            pm.collectionVariables.set('xsrf-cookie', cookies.get('XSRF-TOKEN'))
        }
    })

    In this script, we used some variables. We will create variables in the next step.


    Postman Variables

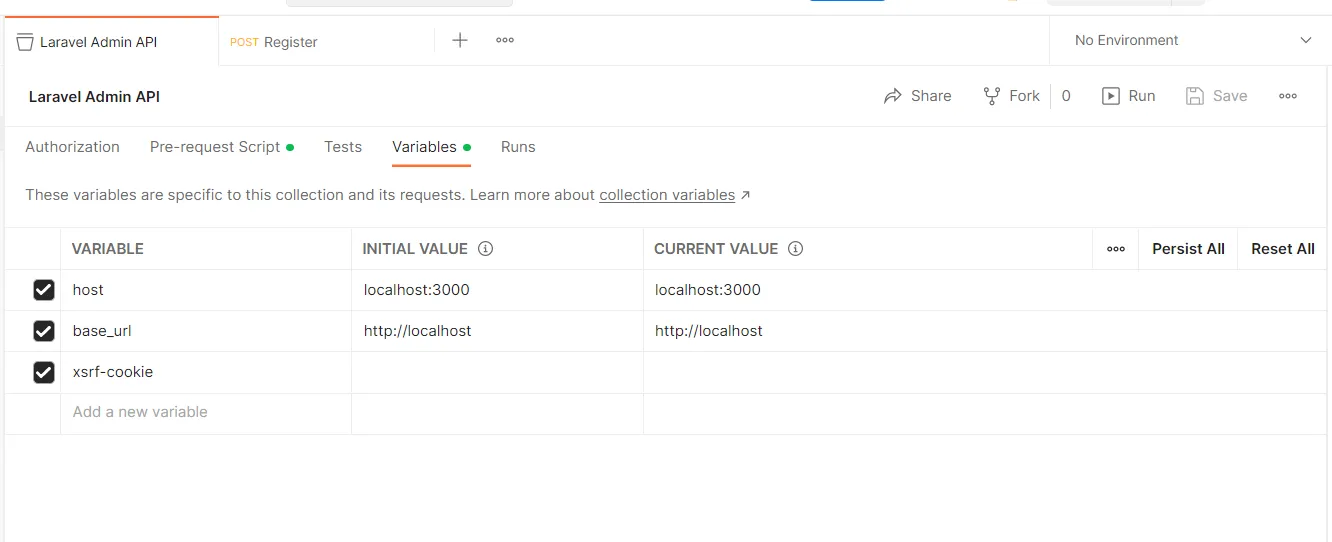
    Add the host, base_url, and xsrf-cookie variables in the Postman variables section


    Postman Add Request

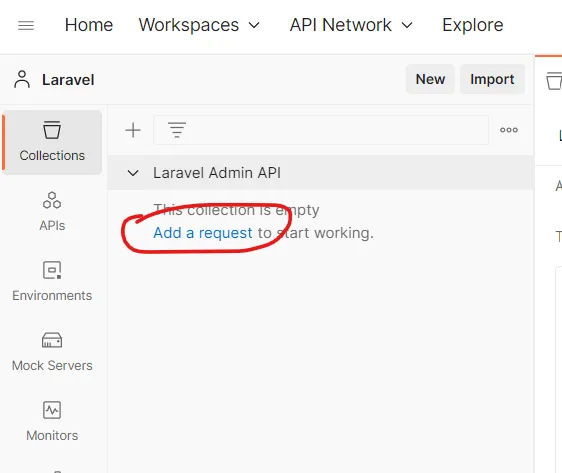
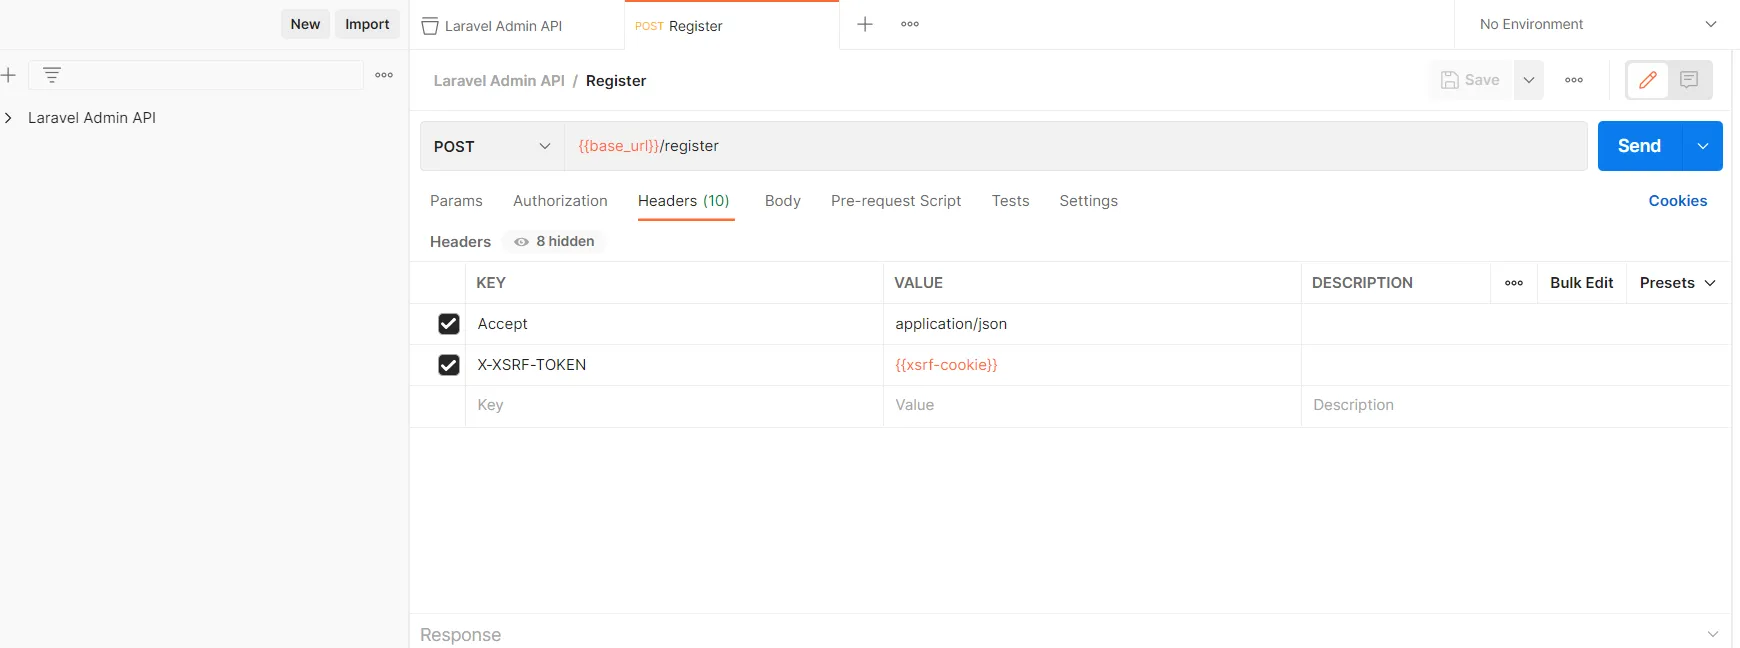
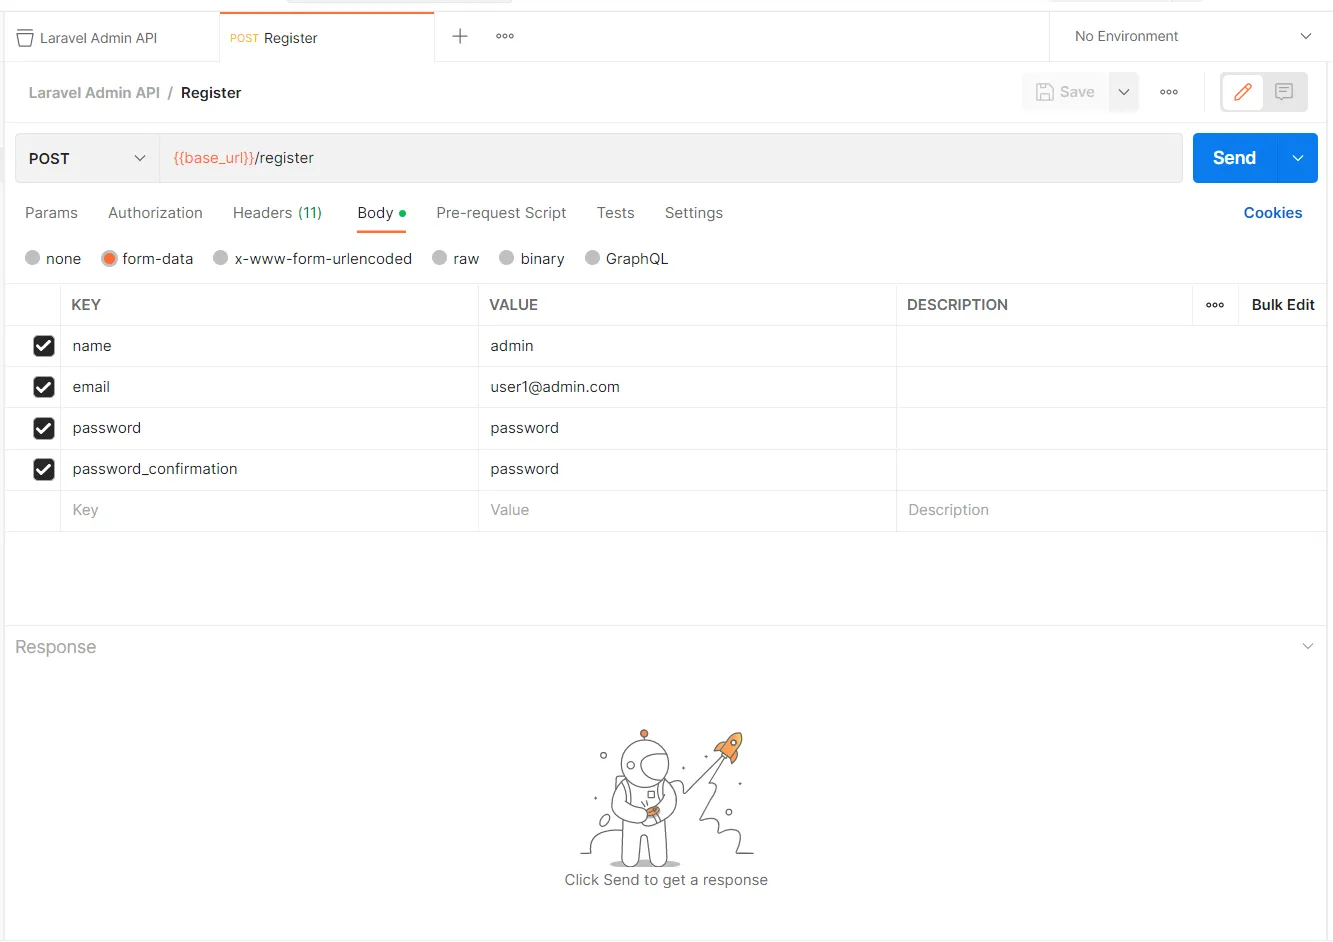
    Click the “Add a request” link and create a new request for registration.

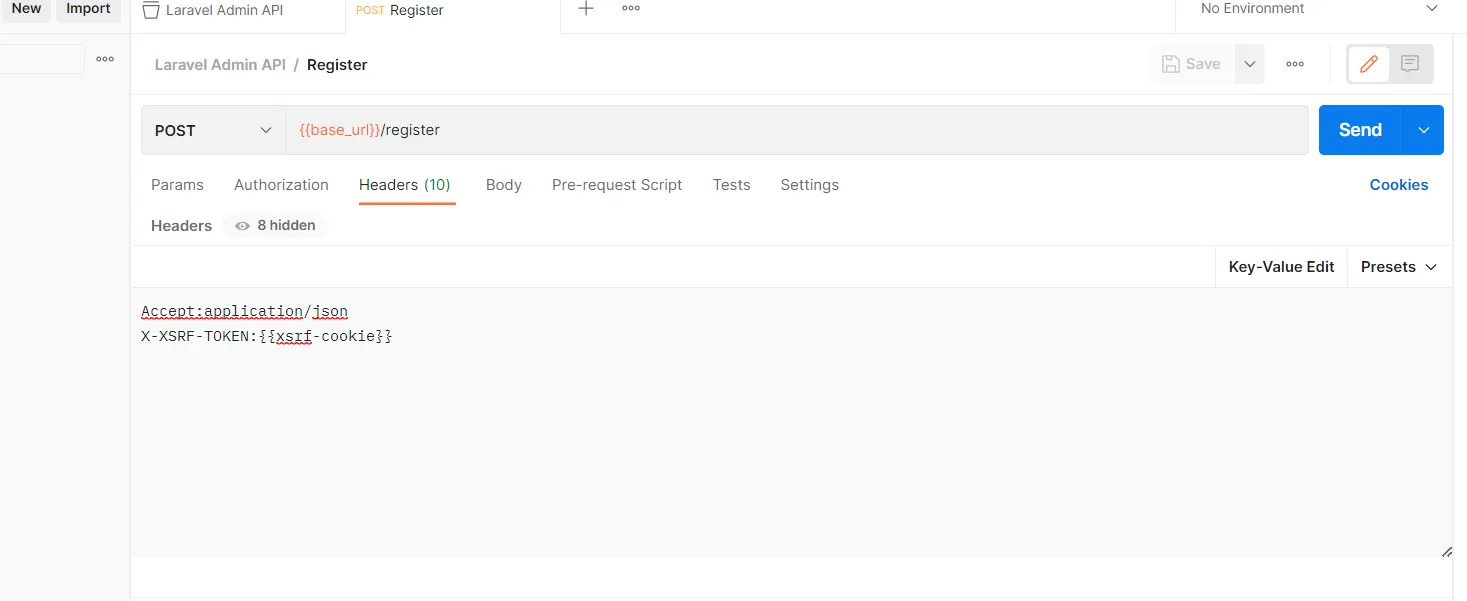
    In the header section add the “Accept” and “X-XSRF-TOKEN” like below

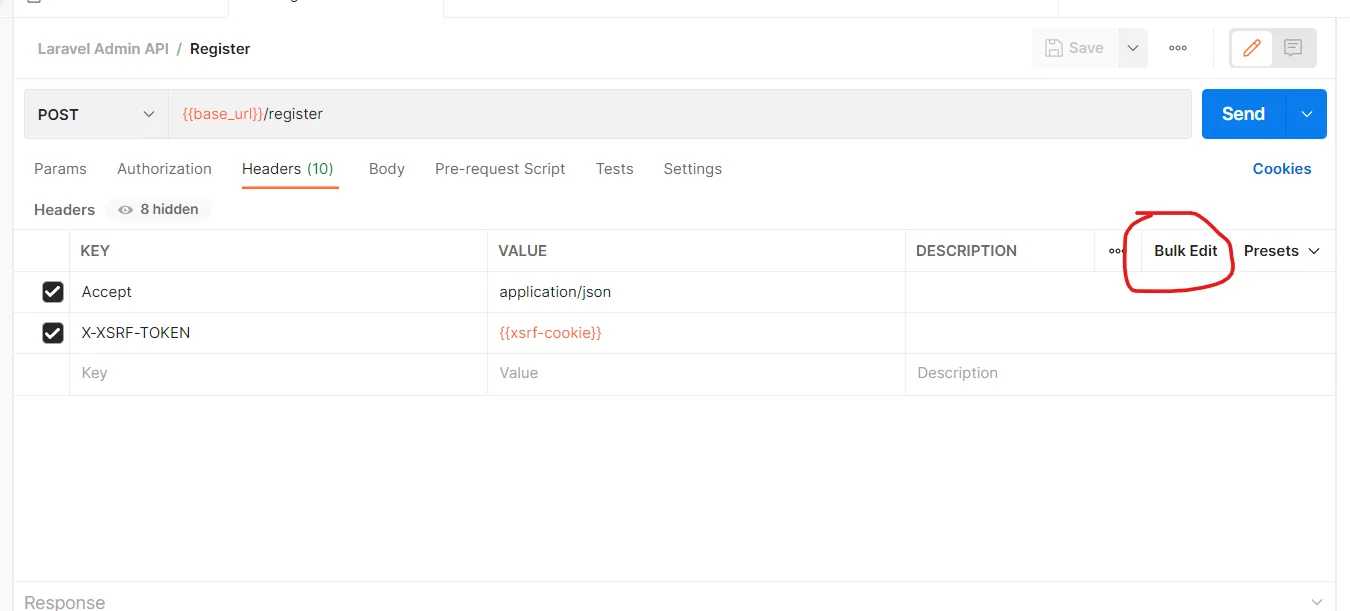
    Also, you can add plain text values by clicking the “Bulk Edit”

    Accept:application/json
    X-XSRF-TOKEN:{{xsrf-cookie}}

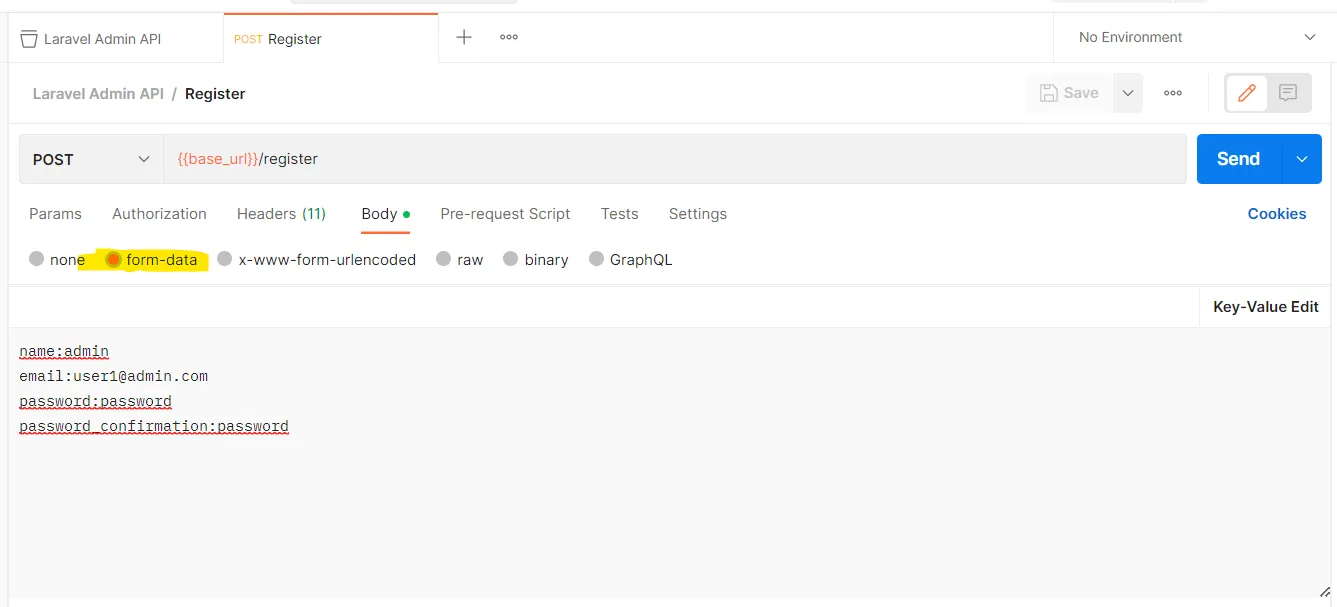
    In the request Body, add the below values on form-data

    name:admin
    email:user1@admin.com
    password:password
    password_confirmation:password

    Register API request

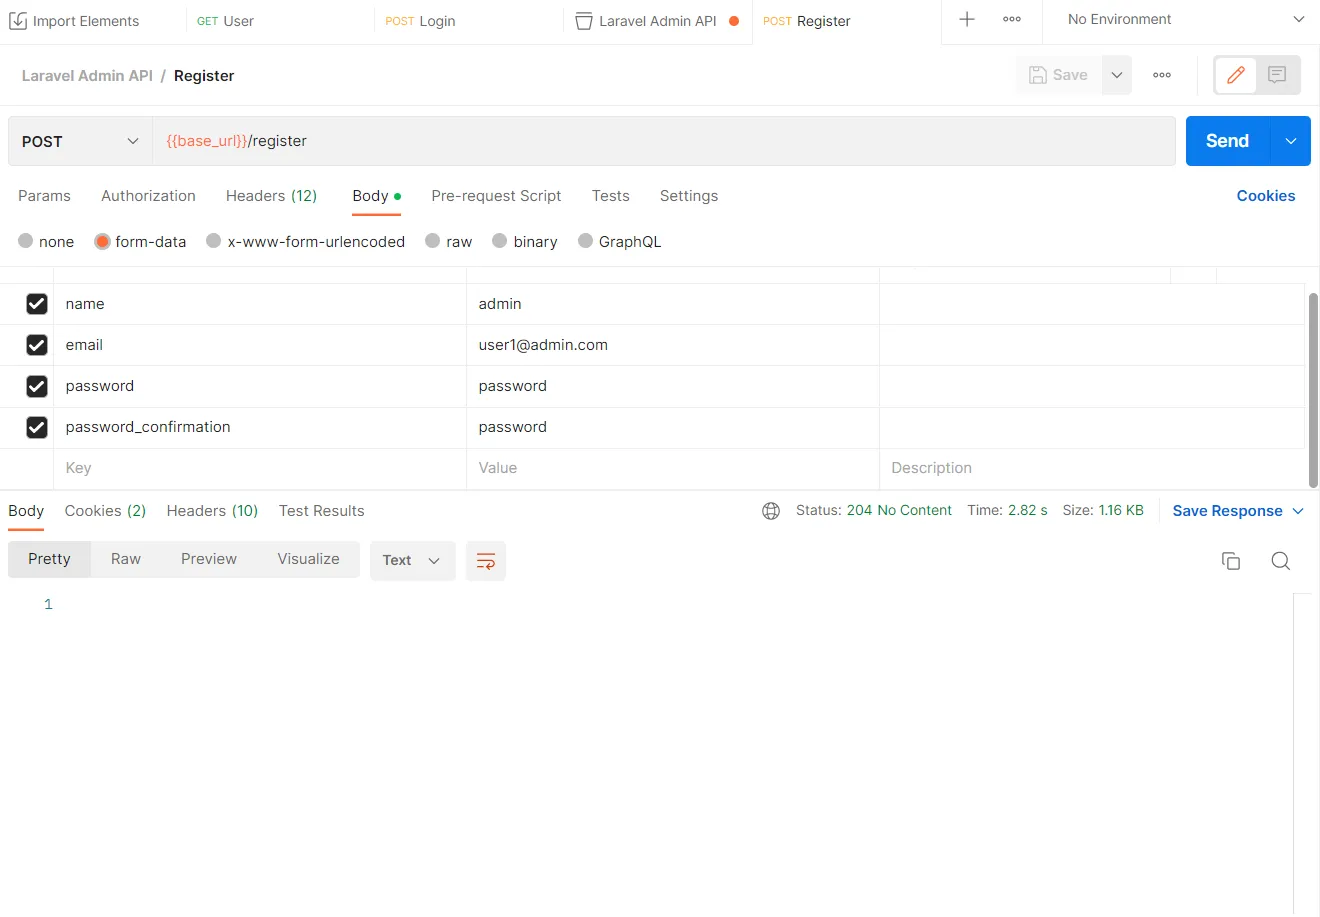
    Click the “send” button

    You will get an empty response if the user is registered successfully


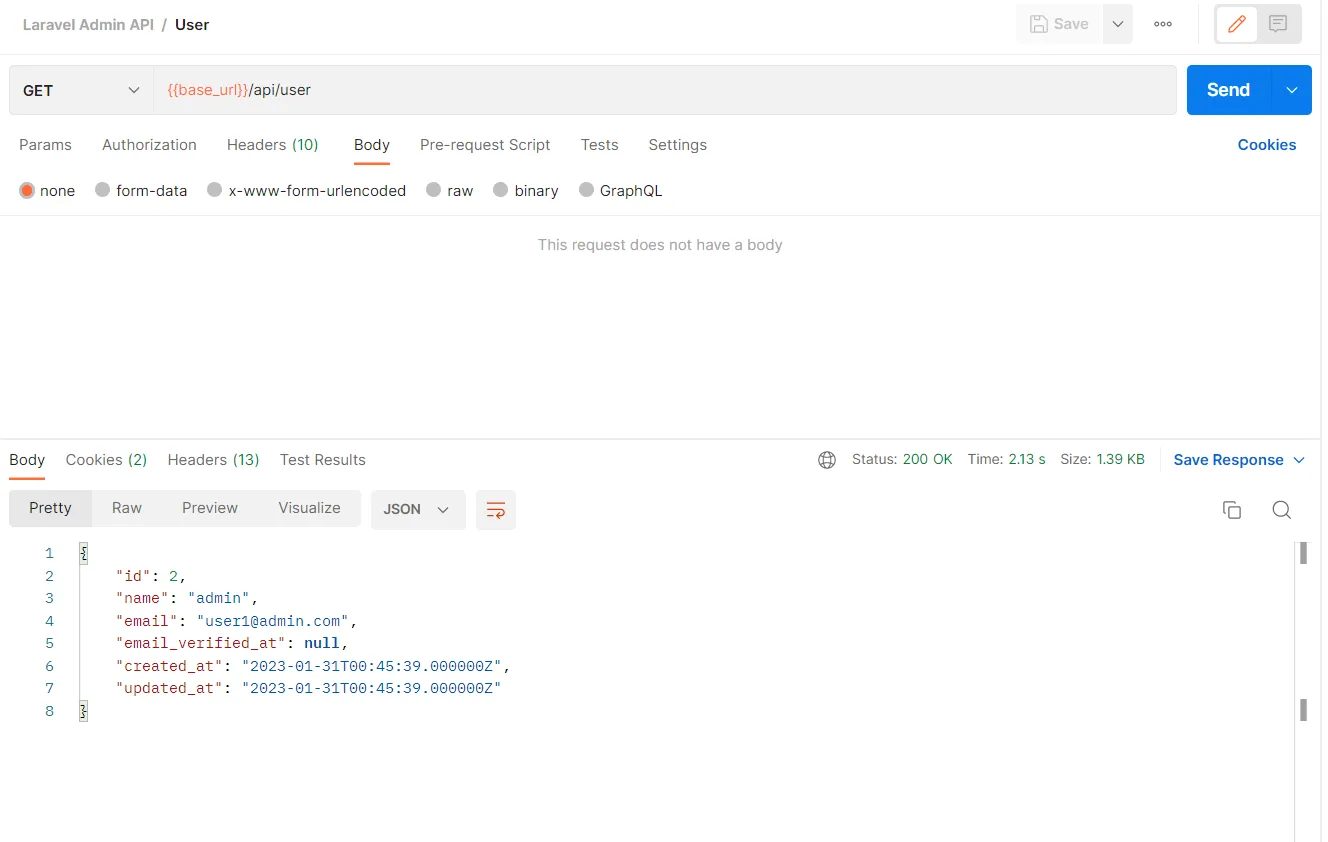
    Get User API request

    Now we going to create an API to get the current user details. Click and create a New Request with the get method.

    The API URL is /api/user and also add the below headers.

    Accept:application/json
    Referer:{{host}}

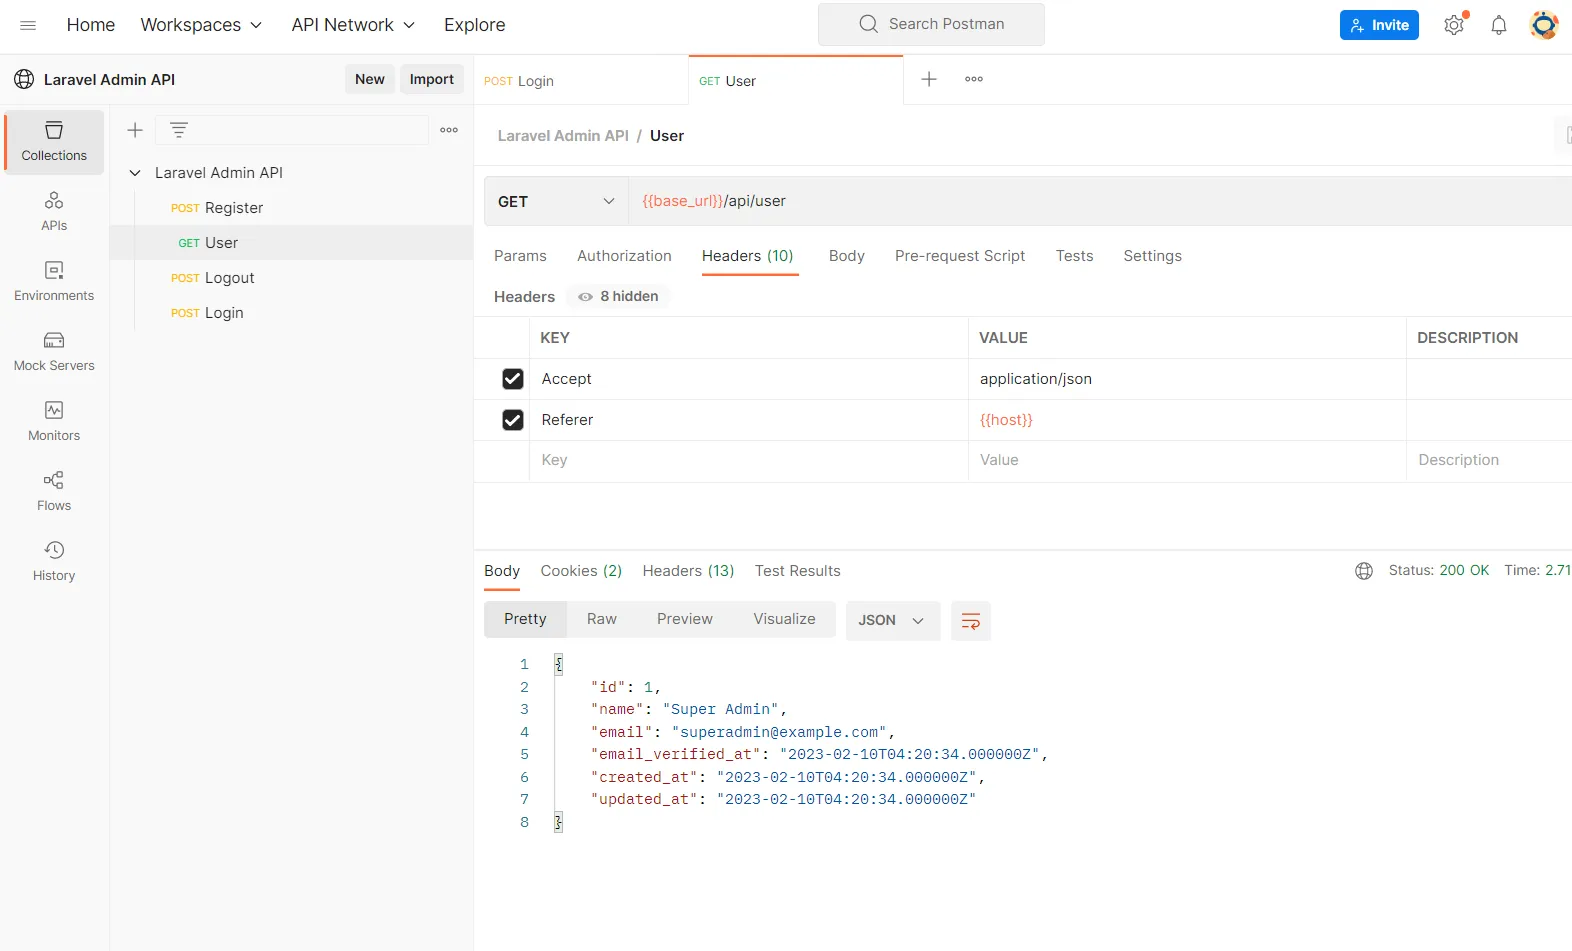
    For this request, the body is none, and then click send the request. You will get the current user details in the response.


    Logout Request

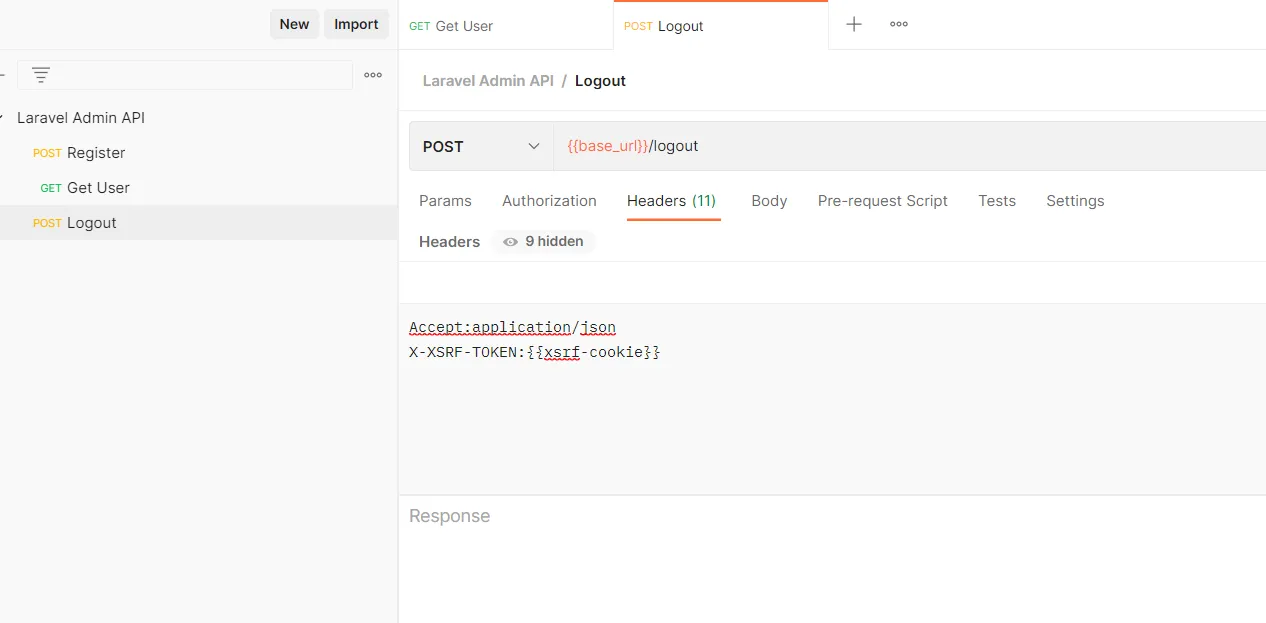
    Create the logout request with /logout URL with the post method. Also, add the headers.

    Accept:application/json
    X-XSRF-TOKEN:{{xsrf-cookie}}

    You will get an empty response after sending the request.


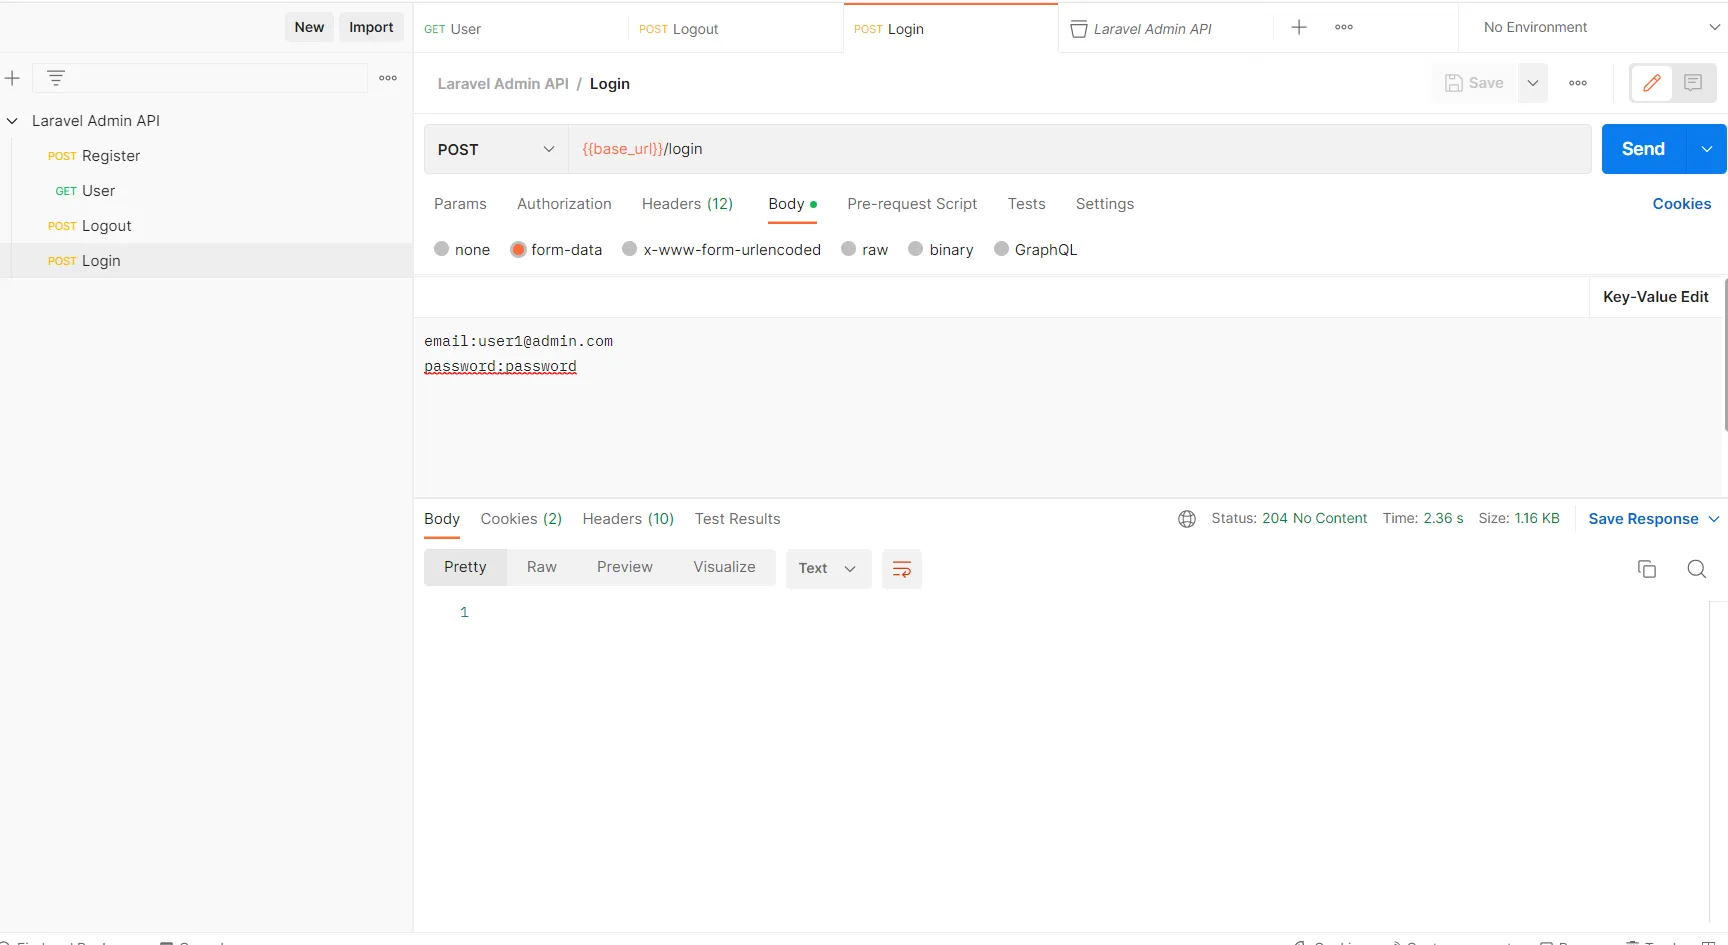
    Login Request

    We have completed the user register, get the user, and logout. Only login is pending.

    Header

    Accept:application/json
    X-XSRF-TOKEN:{{xsrf-cookie}}

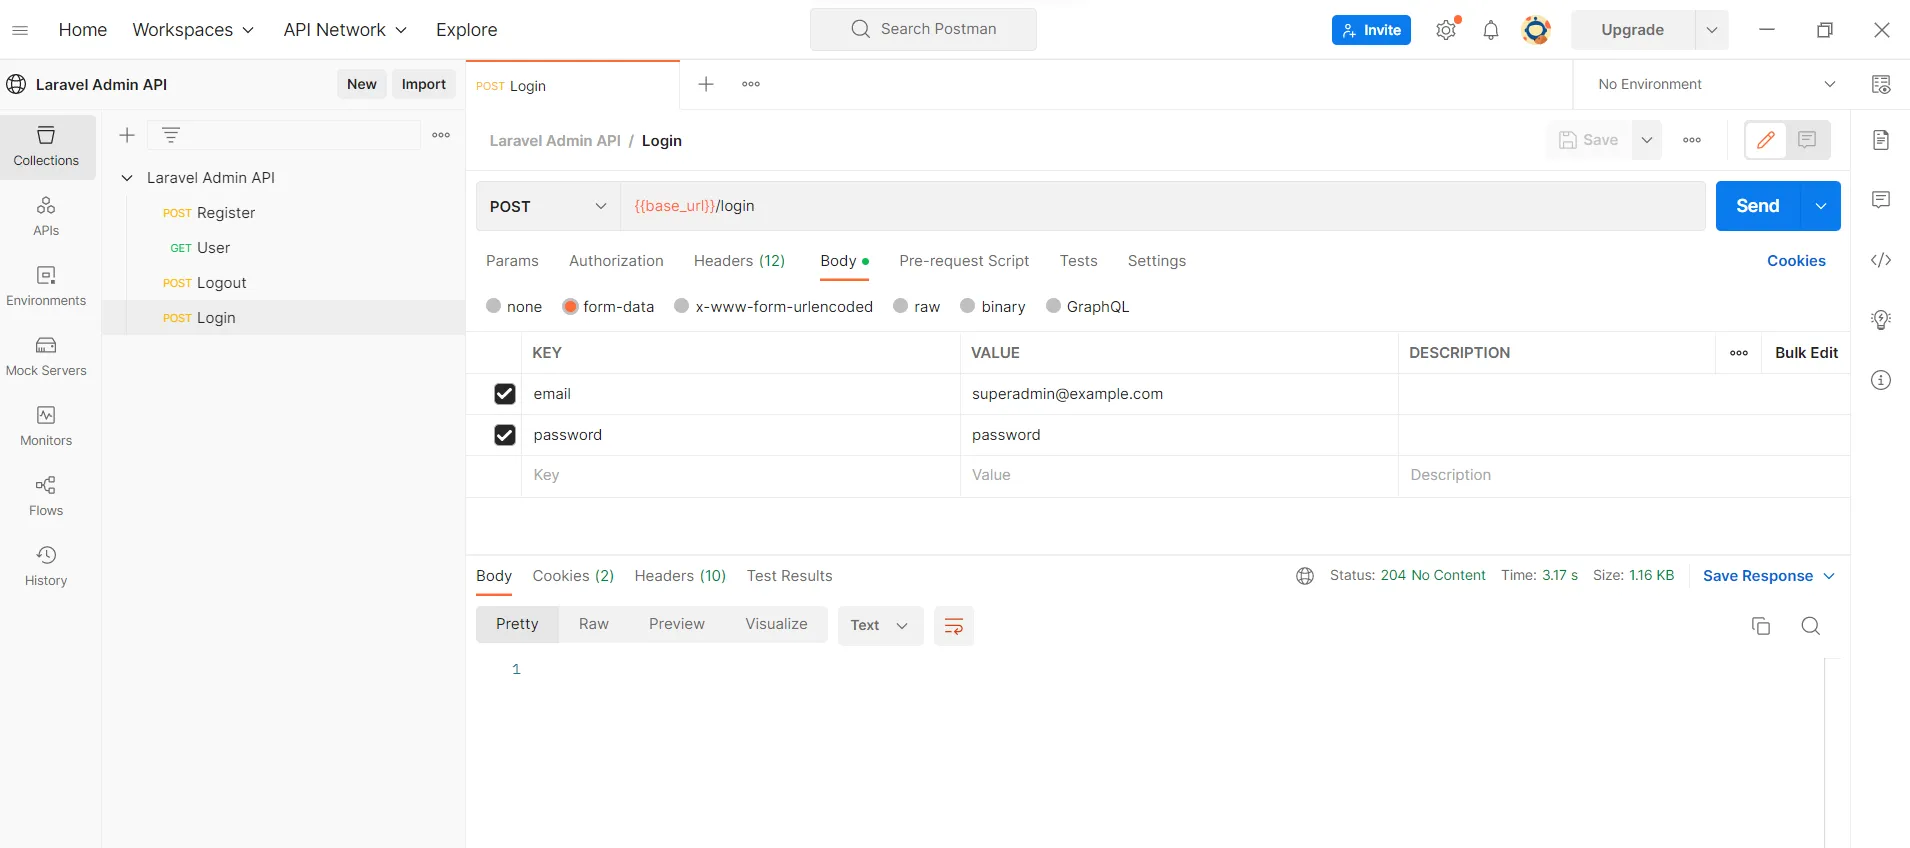
    Body: Select form-data and insert the below values

    email:user1@admin.com
    password:password

    We have created 4 requests in Postman and validated our Admin API. You can import the below-exported data and use it in the Postman. Next part we add permission and roles to our admin API.

    {
     "info": {
      "_postman_id": "6822504e-2244-46f9-bba8-115dc36644f6",
      "name": "Laravel Admin API",
      "schema": "https://schema.getpostman.com/json/collection/v2.1.0/collection.json",
      "_exporter_id": "25059912"
     },
     "item": [
      {
       "name": "Register",
       "request": {
        "method": "POST",
        "header": [
         {
          "key": "Accept",
          "value": "application/json",
          "type": "text"
         },
         {
          "key": "X-XSRF-TOKEN",
          "value": "{{xsrf-cookie}}",
          "type": "text"
         }
        ],
        "body": {
         "mode": "formdata",
         "formdata": [
          {
           "key": "name",
           "value": "admin",
           "type": "text"
          },
          {
           "key": "email",
           "value": "user1@admin.com",
           "type": "text"
          },
          {
           "key": "password",
           "value": "password",
           "type": "text"
          },
          {
           "key": "password_confirmation",
           "value": "password",
           "type": "text"
          }
         ]
        },
        "url": {
         "raw": "{{base_url}}/register",
         "host": [
          "{{base_url}}"
         ],
         "path": [
          "register"
         ]
        }
       },
       "response": []
      },
      {
       "name": "User",
       "request": {
        "method": "GET",
        "header": [
         {
          "key": "Accept",
          "value": "application/json",
          "type": "text"
         },
         {
          "key": "Referer",
          "value": "{{host}}",
          "type": "text"
         }
        ],
        "url": {
         "raw": "{{base_url}}/api/user",
         "host": [
          "{{base_url}}"
         ],
         "path": [
          "api",
          "user"
         ]
        }
       },
       "response": []
      },
      {
       "name": "Logout",
       "request": {
        "method": "POST",
        "header": [
         {
          "key": "Accept",
          "value": "application/json",
          "type": "text"
         },
         {
          "key": "X-XSRF-TOKEN",
          "value": "{{xsrf-cookie}}",
          "type": "text"
         }
        ],
        "url": {
         "raw": "{{base_url}}/logout",
         "host": [
          "{{base_url}}"
         ],
         "path": [
          "logout"
         ]
        }
       },
       "response": []
      },
      {
       "name": "Login",
       "request": {
        "method": "POST",
        "header": [
         {
          "key": "Accept",
          "value": "application/json",
          "type": "text"
         },
         {
          "key": "X-XSRF-TOKEN",
          "value": "{{xsrf-cookie}}",
          "type": "text"
         }
        ],
        "body": {
         "mode": "formdata",
         "formdata": [
          {
           "key": "email",
           "value": "user1@admin.com",
           "type": "text"
          },
          {
           "key": "password",
           "value": "password",
           "type": "text"
          }
         ]
        },
        "url": {
         "raw": "{{base_url}}/login",
         "host": [
          "{{base_url}}"
         ],
         "path": [
          "login"
         ]
        }
       },
       "response": []
      }
     ],
     "event": [
      {
       "listen": "prerequest",
       "script": {
        "type": "text/javascript",
        "exec": [
         "pm.sendRequest({",
         "    url: pm.collectionVariables.get('base_url')+'/sanctum/csrf-cookie',",
         "    method: 'GET'",
         "}, function (error, response, {cookies}) {",
         "    if (!error){",
         "        pm.collectionVariables.set('xsrf-cookie', cookies.get('XSRF-TOKEN'))",
         "    }",
         "})"
        ]
       }
      },
      {
       "listen": "test",
       "script": {
        "type": "text/javascript",
        "exec": [
         ""
        ]
       }
      }
     ],
     "variable": [
      {
       "key": "host",
       "value": "localhost:3000",
       "type": "string"
      },
      {
       "key": "base_url",
       "value": "http://localhost",
       "type": "string"
      },
      {
       "key": "xsrf-cookie",
       "value": "",
       "type": "string"
      }
     ]
    }
    

    Also, all the Request is available in below Postman public workspace

    https://www.postman.com/balajidharma/workspace/laravel-admin-api/collection/25059912-6822504e-2244-46f9-bba8-115dc36644f6?action=share&creator=25059912

  • Add Role and Permissions based authentication to Laravel API

    To manage roles & permission, we going to add the Spatie Laravel-permission package to our Laravel Admin API.

    The following steps are involved to install the Laravel permission package for our Laravel Admin API.

    • Install Spatie Laravel-permission package
    • Publish the configuration and migration file
    • Running Migration

    Install Spatie Laravel-permission package

    Install the package using the composer command

    ./vendor/bin/sail composer require spatie/laravel-permission

    Publish the configuration and migration file

    The vendor:publish artisan command is used to publish the package configuration to the config folder. Also, copy the migration files to the migration folder.

    ./vendor/bin/sail artisan vendor:publish --provider="Spatie\Permission\PermissionServiceProvider"

    Running Migration

    Run the migrations using artisan migrate

    ./vendor/bin/sail artisan migrate

    Now we need to add some roles & permission. Then need to assign the role to users. So we need to create seeders.

    I created an Admin core package with seeders and common functionality when I was working on Basic Laravel Admin Panel & Laravel Vue admin panel

    Add the admin core package to our Admin API

    ./vendor/bin/sail composer require balajidharma/laravel-admin-core

    This admin core package will install the Laravel Menu package. So run the below publish commands

    ./vendor/bin/sail artisan vendor:publish --provider="BalajiDharma\LaravelAdminCore\AdminCoreServiceProvider"
    ./vendor/bin/sail artisan vendor:publish --provider="BalajiDharma\LaravelMenu\MenuServiceProvider"

    Now run the migration with the seeder

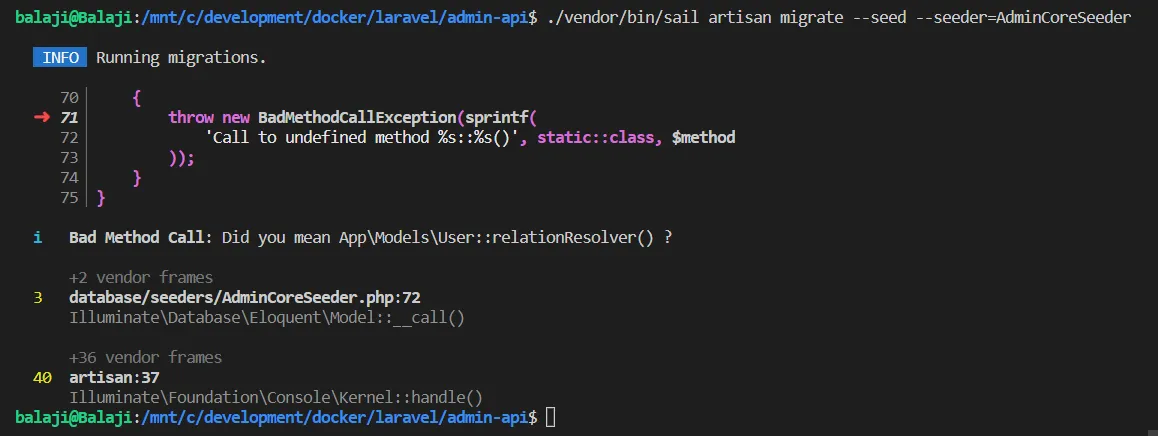
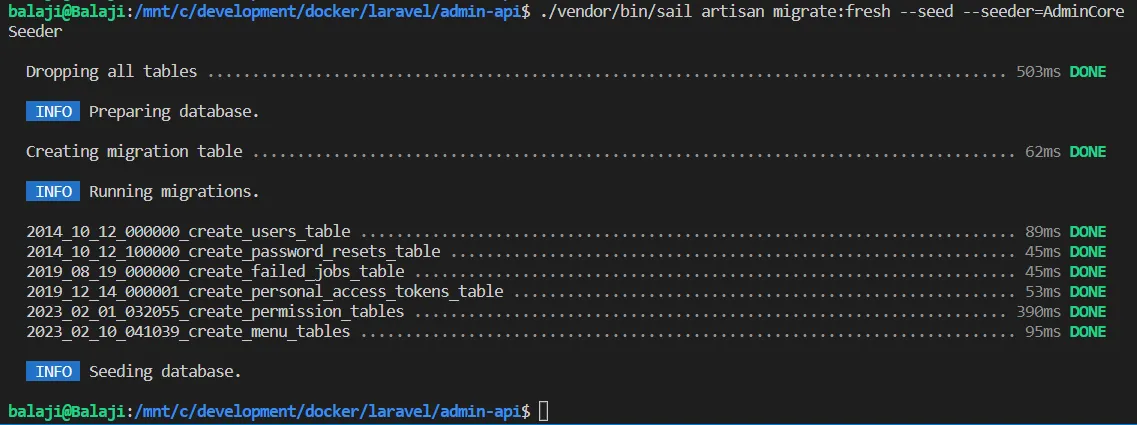
    ./vendor/bin/sail artisan migrate --seed --seeder=AdminCoreSeeder

    The seeder throws the error

    We need to add HasRoles Traits in the user model. Open the app/Models/User.php

    <?php
    
    .
    .
    .
    .
    .
    use Spatie\Permission\Traits\HasRoles;
    
    class User extends Authenticatable
    {
        use HasApiTokens, HasFactory, Notifiable, HasRoles;
    
        /**
         * The attributes that are mass assignable.
         *

    Try again to run the seeder with migrate:fresh. So it will drop all tables and re-run all of our migrations.

    ./vendor/bin/sail artisan migrate:fresh --seed --seeder=AdminCoreSeeder

    Open the Postman application and test the new user login. In the login, change the form data to the below email and password

    Email — superadmin@example.com

    Password — password

    After login, runs the get user request. You will get the super admin details on the response.


    We will create an API for Permission CRUD operations in the next blog.

  • How to Upgrade From Laravel 9.x to Laravel 10.x

    The Laravel 10 has been released on Feb 14. Laravel 10 requires a minimum PHP version of 8.1. Read more about the release on the Laravel release notes.

    Our Basic Laravel Admin Panel currently has Laravel 9.x, So time to upgrade to Laravel 10.

    Laravel Upgrade From 9.x to 10.x

    Laravel upgrade involved the following steps.

    • Update PHP version
    • Composer version update
    • Update Composer Dependencies
    • Update composer Minimum Stability
    • Update Docker composer

    All the upgrade steps are available on the official Laravel document.


    Update PHP version

    Laravel 10 requires PHP 8.1.0 or greater. So update your PHP version. If you using the PHP version below 8.1.

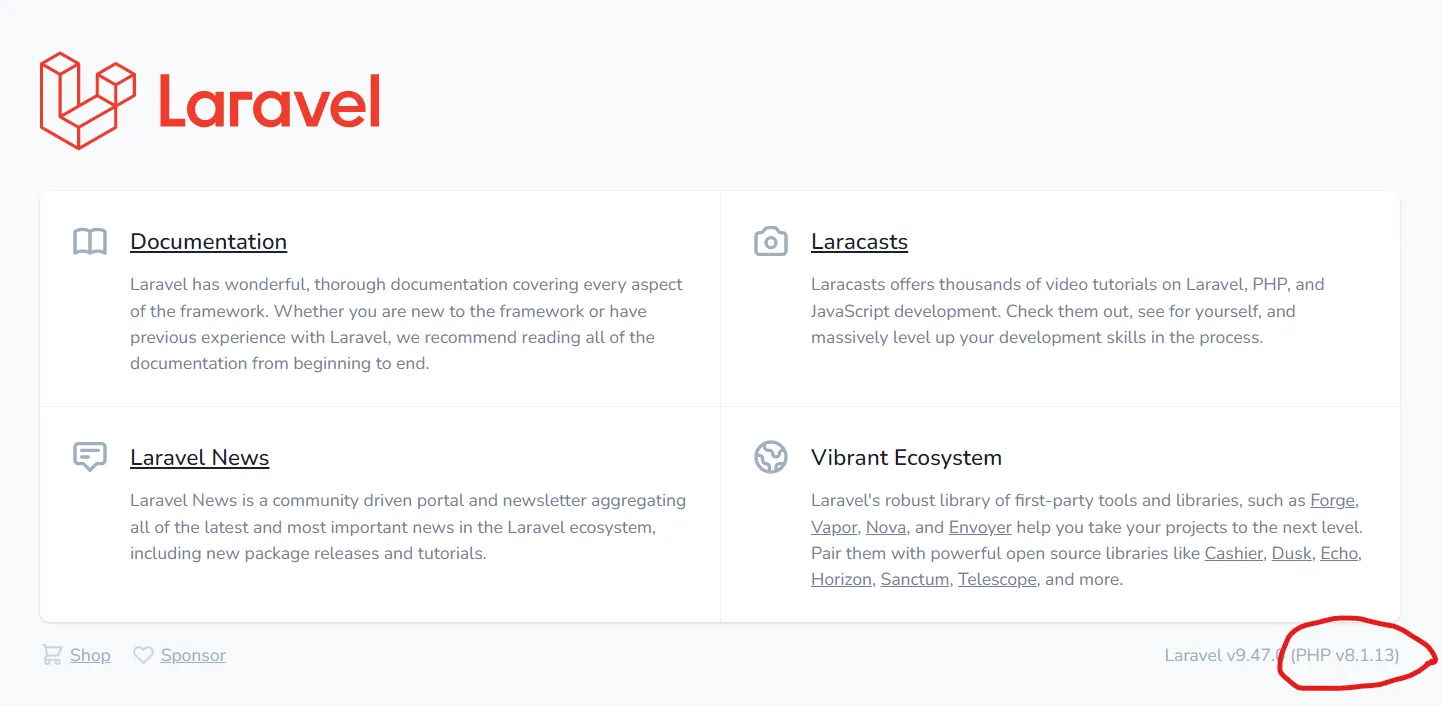
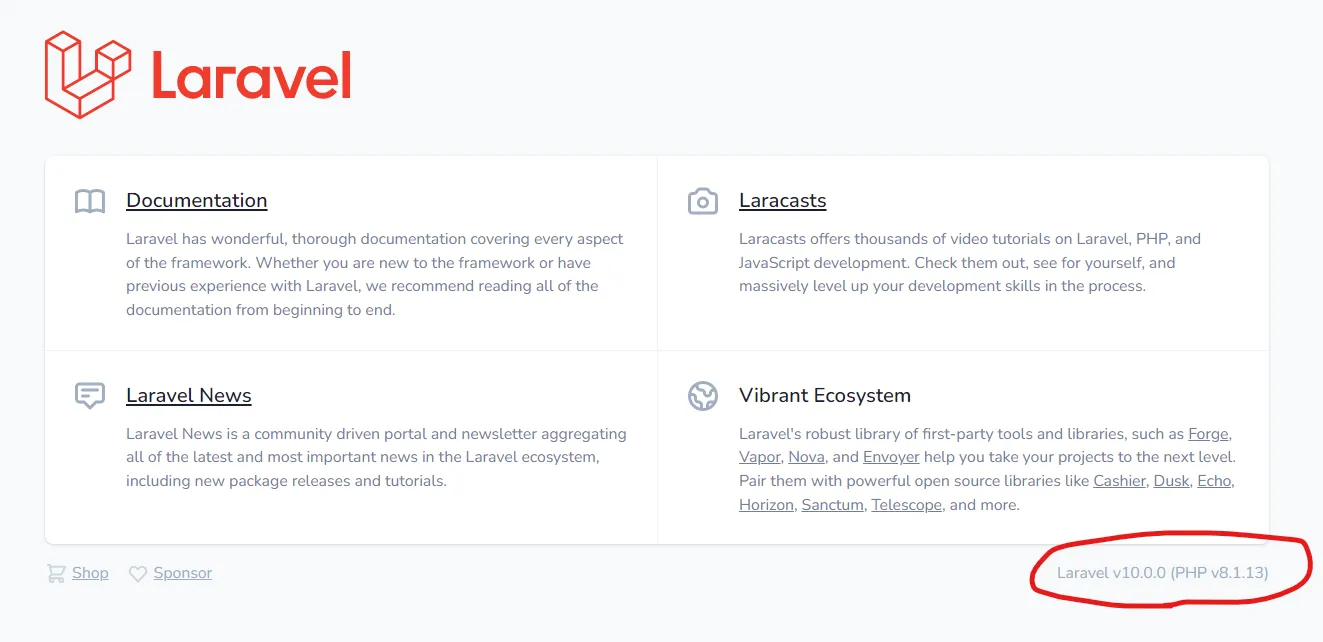
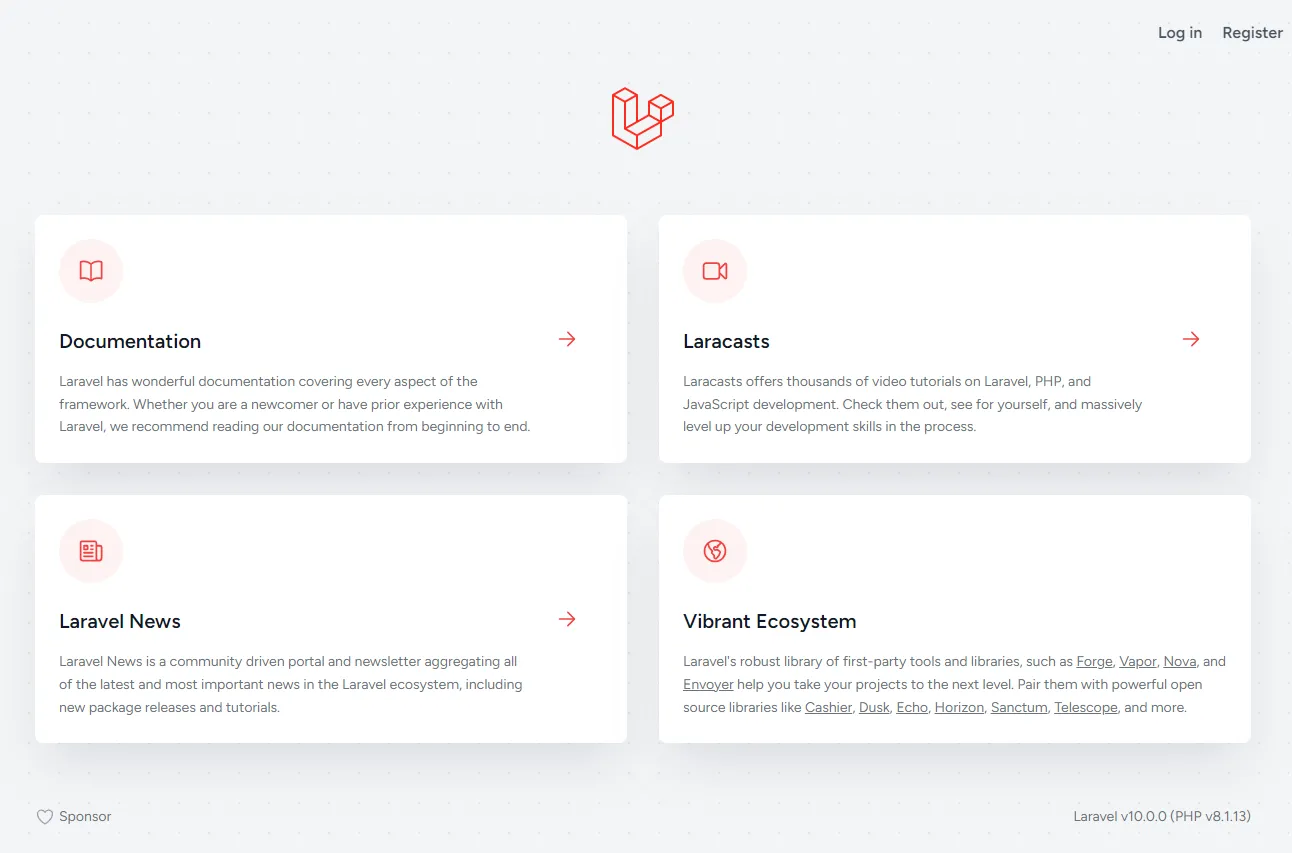
    Now we will check out the Admin Panel PHP version. The PHP version will display the Admin panel or Laravel default home page

    You can also check the PHP version & Laravel versions in the command line busing below the command

    PHP version

    ./vendor/bin/sail php -v
    
    // or
    
    ./vendor/bin/sail php --version
    
    //If you not using sail
    php -v

    Laravel Version

    ./vendor/bin/sail artisan -v
    
    //or
    
    ./vendor/bin/sail artisan --version
    
    //If you not using sail
    php artisan --version

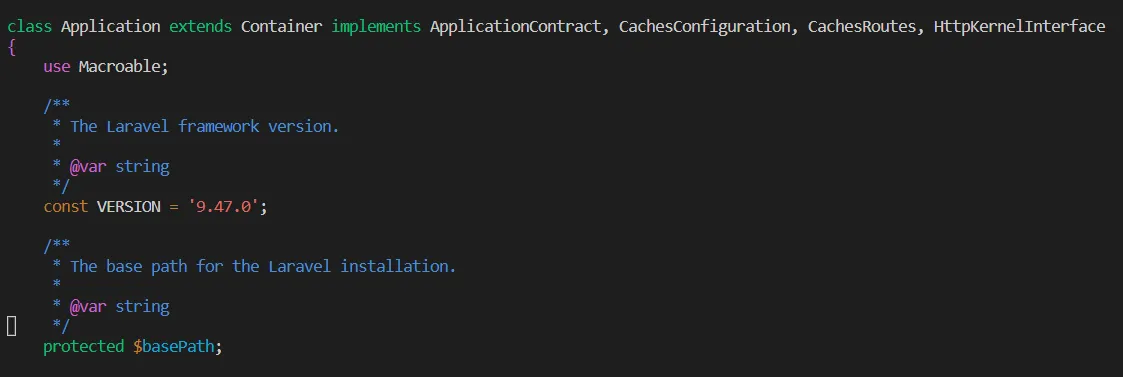
    Also, you can check the Laravel version on the ./vendor/laravel/framework/src/Illuminate/Foundation/Application.php file.

    Our Laravel Admin Panel is using the Laravel sail (Docker development environment). So we need to update the PHP in the docker-compose.yml file. We update it at the end of the step.


    Composer version update

    Laravel 10 requires Composer 2.2.0 or greater. If you using a lower version, uninstall and install a new version.

    You can check your composer version using the below commands

    composer -v
    
    composer -vvv about

    if you using the sail try below

    ./vendor/bin/sail composer -v
    
    ./vendor/bin/sail composer -vvv about

    We already have the composer version above 2.2.0.


    Update Composer Dependencies

    For Laravel 10, we need to update the following dependencies in our application’s composer.json file

    • laravel/framework to ^10.0
    • spatie/laravel-ignition to ^2.0
    • php to ^8.1

    Admin Panel updated below following dependencies

    diff --git a/composer.json b/composer.json
    index 381f15d..b0be0bc 100644
    --- a/composer.json
    +++ b/composer.json
    @@ -5,12 +5,12 @@
         "keywords": ["framework", "laravel", "boilerplate", "admin panel"],
         "license": "MIT",
         "require": {
    -        "php": "^8.0.2",
    +        "php": "^8.1",
             "balajidharma/laravel-admin-core": "^1.0",
             "guzzlehttp/guzzle": "^7.2",
    -        "laravel/framework": "^9.19",
    -        "laravel/sanctum": "^2.14.1",
    -        "laravel/tinker": "^2.7",
    +        "laravel/framework": "^10.0",
    +        "laravel/sanctum": "^3.2",
    +        "laravel/tinker": "^2.8",
             "spatie/laravel-permission": "^5.5"
         },
         "require-dev": {
    @@ -19,11 +19,11 @@
             "laravel/breeze": "^1.7",
             "laravel/dusk": "^7.1",
             "laravel/pint": "^1.0",
    -        "laravel/sail": "^1.0.1",
    +        "laravel/sail": "^1.18",
             "mockery/mockery": "^1.4.4",
    -        "nunomaduro/collision": "^6.1",
    -        "phpunit/phpunit": "^9.5.10",
    -        "spatie/laravel-ignition": "^1.0"
    +        "nunomaduro/collision": "^7.0",
    +        "phpunit/phpunit": "^10.0",
    +        "spatie/laravel-ignition": "^2.0"
         },
         "autoload": {
             "psr-4": {

    Update composer Minimum Stability

    One more change on the composer file. The minimum-stability setting needs to updatestable

    "minimum-stability": "stable",

    After the composer changes do the composer update

    ./vendor/bin/sail composer update

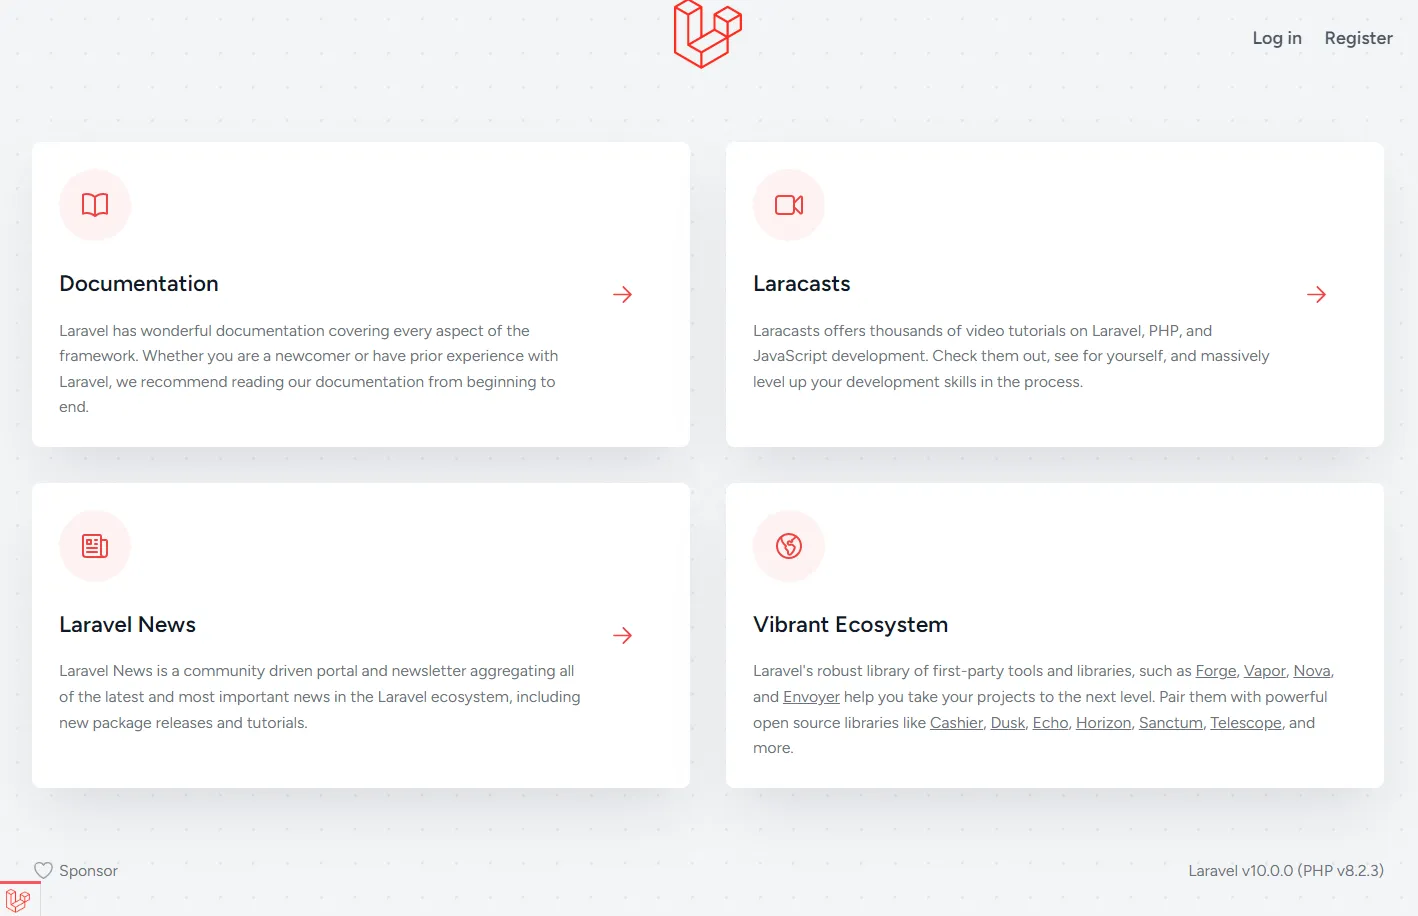
    Now open the application home page.

    If you need an updated welcome page means, copy the https://raw.githubusercontent.com/laravel/laravel/10.x/resources/views/welcome.blade.php and update the resources/views/welcome.blade.php


    Update Docker composer

    We going to update docker-compose.yml with the latest changes on Laravel.

    The latest Laravel sail is using PHP version 8.2. find below the final version of docker-compose.yml

    # For more information: https://laravel.com/docs/sail
    version: '3'
    services:
        laravel.test:
            build:
                context: ./vendor/laravel/sail/runtimes/8.2
                dockerfile: Dockerfile
                args:
                    WWWGROUP: '${WWWGROUP}'
            image: sail-8.2/app
            extra_hosts:
                - 'host.docker.internal:host-gateway'
            ports:
                - '${APP_PORT:-80}:80'
                - '${VITE_PORT:-5173}:${VITE_PORT:-5173}'
            environment:
                WWWUSER: '${WWWUSER}'
                LARAVEL_SAIL: 1
                XDEBUG_MODE: '${SAIL_XDEBUG_MODE:-off}'
                XDEBUG_CONFIG: '${SAIL_XDEBUG_CONFIG:-client_host=host.docker.internal}'
            volumes:
                - '.:/var/www/html'
            networks:
                - sail
            depends_on:
                - mysql
                - redis
                - meilisearch
                - mailpit
                - selenium
        mysql:
            image: 'mysql/mysql-server:8.0'
            ports:
                - '${FORWARD_DB_PORT:-3306}:3306'
            environment:
                MYSQL_ROOT_PASSWORD: '${DB_PASSWORD}'
                MYSQL_ROOT_HOST: "%"
                MYSQL_DATABASE: '${DB_DATABASE}'
                MYSQL_USER: '${DB_USERNAME}'
                MYSQL_PASSWORD: '${DB_PASSWORD}'
                MYSQL_ALLOW_EMPTY_PASSWORD: 1
            volumes:
                - 'sail-mysql:/var/lib/mysql'
            networks:
                - sail
            healthcheck:
                test:
                    - CMD
                    - mysqladmin
                    - ping
                    - '-p${DB_PASSWORD}'
                retries: 3
                timeout: 5s
        redis:
            image: 'redis:alpine'
            ports:
                - '${FORWARD_REDIS_PORT:-6379}:6379'
            volumes:
                - 'sail-redis:/data'
            networks:
                - sail
            healthcheck:
                test:
                    - CMD
                    - redis-cli
                    - ping
                retries: 3
                timeout: 5s
        meilisearch:
            image: 'getmeili/meilisearch:latest'
            ports:
                - '${FORWARD_MEILISEARCH_PORT:-7700}:7700'
            volumes:
                - 'sail-meilisearch:/meili_data'
            networks:
                - sail
            healthcheck:
                test:
                    - CMD
                    - wget
                    - '--no-verbose'
                    - '--spider'
                    - 'http://localhost:7700/health'
                retries: 3
                timeout: 5s
        mailpit:
            image: 'axllent/mailpit:latest'
            ports:
                - '${FORWARD_MAILPIT_PORT:-1025}:1025'
                - '${FORWARD_MAILPIT_DASHBOARD_PORT:-8025}:8025'
            networks:
                - sail
        selenium:
            image: 'selenium/standalone-chrome'
            extra_hosts:
                - 'host.docker.internal:host-gateway'
            volumes:
                - '/dev/shm:/dev/shm'
            networks:
                - sail
        phpmyadmin:
            image: phpmyadmin/phpmyadmin
            links:
                - mysql:mysql
            ports:
                - 8080:80
            environment:
                MYSQL_USERNAME: "${DB_USERNAME}"
                MYSQL_ROOT_PASSWORD: "${DB_PASSWORD}"
                PMA_HOST: mysql
            networks:
                - sail
    networks:
        sail:
            driver: bridge
    volumes:
        sail-mysql:
            driver: local
        sail-redis:
            driver: local
        sail-meilisearch:
            driver: local

    We have successfully upgraded our Admin Panel to Laravel 10.x


  • Laravel: Automate Code Formatting!

    Pint is one the newest members of Laravel first-party packages and will help us to have more readable and consistent codes.

    Installing and Configuring Laravel Pint is so easy and It is built on top of PHP-CS-Fixer so it has tones of rules to fix code style issues. (You don’t need Laravel 9 to use Pint and it’s a zero dependency package)

    But running Pint is quite painful because every time we want to push our changes to the remote repository we have to run below command manually:

    ./vendor/bin/pint --dirty

    The --dirty flag will run PHP-CS-Fixer for changed files only. If we want to check styles for all files just remove --dirty flag.

    In this article we want to simply automate running code styles check with Pint before committing any changed file so even team developers will have a well defined code structure and don’t need to run Laravel Pint every time before we push our codes to remote repo!

    Before we start, be careful this is a very simple setup and you can add as many options as you want to Laravel Pint.

    In order to run ./vendor/bin/pint --dirty just before every commit, we should use the pre-commit hook inside .git folder.

    First of all we will create a scripts folder inside our root Laravel directory. In this folder we will have a setup.sh file and pre-commit file without any extension.

    scripts/
    setup.sh
    pre-commit

    Inside our setup.sh we have:

    #! /usr/bin/env bash
    
    cp scripts/pre-commit .git/hooks/pre-commit
    chmod +x .git/hooks/pre-commit

    And write the following lines on pre-commit file:

    #! /usr/bin/env bash
    
    echo "Check php code styles..."
    echo "Running PHP cs-fixer"
     ./vendor/bin/pint --dirty
     git add .
    echo "Done!"

    Second of all, we should go to composer.json file and on the scripts object add this line: (If post-install-cmd key does not exist, you should create post-install-cmd part and then add below)

    "post-install-cmd": [
                "bash scripts/setup.sh"
            ]

    Third of all, we will require Pint package by this:

    composer require laravel/pint --dev

    And To be sure Don’t Forget to run:

    composer install

    The composer install command will add the pre-commit hook to our .git folder and after that we are ready to go!

    From now on, we can simply write our code and just before we commit our changes the Pint command will run automatically and will fix our code styles!

    Pint use Laravel code styles as defaultbut if you want to use psr-12 like me, you can create a pint.json file inside the root directory of your Laravel project and copy below json to have a more opinionated PHP code styles:

    {
        "preset": "psr12",
        "rules": {
            "simplified_null_return": true,
            "blank_line_before_statement": {
                "statements": ["return", "try"]
            },
            "binary_operator_spaces": {
                "operators": {
                    "=>": "align_single_space_minimal"
                }
            },
            "trim_array_spaces": false,
            "new_with_braces": {
                "anonymous_class": false
            }
        }
    }

    This is a simple config for our Pint command and will simplify null returns and define an equal indentation for arrays. You can check all PHP-CS-Fixer options here!

    READ MORE:

  • Laravel works with Large database records using the chunk method

    Your application database records will increase by every day. As a developer, we faced performance and server memory issues when working with large table records. In this blog, we going to process the large table records and explain the importance of the Eloquent chunk method.

    We need a demo application to work with large records.

    Laravel Installation

    As usual, we going to install Basic Laravel Admin Panel locally. This Basic admin comes with users with roles and permissions.

    The Basic Laravel Admin Panel is based on Laravel Sail. What is Sail? Sail is a built-in solution for running your Laravel project using Docker.

    Refer to the https://github.com/balajidharma/basic-laravel-admin-panel#installation step and complete the installation.


    Demo data

    For demo records, we going to create dummy users on the user’s table using the Laravel seeder. To generate a seeder, execute the make:seeder Artisan command.

    ./vendor/bin/sail php artisan make:seeder UserSeeder
    
    INFO Seeder [database/seeders/UserSeeder.php] created successfully.

    Open the generated seeder file located on database/seeders/UserSeeder.php and update with the below code.

    <?php
    namespace Database\Seeders;
    use Illuminate\Database\Seeder;
    use Illuminate\Support\Facades\DB;
    use Illuminate\Support\Facades\Hash;
    use Illuminate\Support\Str;
    class UserSeeder extends Seeder
    {
        /**
         * Run the database seeds.
         *
         * @return void
         */
        public function run()
        {
            for ($i=0; $i < 1000; $i++) {
                DB::table('users')->insert([
                    'name' => Str::random(10),
                    'email' => Str::random(10).'@gmail.com',
                    'password' => Hash::make('password'),
                ]);
            }
        }
    }

    Now run the seeder using the below Artisan command. It will take extra time to complete the seeding.

    ./vendor/bin/sail php artisan db:seed --class=UserSeeder

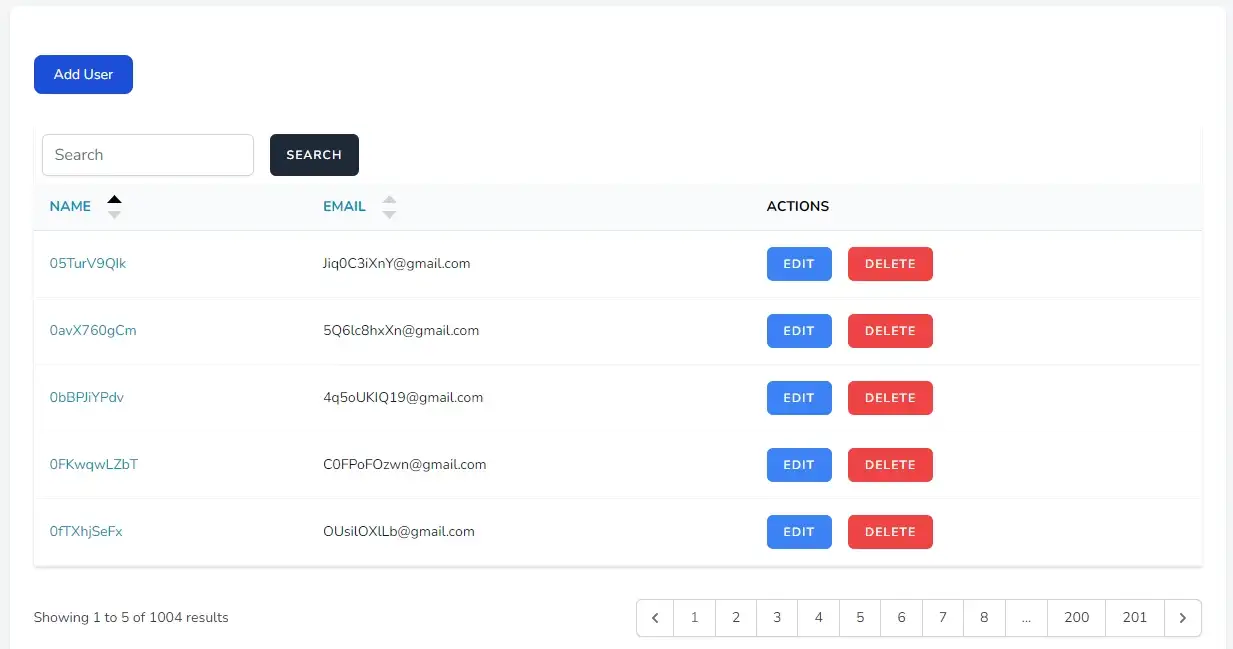
    After the Artisan command, verify the created users on the user list page http://localhost/admin/user


    Processing large records

    Now we going to process the large user records. Assume we need to send black Friday offers notifications emails to all the users. Usually, we generate new Artisan command and send the email by using the scheduler job.

    Memory issue

    We will fetch all the users and send emails inside each loop.

    $users = User::all();
    $users->each(function ($user, $key) {
        echo $user->name;
    });

    If you have millions of records or if your result collection has a lot of relation data means, your server will throw the Allowed memory size of bytes exhausted error.

    To overcome this issue we will process the limited data by saving the limit in the database or cache.

    Example: First time we fetch the 100 records and save the 100 on the database table.
    Next time fetch 100 to 200 records and save the 200 in the database. So this method involved additional fetch and update. Also, we need to stop the job once processed all the records.

    Laravel provides the inbuild solution of the Eloquent chunk method to process the large records


    Laravel Eloquent chunk method

    The Laravel ELoquent check method retrieves a small chunk of results at a time and feeds each chunk into a Closure for processing.

    User::chunk(100, function ($users) {
        foreach ($users as $user) {
            echo $user->name;
        }
    });

    Understand the chunk method

    I will create one function in the user controller and explain the check method detailed.

    Open the routes/admin.php and add the below route

    Route::get('send_emails', 'UserController@sendEmails');

    Now open the app/Http/Controllers/Admin/UserController.php and add the sendEmails method.

    Without chunk:
    After adding the below code open the http://localhost/admin/send_emails page

    public function sendEmails()
    {
        $users = User::all();
        $users->each(function ($user, $key) {
            echo $user->name;
        });
    }

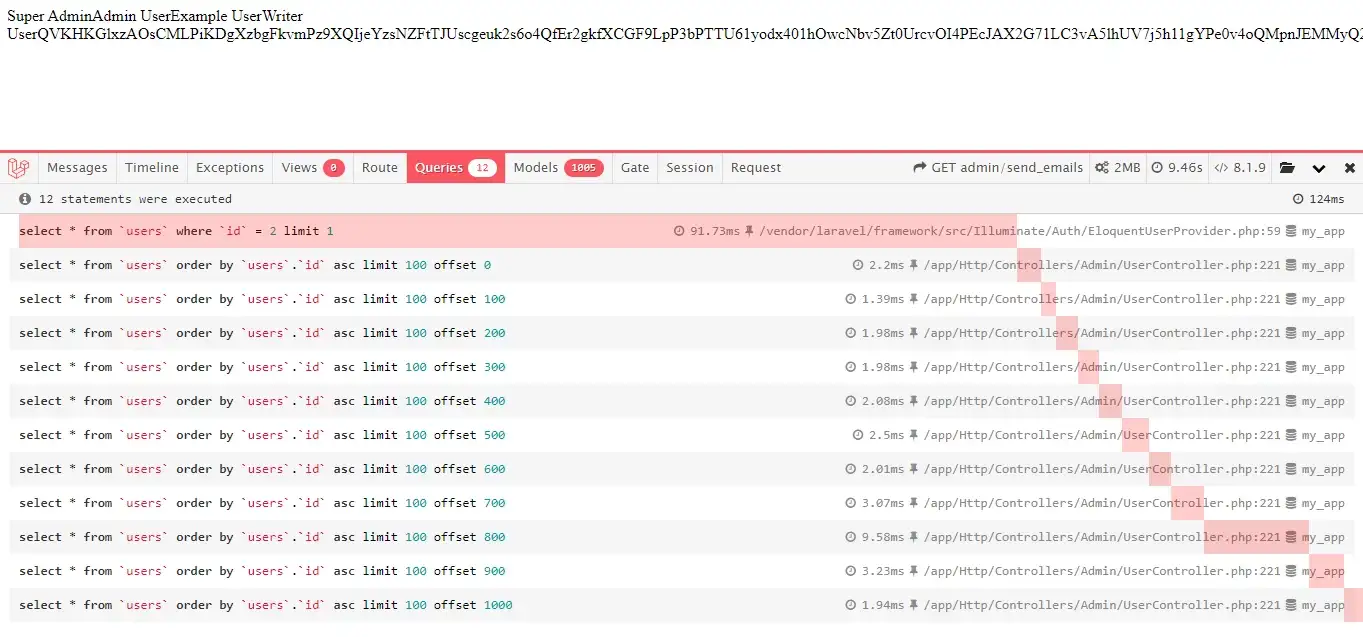
    Open the Laravel Debugbar queries panel. The select * from users will fetch all the 1000+ records.

    With chunk method:
    Replace the same function with the below code and check the page in the browser.

    public function sendEmails()
    {
        User::chunk(100, function ($users) {
            foreach ($users as $user) {
                echo $user->name;
            }
        });
    }

    The chunk method adds limits and processes all the records. So if using chunk, it processes 100 records collection at the time. So no more memory issues.


    What is chunkById?

    This chunkById the method will automatically paginate the results based on the record’s primary key. To understand it, again update the sendEmails the method with the below code

    public function sendEmails()
    {
        User::chunkById(100, function ($users) {
            foreach ($users as $user) {
                echo $user->name;
            }
        });
    }

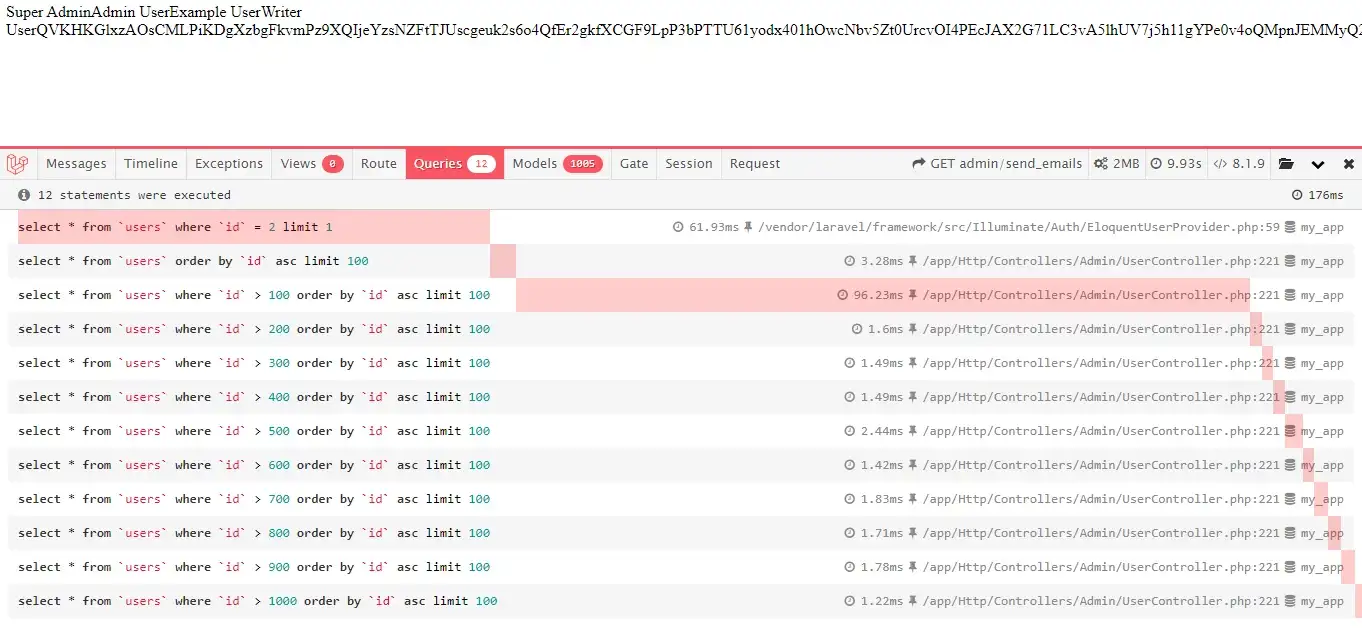
    Now user id is added on where condition along with the limit of 100.

    // chunkById
    select * from `users` where `id` > 100 order by `id` asc limit 100
    select * from `users` where `id` > 200 order by `id` asc limit 100
    select * from `users` where `id` > 300 order by `id` asc limit 100
    // chunk
    select * from `users` order by `users`.`id` asc limit 100 offset 0
    select * from `users` order by `users`.`id` asc limit 100 offset 100
    select * from `users` order by `users`.`id` asc limit 100 offset 200

    This chunkById is recommended when updating or deleting records inside the closure (in the loop).


    Conclusion

    The Eloquent chunk method is a very useful method when you work with large records. Also, read about the collection check method.

  • Restructuring a Laravel controller using Services & Action Classes

    Laravel Refactoring — Laravel creates an admin panel from scratch — Part 11

    In the previous part, we moved the UserController store method validation to Form Request. In this part, we going to explore and use the new trending Actions and Services Classes.

    We going to cover the below topic in the blog

    • Laravel project structure
    • Controller Refactoring
    • Service Class
      • What is Service Class
      • Implement Service Class
    • Action Class
      • Implement Action Class
    • Advantages of Services & Action Classes
    • Disadvantages of Services & Action Classes
    • Conclusion

    Laravel project structure

    Laravel does not restrict your project structure also they do not suggest any project structure. So, you have the freedom to choose your project structure.

    Laravel gives you the flexibility to choose the structure yourself

    We will explore both Services & Action Classes and we use these classes in our Laravel basic admin panel.

    Controller Refactoring

    The UserController the store function does the below 3 actions.

    public function store(StoreUserRequest  $request)
    {
        // 1.Create a user
        $user = User::create([
            'name' => $request->name,
            'email' => $request->email,
            'password' => Hash::make($request->password)
        ]);
        // 2.Assign role to user
        if(! empty($request->roles)) {
            $user->assignRole($request->roles);
        }
        // 3.Redirect with message
        return redirect()->route('user.index')
                        ->with('message','User created successfully.');
    }
    

    To further refactor, we can move the logic to another class method. This new class is called Services & Action Classes. We will see them one by one.


    Services Class

    We decided to move the logic to another class. The Laravel best practices are suggested to move business logic from controllers to service classes due to the Single-responsibility principle (SRP). The Service class is just a common PHP class to put all our logic.

    What is Service Class

    A service is a very simple class and it is not extended with any class. So, it is just a standalone PHP class.

    We going to create a new app/Services/Admin/UserService.php service class with the createUser method. This is a custom PHP class in Laravel, so no artisan command. We need to create it manually.

    Implement Service Class

    app/Services/Admin/UserService.php

    <?php
    namespace App\Services\Admin;
    
    use App\Models\User;
    use Illuminate\Support\Facades\Hash;
    
    class UserService
    {
        public function createUser($data): User
        {
            $user = User::create([
                'name' => $data->name,
                'email' => $data->email,
                'password' => Hash::make($data->password),
            ]);
    
            if(! empty($data->roles)) {
                $user->assignRole($data->roles);
            }
    
            return $user;
        }
    }

    Then, in the UserController call this method. For the Automatic Injection, you may type-hint the dependency in the controller.

    Blog Updated: Earlier I passed the $request (function createUser(Request $request)) directly to the service class. The service can use by other methods. So $request is converted to an object and passed as params.

    app/Http/Controllers/Admin/UserController.php

    use App\Services\Admin\UserService;
    public function store(StoreUserRequest $request, UserService $userService)
    {
        $userService->createUser((object) $request->all());
        return redirect()->route('user.index')
                        ->with('message','User created successfully.');
    }

    We can do some more refactoring on UserService Class by moving the user role saving to the new method.

    app/Services/Admin/UserService.php

    class UserService
    {
        public function createUser($data): User
        {
            $user = User::create([
                'name' => $data->name,
                'email' => $data->email,
                'password' => Hash::make($data->password),
            ]);
            return $user;
        }
        public function assignRole($data, User $user): void
        {
            $roles = $data->roles ?? [];
            $user->assignRole($roles);
        }
    }

    app/Http/Controllers/Admin/UserController.php

    public function store(StoreUserRequest $request, UserService $userService)
    {
        $data = (object) $request->all();
        $user = $userService->createUser($data);
        $userService->assignRole($data, $user);
        return redirect()->route('user.index')
                        ->with('message','User created successfully.');
    }

    Now we implemented the Service class. We will discuss the benefit at the end of the blog.

    Click here to view examples of service classes used on Laravel


    Action Class

    In the Laravel community, the concept of Action classes got very popular in recent years. An action is a very simple PHP class similar to the Service class. But Action class only has one public method execute or handle Else you could name that method whatever you want.

    Implement Action Class

    We going to create a new app/Actions/Admin/User/CreateUser.php Action class with the single handle method.

    app/Actions/Admin/User/CreateUser.php

    <?php
    
    namespace App\Actions\Admin\User;
    
    use App\Models\User;
    use Illuminate\Support\Facades\Hash;
    
    class CreateUser
    {
        public function handle($data): User
        {
            $user = User::create([
                'name' => $data->name,
                'email' => $data->email,
                'password' => Hash::make($data->password),
            ]);
    
            $roles = $data->roles ?? [];
            $user->assignRole($roles);
    
            return $user;
        }
    }

    Now call this handle method on UserController. The method injection to resolve CreateUser.

    app/Http/Controllers/Admin/UserController.php

    public function store(StoreUserRequest $request, CreateUser $createUser)
    {
        $createUser->handle((object) $request->all());
        return redirect()->route('user.index')
                        ->with('message','User created successfully.');
    }

    The biggest advantage of this Action class we don’t worry about the function name. Because it should always single function like handle


    Advantages of Services & Action Classes

    • Code reusability: We can call the method on the Artisan command and also easy to call other controllers.
    • Single-responsibility principle (SRP): Achieved SRP by using Services & Action Classes
    • Avoid Conflict: Easy to manage code for larger applications with a large development team.

    Disadvantages of Services & Action Classes

    • Too many classes: We need to create too many classes for single functionality
    • Small Application: Not recommended for smaller applications

    Conclusion

    As said earlier, Laravel gives you the flexibility to choose the structure yourself. The Services and Action classes are one of the structure methods. It should be recommended for large-scale applications to avoid conflict and do faster releases.

    For the Laravel Basic Admin Panel, I am going with the Actions classes.

    The Laravel admin panel is available at https://github.com/balajidharma/basic-laravel-admin-panel. Install the admin panel and share your feedback.

    Thank you for reading.

    Stay tuned for more!

    Follow me at balajidharma.medium.com.


    References

    https://freek.dev/1371-refactoring-to-actions
    https://laravel-news.com/controller-refactor
    https://farhan.dev/tutorial/laravel-service-classes-explained/
  • Resize ext4 file system

    Using Growpart

    $ growpart /dev/sda 1
    CHANGED: partition=1 start=2048 old: size=39999455 end=40001503 new: size=80000991,end=80003039
    $ resize2fs /dev/sda1
    resize2fs 1.45.4 (23-Sep-2019)
    Filesystem at /dev/sda1 is mounted on /; on-line resizing required
    old_desc_blocks = 3, new_desc_blocks = 5
    The filesystem on /dev/sda1 is now 10000123 (4k) blocks long.

    Using Parted & resize2fs

    apt-get -y install parted
    parted /dev/vda unit s print all # print current data for a case
    parted /dev/vda resizepart 2 yes -- -1s # resize /dev/vda2 first
    parted /dev/vda resizepart 5 yes -- -1s # resize /dev/vda5
    partprobe /dev/vda # re-read partition table
    resize2fs /dev/vda5 # get your space

    Parted doesn’t work on ext4 on Centos. I had to use fdisk to delete and recreate the partition, which (I validated) works without losing data. I followed the steps at http://geekpeek.net/resize-filesystem-fdisk-resize2fs/. Here they are, in a nutshell:

    $ sudo fdisk /dev/sdx
    > c
    > u
    > p
    > d
    > p
    > w
    $ sudo fdisk /dev/sdx
    > c
    > u
    > p
    > n
    > p
    > 1
    > (default)
    > (default)
    > p
    > w

    sumber: https://serverfault.com/questions/509468/how-to-extend-an-ext4-partition-and-filesystem

  • 1. Why ?

    There are lot of ways of how you can manage you company, home or corporate DNS zones. You can offload this task to any DNS registar, you can use any available DNS server software with any back-end that you like, or … you can use Zabbix and particularly Zabbix database as your trusty backend. Let’s look at the simple fact, that you already installed and configured Zabbix on your network. And you invested considerable time and effort of doing so. And. looking inside Zabbix, you see, that it knows a great deal about your infrastructure. It’s host names and IP addresses. Maybe, you are also running discovery process on your network and keeping this portion of configuration up-to date. Maybe you already integrate Zabbix with your inventory system. And with your ticketing system. If you did not done that already, maybe you should. So, your Zabbix installation already one of the central points of your enterprise management. Any reason, why you still using vi to manage your DNS zones or paying somebody to do this for you, when you have all you needed at your fingertips ?

    2. What you will need ?

    Aside from Zabbix itself, not much:

    Some time and software development skills …

    3. Prepare your environment.

    I will not be covering on how to install and configure Python on your target hosts. You can install it from rpm/deb repositories or compile yourself from the scratch. Second, download unbound DNS resolver and compile it. I am doing this using command

    ./configure --with-libevent --with-pyunbound --with-pthreads --with-ssl --with-pythonmodule

    Please note, that you shall have development files for libevent, openssl, posix threads and the Python on your host.

    Next, compile and install REDIS server. I will leave you with excellent Redis documentation as your guide through this process. All I want to say: “It is not difficult to do”. After you’ve compiled and installed Redis, install Python redis module – redis-py.

    4. Overview of the design.

    You will have number of components on your Zabbix-DNS infrastructure.

    • REDIS servers. Will be serving as a primary storage for you direct and reverse mappings. Depending on the size of your DNS zones, you may want to scale the memory for the hosts on which you will run your
      REDIS servers. All REDIS servers are configured for persistency.
    • DNS_REDIS_SYNC. Script, which will query SQL table interfaces from zabbix database and populate master REDIS server.
    • resolver.py. Unbound python script, which will provide a proper interfacing between zabbix database, REDIS and UNBOUND resolver

    5. Masters and slaves.

    I am intentionaly insisiting on more complicated master-slave configuration for your installation. When you will need to scale your DNS cluster, you will appretiate that you’ve done this. Depending on your Zabbix configuration, you may be choosing appropriate location for your master REDIS server and DNS_REDIS_SYNC process.

    Depending on the size of your Zabbix and number of NVPS, you may consider to perform “select” operations on SQL table “interface” on the less busy with inserts and updates slave MySQL server.

    How to setup master-slave MySQL replication is outside of the scope of this article.

    Google it. Slave REDIS node shall be local to a DNS resolver.

    6. DNS_REDIS_SYNC

    DNS_REDIS_SYNC is a simple Python (or whatever language you choose to use, as long as it can interface with MySQL and REDIS) script, which designed to populate master REDIS storage. In order to get information from table interface, you may issue query

    select interfaceid,ip,dns from interface where type = 1

    When you’ve got all you Name->IP associations from Zabbix database, start to populate direct and reverse zones in REDIS, like

    SET A:%(name) %(ip)

    SET PTR:%(ip) %(name)

    you do not want keys to stick in you REDIS forever, so I recommend to set conservative expiration for your keys. See Chapter #7

    EXPIRE A:%(name) %(expiration_time_in_sec)

    EXPIRE PTR:%(ip) %(expiration_time_in_sec)

    That’s it. Your REDIS database is ready to be used by resolver.py module.

    7. Expire or not to expire.

    The easiest and more dangerous way to remove the old info from DNS zones stored in REDIS, is to use REDIS EXPIRE commands and capabilities. This will work great if you never get in the situation like this

    Downtime of the Zabbix MySQL server > Key expiration time.

    One way on how to deal with that situation is to monitor the downtime of the primary Zabbix MySQL from another Zabbix server, which configured to monitor primary server (you shall have this server already) and when downtime crosses pessimistic threshold, execute Action script, which will extend TTL for the keys in the master REDIS server.

    8. Anathomy of the resolver.py

    Before you will write your resolver.py, consult Unbund documentation on how to write unbound python modules and how to use unbound module. Also, you shall be aware of “gotcha” for the resolver.py . Since it is executed in “embedded Python”, it does not inherit information about location of the some of the python modules. Be prepared to define path to those modules using sys.path.append(…) calls.

    Main callback for the query processing inside resolver.py will be function “operate(id, event, qstate, qdata)”. Parameters are:

    • id, is a module identifier (integer);
    • event, type of the event accepted by module. Look at the documentation of which event types are there. For the resolver, we do need to catch MODULE_EVENT_PASS and MODULE_EVENT_NEW
    • qstate, is a module_qstate data structure
    • qdata , is a query_info data structure

    First, qstate.qinfo.qname_str will contain your query. The best way to detect if this is a query of the direct or reverse zones is to issue this call

    <em>socket.inet_aton(qstate.qinfo.qname_str[:-1])</em>

    and then catch the exceptions. If you have an exception, then it direct zone, of not – reverse.

    Second, you will be needed to build a return message, like this:

    msg = DNSMessage(qstate.qinfo.qname_str, RR_TYPE_A, RR_CLASS_IN, PKT_QR | PKT_RA | PKT_AA)

    Then, depend on which zone you shall query, you sent a one of the following requests to REDIS:

    GET A:%(name)

    GET PTR:%(ip)

    if REDIS returns None, you shall query Zabbix mysql database with one of the following queries:

    select interfaceid,ip,dns from interface where type = 1 and dns = ‘%(name)’;

    select interfaceid,ip,dns from interface where type = 1 and ip = ‘%(ip)’;

    If MySQL query returned data, you shall populate REDIS as described in Chapter 6, fill return message and invalidate and re-populate UNBOUND cache using following calls:

    invalidateQueryInCache(qstate, qstate.return_msg.qinfo)

    storeQueryInCache(qstate, qstate.return_msg.qinfo, qstate.return_msg.rep, 0)

    Return message is filled by appending results to a msg.answer

    "%(name) 900 IN A %(ip)"
    "%(in_addr_arpa) 900 IN PTR %(name)."

    for direct and reverse zones.

    qstate alse shall be updated with information about return message before you manipulate with UNBOUND cache

    msg.set_return_msg(qstate)

    9. Summary.

    Well, now you know enough on how to integrate information from your Zabbix instance into your enterprise.

  • Plymouth – Getting Started Guide

    Editing Plymouth

    You can edit Plymouth with a simple text editor for animations and images. This is Ubuntu version agnostic.

    Original to New
    • Get Template
    • Customize Template
    • Set Custom Theme

    Make a template

    First you will get a template that covers all the basic aspects of a Plymouth. Change my-theme to your own personal them name.

    sudo cp --recursive /lib/plymouth/themes/ubuntu-logo ~/themes/my-theme

    Customize file names

    Now you can change some names to help identify our theme from others.

    sudo mv ubuntu-logo.plymouth my-theme.plymouth
    sudo mv ubuntu-logo.script my-theme.script
    sudo mv ubuntu-logo.grub my-theme.grub
    sudo mv ubuntu_logo16.png my_theme16.png
    sudo mv ubuntu_logo.png my_theme.png

    Edit image files

    Use your image editor of choice to alter the png images. I like GIMP for quick edits.

    gimp my_theme.png my_theme16.png
    gimp progress_dot_on.png progress_dot_off.png
    gimp progress_dot_on16.png progress_dot_off16.png

    Here is an example of my alterations:

    Edit the configuration files.

    1. Set up theme information file.
    gedit my-theme.plymouth

    Edit lines 2, 7, and 8 and change ubuntu logo to you theme name.

    [Plymouth Theme]
    Name=My Theme
    Description=A theme that features a blank background with a logo.
    ModuleName=script
    
    [script]
    ImageDir=/lib/plymouth/themes/my-theme
    ScriptFile=/lib/plymouth/themes/my-theme/my-theme.script

    For 17.10+, replace /lib/plymouth/themes with /usr/share/plymouth/themes

    1. Start-up terminal color. (Optional)
    gedit my-theme.grub

    Change it from purple to something else.

    Edit line 1 with RGB color code.

    A good site to help you is Color-Hex. I am just going to make mine black.

    if background_color 0,0,0; then
        clear
    fi

    The script file to apply theme changes

    gedit my-theme.script

    There is many different aspects to this file that you can change to customize your plymouth boot theme. If you wish to do more advanced changes you should study it. I am only showing how to change the background color, logo, and status indicator.

    Edit lines 169, 170, 174, and 180 to change the background gradient and images you edited earlier.

    Window.SetBackgroundTopColor (0.66, 0.66, 0.66);       #top
    Window.SetBackgroundBottomColor (0.146, 0.146, 0.146); #bottom
    
    bits_per_pixel = Window.GetBitsPerPixel ();
    if (bits_per_pixel == 4) {
        logo_filename = "my_theme16.png";
        progress_dot_off_filename = "progress_dot_off16.png";
        progress_dot_on_filename = "progress_dot_on16.png";
        password_field_filename = "password_field16.png";
        question_field_filename = "password_field16.png";
    } else {
        logo_filename = "my_theme.png";
        progress_dot_off_filename = "progress_dot_off.png";
        progress_dot_on_filename = "progress_dot_on.png";
        password_field_filename = "password_field.png";
        question_field_filename = "password_field.png";
    }

    Send your theme folder

    cp --recursive ~/themes/my-theme /lib/plymouth/themes

    Set Plymouth configuration to use theme.

    sudo ln -sf /lib/plymouth/themes/my-theme/my-theme.plymouth /etc/alternatives/default.plymouth
    sudo ln -sf /lib/plymouth/themes/my-theme/my-theme.grub /etc/alternatives/default.plymouth.grub

    18.04+

    sudo update-initramfs -u

    Restart to watch it in action.

    You can get a list of themes available via the repositories through Synaptic Package Manager or through the command line via aptitude:

    $ aptitude search plymouth-theme
    p   lubuntu-plymouth-theme        - plymouth theme for Lubuntu
    p   plymouth-theme-fade-in        - graphical boot animation and logger - fade-in theme
    p   plymouth-theme-glow           - graphical boot animation and logger - glow theme
    i   plymouth-theme-kubuntu-logo   - graphical boot animation and logger - kubuntu-logo theme
    p   plymouth-theme-sabily         - plymouth theme for Sabily
    p   plymouth-theme-script         - graphical boot animation and logger - script theme
    p   plymouth-theme-solar          - graphical boot animation and logger - solar theme
    p   plymouth-theme-spinfinity     - graphical boot animation and logger - spinfinity theme
    p   plymouth-theme-text           - graphical boot animation and logger - text theme
    c   plymouth-theme-ubuntu-logo    - graphical boot animation and logger - ubuntu-logo theme
    i   plymouth-theme-ubuntu-text    - graphical boot animation and logger - ubuntu-logo theme
    p   plymouth-theme-ubuntustudio   - Ubuntu Studio Plymouth theme
    p   xubuntu-plymouth-theme        - Plymouth theme for Xubuntu

    You can then install the resulting packages via Synaptic or apt as normal:

    $ sudo apt install plymouth-theme-solar

    If you’re looking for something not in the repositories, UbuntuGeek has an excellent tutorial on how to install and create your own custom Plymouth themes.