Source: https://medium.com/beqode/using-laravel-passport-with-react-native-8e1d159df3f
Author: bandel
-
DO Repeat Yourself (Laravel Edition)
This story was originally published on beqode.com with proper code syntax highlighting and formatting. Read it there, give it a clap here.
OK, the title is clickbait, go against the “Don’t Repeat Yourself” (DRY) principle and you’ll trigger the Internet.
Obviously we don’t want to repeat ourselves a.k.a copy/paste, a.k.a spaghetti code ™, a.k.a “Don’t touch this piece”, a.k.a high maintenance cost code…
But there are (few) areas where it is even recommended to repeat yourself and I wanted to highlight them only because I made the mistakes myself when I was a junior developer.
Controllers
Here I refer to a controller as the method inside a
classcontroller, the direct “controller” of a view, resource, etc…Controllers can repeat themselves.
Well, that is if and only if you’ve been separating your domains properly:
- Repositories to query your DB/Model
- Services to extract your business logic
Once everything is separated, it is quite normal for 2 controllers to look alike:
class UserController
{
    protected $users;

    public function __construct(Users $users)
    {
        $this->users = $users;
    }

    public function show(Request $request, string $username)
    {
        $user = $this->users->findByUsername($username);

        if (!$user) {
            return abort(404);
        }

        return view('user.show', compact('user'));
    }

    public function edit(Request $request, string $username)
    {
        $user = $this->users->findByUsername($username);

        if (!$user) {
            return abort(404);
        }
        return view('user.edit', compact('user'));
    }
}
It’s obviously OK to repeat:
$user = $this->users->findByUsername($username);

if (!$user) {
    return abort(404);
}
Whereas if you did not have the
Usersrepository, that would not be acceptable:class UserController { public function show(Request $request, string $username) { $user = User::with('posts') ->whereNotNull('email_verified_at') ->whereNull('banned_at') ->where('username', $username) ->first(); // ... } public function edit(Request $request, string $username) { $user = User::with('posts') ->whereNotNull('email_verified_at') ->whereNull('banned_at') ->where('username', $username) ->first(); // ... } }To make my point even clearer: you should NOT attempt to group
showandedittogether in order to stay DRY:class UserController { // ... public function show(Request $request, string $username) { return $this->showOrEdit($request, $username, 'show'); } public function edit(Request $request, string $username) { return $this->showOrEdit($request, $username, 'edit'); } protected function showOrEdit(Request $request, string $username, string $action) { $user = $this->users->findByUsername($username); if (!$user) { return abort(404); } return view('user.' . $action, compact('user')); } }While this could seem like a good idea now (it is not), it is very likely the 2 controllers will evolve their own separate ways and you’ll end up with a
showOrEditfull ofifand very prone to errors ! It’s basically added complexity for very little gains and at the cost of readability.Even worse, trying to group
editandshowtogether inside the controller instead of properly extracting the business logic into theUsersrepository !class UserController { // ... protected function showOrEdit(Request $request, string $username, string $action) { $user = User::with('posts') ->whereNotNull('email_verified_at') ->whereNull('banned_at') ->where('username', $username) ->first(); // ... } }So do repeat your controllers, but only when they are composed with your different repositories & services.
You could even OOP’ing your class controllers (inheritance) in order to group functionalities and stay DRY, this is almost certainly a bad idea ! class controllers are merely connectors to your views and should not hold any business logic (which is what the inheritance pattern is likely trying to achieve).
All of the above comes down to the “Fat model, skinny controllers” mantra. You can have as many skinny controllers as you want, and because they are skinny, because all your business logic (repositories, services) has been extracted, they will be very similar and that’s completely fine ! Do repeat those skinny controllers!
Views
Another area where you shouldn’t sweat it too long for keeping your code DRY is Views. One with good intentions could spend way too much time trying to re-use views, splitting them into multiple partials, make use of layout inheritance, etc…
Views are very very likely to change over time (copy, CSS…) and trying to optimise reusability is in my experience/opinion, not worth the effort.
Views are very unique by definition, they fulfil a very specific (display) purpose. While it seems like 2 similar views could be grouped together in a partial, it’s rarely true, misleading and will almost certainly end up in unmaintainable code.
See Views as disposable pieces of code: Copy them, delete them, replace them without too much thinking.
A concrete example is trying to make one unique component for two different list items.
Say you have a
_booking-item.twigpartial, it displays a Booking item in a list of upcoming bookings in your Admin area:<article class="booking"> <h2 class="booking__title">New Booking #{{ booking.id }}</h2> <div class="booking__buttons"> <button>Accept</button> <button>Reject</button> </div> </article>Now you have a new requirement to display a list of archived bookings in a tab next to your upcoming bookings list.
It is tempting to reuse
_booking-item.twigand to write some conditional logic in it:<article class="booking{% if booking.isArchived() %} booking--archived{% endif %}"> {% if booking.isUpcoming() %} <h2 class="booking__title">New Booking #{{ booking.id }}</h2> {% else %} <h2 class="booking__title">Booking #{{ booking.id }}</h2> {% endif %} {% if booking.isArchived() %} <p>Processed on {{ booking.processed_at|date('M d, Y') }}</p> {% endif %} {% if booking->isUpcoming() %} <div class="booking__buttons"> <button>Accept</button> <button>Reject</button> </div> {% endif %} </article>While clean-ish, this is not (at all) scalable.
Also remember that the above is not a real world example, and I would even argue that this simple view is already bloated with needless logic that prevents me from understanding the final result of the view.
When I open a view I want to instantly have a feeling of what it will look like. Views are unimportant pieces of code, they are swappable, deletable, replaceable…
If we rewrite our
_booking-item.twigpartial into two different partials:{# resources/views/_booking-item.twig (Unchanged) #} <article class="booking"> <h2 class="booking__title">New Booking #{{ booking.id }}</h2> <div class="booking__buttons"> <button>Accept</button> <button>Reject</button> </div> </article> {# resources/views/_booking-archive-item.twig #} <article class="booking booking--archived"> <h2 class="booking__title">Booking #{{ booking.id }}</h2> <p>Processed on {{ booking.processed_at|date('M d, Y') }}</p> </article>I have a much better understanding of what the final result will look like.
Yes, if you change the
booking__titleclass name in your CSS tobooking__heading, you do have to edit 2+ files to change the class name in your views. That’s the trade-off for readability.There is no hard line of when to group or split your views, but in my experience don’t be afraid to repeat yourself in your views, this is very much unimportant.
The point I am trying to make is: Views may not be DRY. I would even say they should not be DRY. This will save you a lot of time, again, Views are disposable, write them, leave them, come back to them, edit them, delete them, they should not be in the way, they should not delay the greater Architecture you have to design in your business logic, they must take very little of your precious bandwidth.
Conclusion
There is a limit to DRY, and that limit is: Once you’ve been separating your different concerns properly, you can Repeat Yourself (RY) ™.
Especially (and only ?) in areas like Controllers & Views.
Source: https://medium.com/beqode/do-repeat-yourself-laravel-edition-c4a058f587f6
-
A Look at the New PHP 8.1 Fibers Feature
PHP is trying to shove the lack of features from its code base, and Fibers is one of the meaningful additions to the language. PHP Fibers, incoming in PHP 8.1 at the end of the year, will introduce a sort of async programming (coroutines) into the wild.
The fiber concept basically refers to a lightweight thread of execution (also called coroutine). These seem to run in parallel but are ultimately handled by the runtime itself rather than by pushing it directly to the CPU. A lot of major languages have their own ways to implement them, but the principle is the same: Let the computer do two or more things at the same time, and wait until everything is completed.
PHP implementation of Fibers is not true asynchronous computing, as one may think. Indeed, the core of PHP will be still synchronous after Fibers are introduced.
You can think of PHP Fibers as being like switching from one car to another.
How Will Fibers Work?
A Fiber is a single final class that looks like a car: It can start and run immediately, push the brakes and wait, and resume its trip.
final class Fiber
{
    public function __construct(callable $callback) {}
    public function start(mixed ...$args): mixed {}
    public function resume(mixed $value = null): mixed {}
    public function throw(Throwable $exception): mixed {}
    public function isStarted(): bool {}
    public function isSuspended(): bool {}
    public function isRunning(): bool {}
    public function isTerminated(): bool {}
    public function getReturn(): mixed {}
    public static function this(): ?self {}
    public static function suspend(mixed $value = null): mixed {}
}
When you create a new Fiber instance with a callable, nothing will happen. Is not until you start the Fiber that the callback is executed like any other normal PHP code.
$fiber = new Fiber(function() : void {
    echo "I'm running a Fiber, yay!";
});

$fiber->start(); // I'm running a Fiber, yay!
Didn’t I say Fibers were asynchronous? They are, but only until you hit the brakes by calling
Fiber::suspend()inside the callback. Then it passes the control to the “outside,” but bear in mind this Fiber car is still alive and waiting to resume.$fiber = new Fiber(function() : void { Fiber::suspend(); echo "I'm running a Fiber, yay!"; }); $fiber->;start(); // [Nothing happens]Now that the car is suspended, the next thing to do is to take your foot off the brake, and for that, we can call the
resume()method from the outside.$fiber = new Fiber(function() : void { Fiber::suspend(); echo "I'm running a Fiber, yay!"; }); $fiber->start(); // [Nothing happened] $fiber->resume(); // I'm running a Fiber, yay!This is literally untrue async, but that doesn’t mean your application can’t do two things at a time. The real truth here is that the Fiber function state is saved where it was left off. You’re figuratively switching between cars, driving each to one point.
One of the neat things about
start(),suspend(), andresume()is that they accept arguments:- The
start()method will pass the arguments to the callable and will return whatever the suspend() method receives. - The
suspend()method returns whatever value the resume() method received. - The
resume()method returns whatever the next call to suspend() received.
This makes communication between the Main thread and the Fiber relatively easy:
resume()is used to put values into the Fiber that are received withsuspend(), andsuspend()is used to push values out that are received byresume().
This makes the official example way easier to understand:
$fiber = new Fiber(function (): void {
    $value = Fiber::suspend('fiber');
    echo "Value used to resume fiber: ", $value, "\n";
});

$value = $fiber->start();

echo "Value from fiber suspending: ", $value, "\n";

$fiber->resume('test');
If you execute the above code, you will receive something like this:
Value from fiber suspending: fiber
Value used to resume fiber: test
We’re Close To Having Our Own Complete Web Server
Let’s face it, PHP is paired with nginx/Apache 99% of the time, mainly because it is not multithreaded. The server that comes in PHP is blocking and serves only for some tests or showing something to a client.
Fibers may open the door to letting PHP work with the socket more efficiently, and enable things like WebSockets, server-side events, pooled database connections, or even HTTP/3, without having to resort to compiling extensions, hacking your way down with unintended features, encapsulating PHP into another external runtime, or any other recipe for disaster.
Some things may take time to settle, but if there is a promise of keeping a single code base for other features, without having to spend days trying to compile and deploy, I’m on board.
You Won’t Use Fibers Directly
According to the documentation, Fibers offers “only the bare minimum required to allow user code to implement full-stack coroutines or green-threads in PHP.”
In other words, unless you have a very weird reason to use them directly, you will never have to interact with Fibers like you would doing coroutines on Javascript or Go.
Some high-level frameworks (like Symfony, Laravel, CodeIgniter, and CakePHP, among others) will take some time to understand how to approach Fibers and create a set of tools for them to work with from a developer standpoint. Some low-level frameworks, like amphp and ReactPHP, have already boarded the Fiber ship in their latest development versions.

Standards — xkcd While this will free you from thinking more about Fibers rather than your idea, it means that everyone will make their own flavor of concurrency, with all their advantages and caveats.
Only One Fiber at a Time

Photo by Victoire Joncheray on Unsplash I’m going to quote Aaron Piotrowski from PHP Internals Podcast #74:
“Since only one Fiber can be executing at the same time, you don’t have some of the same race conditions that you have with memory being accessed or written to by two threads at the same time.”
Aaron also adds that it will be the frameworks that will be able to tackle the concurrency and synchronization problem over the same piece of memory.
This is good because you won’t need to think about data races, semaphores, and mutexes, things that gophers understand perfectly. But you’re still bound to essentially only two things at a time, no matter what you do.
No Channels in the Meantime
Since only one Fiber is running at the same time, even if you declare multiple ones, there is no problem of synchronization of data. But Aaron said that there is the potential of another Fiber waking up and rewriting what the first Fiber is sharing. One of the solutions is to use Go’s channels style.
Derick Rethans asked about channels, and Aaron’s answer is simple: Something else must be implemented alongside Fibers, but until then, the frameworks will have the last word on how to use channels, if they deem them necessary for what they offer, like the guys at amphp.
Comparing With the New Kid on the Block
The Go language has been gaining traction a lot of these months, especially thanks to being built around concurrency from the ground up. Anything can be executed concurrently with the go keyword, and synchronization is done by mutexes or channels, making it brain-dead easy to work with.
names := make(chan string)
go doFoo(names)
go doBar(names)
From that perspective, Go is miles ahead of PHP’s initial concurrency solution. If you need something fully multithreaded, you may want to make your software in Go, or even Rust if you want to use CPU threads directly.
It’s not that PHP is not compatible with any concurrency model, but surely its foundation is still synchronous at its core, at the expense of convenience and better understandability. Compared to Go, the latter suffers from excessive plumbing.
If you wanted a true concurrency model like Go, then PHP would have to be rewritten from the very ground up, but that would open a lot of possibilities in a computing world that has already embraced multithreading.
Hopefully, this will bring more focus on features and independence, something that I have been very vocal about.
Source: https://betterprogramming.pub/a-look-at-the-new-php-8-1-fibers-feature-979489399918
- The
-
The Downsides of Coding With Laravel Octane
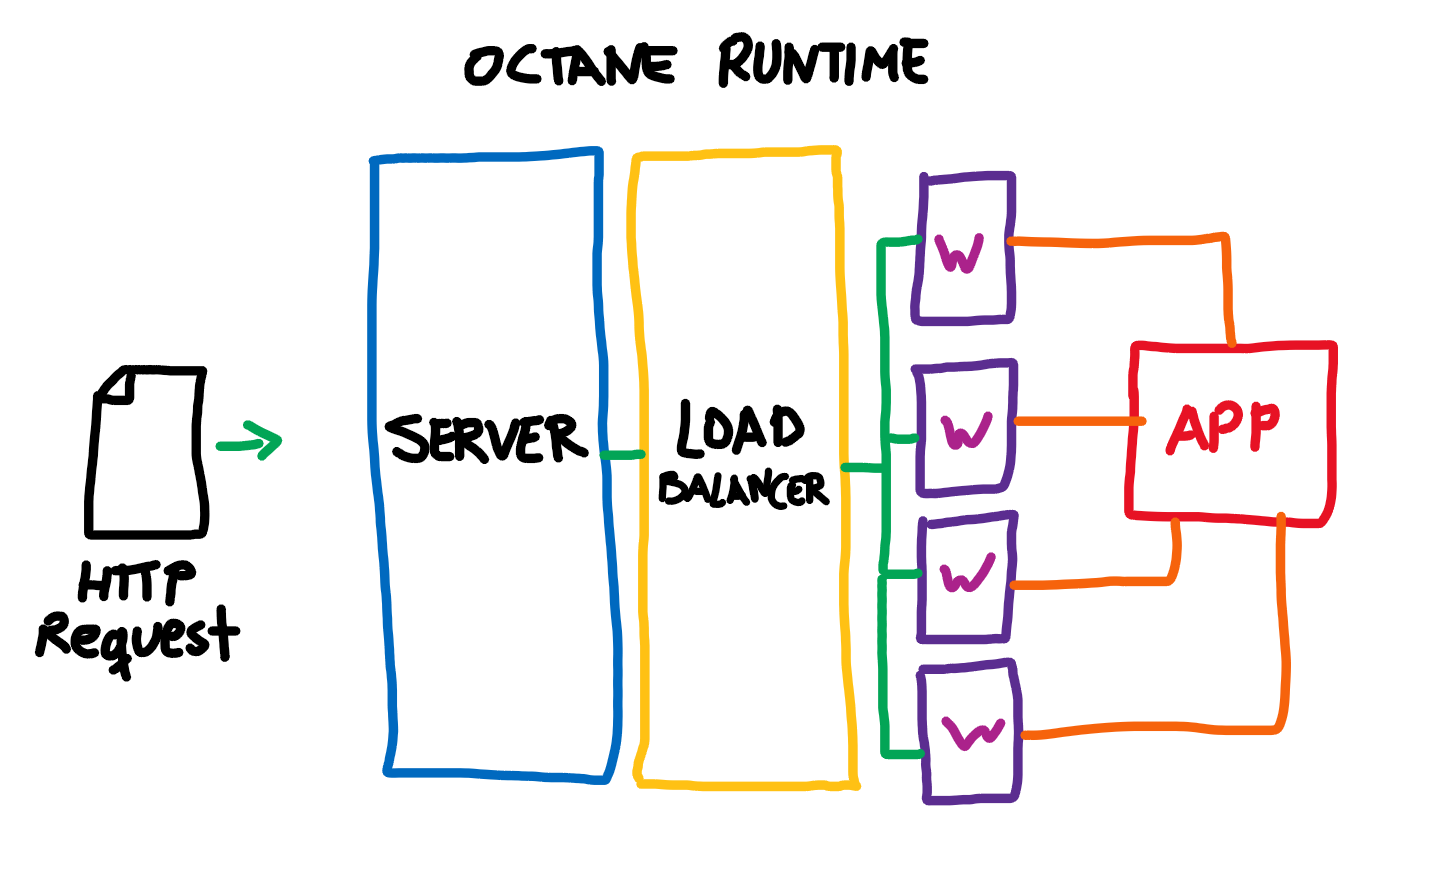
Laravel Octane was announced some weeks ago with the promise of pushing the framework to the moon in terms of requests served per second. It wasn’t public until today (in beta form) for everyone to test, with first-party Laravel package compatibility (e.g. Nova or Telescope) out of the box.
The way Laravel Octane works to push the boundaries is essentially simple: Instead of “starting” the application each request, it does it fully once and saves it into a shared part of the memory. Once done, Octane will spawn multiple PHP workers that will receive this shared application instance. These processes handle not one but multiple requests at the same time.
As many of you know, PHP is a single-thread process at its core and will still be even after the arrival of PHP Fibers. Laravel Octane does not use PHP Fibers, but alternatively, it runs the application under a custom HTTP server with tighter control over PHP. For the latter, Roadrunner or Swoole is required.
The amazing performance does come with some code caveats.
One Instance To Rule Them All
If you figured out the problem, you’re awesome. But for those who are still lost, this a very simplified version of how it works:

A very amateurish and simplified example of how Laravel Octane works When the server starts, the application starts up by registering and booting all the services — even those marked as “deferred,” which we call “bootstrap.” This fresh instance is then shared across all PHP Workers. This is contrary to how a normal PHP process works. Typically, the application bootstraps and is destroyed each time a request goes in and a response goes out.
I’m going to quote this excellent and extensive Diving Laravel article about how Laravel Octane works — specifically how the application and the service singletons are handed out — which will clear your mind immediately:
“Bindings in the container can be registered as singletons, these special bindings are only going to be resolved once in an application lifetime. The resolved instances will be stored in the container cache and the same instances will be re-used during the lifetime of the application.
(…) Instances are resolved by calling $app->resolve(‘singleton’) or $app->make(‘singleton’). So, if you resolve any singletons inside your service providers’ boot or register methods, these singletons will persist. Singletons that are resolved while handling requests won’t persist tho, they will get constructed on every request when running under Octane. You don’t need to worry about those.”
Since the application has been already bootstrapped, the app works at blast speed since there is no need to bootstrap again. Now, imagine the shenanigans: A service singleton will keep the same data for all the requests from anybody! And this also applies to the config repository and the container itself. Bollocks!
If you want to break Laravel Octane, you can even do a simple memory leak by piling up data into a
Classstatic property for each request.MyLeaker::$pileUp = Str::random(100);
Coding With Laravel Octane in Mind
Now that you know how it works, it’s very easy to understand that the application, as a whole, is essentially the same in all aspects across all requests. Changing the state globally in the bootstrapping will rebound on all requests, and outside of it, it will only work for the current one. The application doesn’t die once the request is out, but it will immediately serve the next one that comes into the server.
With that in mind, here are my recommendations if you plan to create an application with Laravel Octane or create a package that promises the same:
- It’s safe to register singletons if you expect them to be resolved only once and to stay the same across requests.
- It’s safe to inject the config if you expect immutability from it.
- It’s safe to inject the container to resolve a service registered at bootstrap, but not to add or modify something inside it and expect it to persist.
- Always try to use
request()outside controllers. - Never use static properties. Use constants instead when possible.
In short, the application state at bootstrapping is different from the application instance at request time. Also, singletons should not be directly tied to requests.
Conclusion
While Laravel Octane is not disruptive in any way, as a developer, you will have to double-check your dependencies for any Laravel Octane incompatibility — especially those who deal with many singletons.
I think it is convenient to tell the developers that your code has been revised in order to work with Laravel Octane in a non-disruptive way. I’m even badging my repositories as “Laravel Octane Compatible” once revised so people can jump in faster and more safely.

For the rest, Laravel Octane is not a requisite, as many app bottlenecks are bound to unoptimized database queries, slow session stores, or slow external API requests. As always, benchmark your app to check where the slowness comes from, as Laravel Octane may only give you more headaches than solutions.
Source: https://betterprogramming.pub/the-downsides-of-coding-with-laravel-octane-17f4a7a4ea85
-
13 Manfaat Kopi si Minuman Ajaib (Seribu Jenis Antioksidan)
Selama berabad-abad, kopi menjadi minuman yang dipuja sekaligus dicela. Penelitian mengenai manfaat kopi mungkin sama banyaknya dengan bukti-bukti tentang efek buruknya. Kontroversi ini timbul karena begitu banyak zat yang dikandung dalam secangkir kopi.
Kandungan utama yang paling dikenal dari kopi adalah kafein. Namun, dampak yang ditimbulkannya terhadap tubuh bukan hanya disebabkan kafein, melainkan juga zat-zat lainnya. Untuk tahu lebih jelas kegunaan kopi dan efeknya bagi tubuh, simak uraian berikut ini.
Kandungan Nutrisi Kopi dan Waktu yang Tepat Meminumnya

Menurut sejarahnya, kopi pertama kali diminum oleh bangsa Yaman dalam sebuah upacara keagamaan. Namun, tanaman kopi saat ini sudah dibudidayakan di lebih dari 70 negara di dunia, termasuk Indonesia. Jenis yang paling banyak ditanam adalah kopi arabika dan robusta.
Meskipun kandungan vitamin dan mineralnya sangat sedikit, kopi tidak mengandung gula maupun karbohidrat. Selain kafein, kopi juga mengandung kalori, protein, riboflavin, pantothenic acid, kalium, mangan, magnesium, dan niasin.
Fakta lain akan kehebatan kopi adalah bahwa biji kopi mengandung lebih dari 1.000 macam antioksidan. Selain mengatasi peradangan dam menetralkan radikal bebas, antioksidan utama dalam kopi, chromogenic acid, terbukti mampu mencegah penyakit kardiovaskuler.
Lalu, kapan waktu terbaik untuk minum kopi? Ternyata, minum kopi di pagi hari tidak disarankan karena akan terjadi “tabrakan” antara hormon kortisol dengan kafein. Keduanya sama-sama berfungsi meningkatkan kewaspadaan sehingga manfaat kopi menjadi tidak efektif.
Kopi disarankan untuk diminum antara pukul 09.30–11.30 pagi agar manfaat kopi lebih terasa. Pada jam-jam tersebut, hormon kortisol berada pada level terendah. Minum kopi akan menggantikan kortisol dalam mengembalikan tingkat kewaspadaan.
Manfaat Kopi untuk Kesehatan
Banyak yang berpendapat bahwa minum kopi akan menyebabkan peningkatan detak jantung dan tekanan darah, serta insomnia.
Namun, penelitian-penelitian terbaru membuktikan bahwa di balik rasanya yang pahit, kopi memiliki banyak manfaat untuk kesehatan, yaitu sebagai berikut.
Mempertajam Memori Jangka Pendek
Kafein dalam kopi baik bagi otak karena memengaruhi area otak yang bertanggung jawab untuk konsentrasi dan memori jangka pendek. Dengan minum kopi setiap hari, kemampuan otak untuk berkonsentrasi dan mengingat peristiwa akan meningkat.
Mengurangi Risiko Alzheimer dan Demensia
Minum 3-5 cangkir kopi sehari dipercaya akan menurunkan risiko demensia dan Alzheimer hingga 65%. Hal ini disebabkan kopi mencegah pembentukan plak beta-amyloid dan menurunkan gula darah yang merupakan pemicu terjadinya Alzheimer dan demensia.
Mencegah Beberapa Jenis Kanker
Polifenol di dalam kopi merupakan antioksidan yang bersifat antikarsinogen. Bagi pria, minum kopi setiap hari akan mencegah kanker prostat, dan bagi wanita, kopi dapat mencegah kanker endometrium. Minum kopi juga terbukti mencegah kanker payudara, usus, dan hati.
Mencegah Diabetes
Minum kopi tanpa gula terbukti menurunkan risiko diabetes sebesar 7%. Selain meningkatkan efektivitas insulin, kopi mencegah kerusakan jaringan dan mengurangi penumpukan zat-zat racun seperti amyloid fibril yang ditemukan pada penderita diabetes.
Baik untuk Jantung
Anda mungkin sering mendengar bahwa minum kopi berbahaya untuk jantung. Namun, sebuah penelitian yang melibatkan 37.000 orang menunjukkan konsumsi kopi dengan dosis sedang bisa menurunkan 20% risiko terjadinya penyakit jantung.
Menjaga Kesehatan Hati
Kopi mampu menurunkan risiko kanker dan sirosis hati hingga 20%. Studi yang dilakukan di Turki menunjukkan, kopi akan menurunkan produksi enzim hati yang merupakan indikator terjadinya kerusakan pada hati.
Meringankan Depresi
Menurut para ahli saraf, kopi dapat mengaktifkan neurotransmitter sehingga mood Anda menjadi lebih baik. Yang termasuk dalam transmitter adalah hormon serotonin dan dopamin yang membuat perasaan menjadi lebih gembira.
Manfaat Kopi untuk Kecantikan

Selain memberikan manfaat dari dalam tubuh, pemakaian kopi untuk perawatan dari luar juga punya manfaat menakjubkan untuk kecantikan. Bagaimana cara memanfaatkan kopi untuk merawat kecantikan? Ini dia ulasannya.
Mengangkat Sel Kulit Mati
Kopi giling tidak larut dalam air sehingga cocok digunakan sebagai eksfolian untuk wajah dan tubuh. Caranya, campurkan bubuk kopi atau ampas kopi baru dengan gula dan minyak zaitun, lalu gosokkan ke permukaan kulit. Diamkan selama beberapa menit, lalu bilas hingga bersih.
Merevitalisasi Kulit
Selain kopi hitam, Anda juga bisa menggunakan kopi hijau untuk merevitalisasai kulit. Caranya, campurkan 3 sendok teh kopi hijau, 1 sendok teh susu, dan air secukupnya sampai menjadi pasta. Gunakan sebagai masker, biarkan hingga kering, lalu bilas air dengan dingin.
Melenyapkan Mata Panda
Untuk melenyapkan mata panda, aplikasikan bubuk kopi yang sudah sedikit dibasahi di sekitar mata. Kafein dalam kopi akan merangsang darah mengalir ke area mata sehingga kulit di sekeliling mata kembali kencang dan antioksidannya melindungi dari pengaruh sinar UV.
Mengobati Jerawat
Ada tiga senyawa penting yang membuat manfaat kopi sangat efektif untuk mengatasi jerawat, yaitu antioksidan, stimulan, dan chlorogenic acid. Scrub dari kopi akan membersihkan sel kulit mati yang menyumbat pori dan chlorogenic acid mencegah peradangan.
Merawat Kaki
Bubuk kopi juga bisa digunakan sebagai scrub untuk kaki sehingga bersih dan halus. Kandungan kafein pada kopi akan memperlancar sirkulasi darah ke kaki. Untuk menggunakannya, lakukan cara berikut.
- Seduh satu gelas besar kopi
- Tuang kopi bersama ampasnya ke dalam ember kecil.
- Setelah kopi dingin, rendam kaki sambil digosok perlahan.
- Bilas dengan air bersih, keringkan, dan gunakan lotion.
Menghitamkan Rambut
Warna hitam pada kopi bisa digunakan untuk menghitamkan rambut. Buatlah seduhan kopi kental, tunggu hingga dingin. Aplikasikan ke seluruh rambut, diamkan selama 30 menit–3 jam, lalu bilas. Anda juga bisa mencampurnya dengan minyak zaitun sebagai masker rambut.
Banyak studi menunjukkan, Anda akan mendapatkan manfaat kopi secara maksimal jika minum 1-2 cangkir kopi setiap hari. Akan lebih baik lagi jika Anda menggiling sendiri biji kopinya dan segera menyeduh serta meminumnya saat itu juga. Selamat ngopi!
-
Speeding Up Arduino
Introduction
For many of us, we started out programming on desktops and servers, which seemed to have infinite memory and processing power (well, depending on when you started programming, I guess). There was little reason to optimize your code since you weren’t likely to exceed the system’s limits anyway. And then, when you got in to embedded systems, there was the rude awakening. Moving from such a powerful system to a much smaller, less capable one, like an Arduino, was a bit of a shock. All of a sudden you had to think about saving CPU cycles and memory, which doesn’t always come easy to programmers just starting out.
As you’ll see throughout this article, fast code is not only important for doing calculations, but even more so for IO operations. If you venture in to robotics (like drones or other control systems) this will become even more clear since much of the work done by the microcontroller results in IO. Usually a faster feedback loop meant better performance.
After a few weeks of wrangling with a microcontroller to squeeze out every ounce of processing power as possible for a drone flight controller, I thought I’d write up an article to help you find ways to improve the speed and efficiency of your own projects.
Throughout this article, I’ll be focusing on the Arduino Uno since that seems to be the most common board out there, although much of this article should also apply to the other boards as well.
Why Arduinos are Slow
Clock Speed
First of all, you are only as fast as your clock (disregarding multi-core processors), which the Arduino Uno defaults to using a 16Mhz crystal. What that means is the ATmega microcontroller can execute up to 16 million instructions per second. Now, 16 million instructions per second may sound like a lot (and it is, sort of), but when you consider what all an Arduino needs to do to execute even simple operations, it really isn’t that much. For many projects, the clock cycles are shared between things like calculations, I2C communication, reading and writing to pins and registers, and many more operations.
Even then, seemingly simple commands can take up quite a bit of clock cycles, such as setting a digital pin to high. This is one of the simplest IO operations you can perform on an Arduino, but it actually takes a very long time (over 50 clock cycles!) because of the amount of code used in the
digitalWrite()method, which I’ll address in the next section. So a faster clock would allow you to execute the instructions at a faster pace.Safety Checks and Validation
So, outside of the clock speed, why are Arduinos slow? Well, it mostly has to do with some of the standard method calls and objects we use throughout our code. Here are just a few of the main culprits:
digitalWrite()digitalRead()pinMode()
Many of these methods suffer from the same drawbacks, so let’s take a look at the code for one of the most commonly used methods,
digitalWrite():void digitalWrite(uint8_t pin, uint8_t val) { uint8_t timer = digitalPinToTimer(pin); uint8_t bit = digitalPinToBitMask(pin); uint8_t port = digitalPinToPort(pin); volatile uint8_t *out; if (port == NOT_A_PIN) return; // If the pin that support PWM output, we need to turn it off // before doing a digital write. if (timer != NOT_ON_TIMER) turnOffPWM(timer); out = portOutputRegister(port); uint8_t oldSREG = SREG; cli(); if (val == LOW) { *out &= ~bit; } else { *out |= bit; } SREG = oldSREG; }As you can see, there is quite a bit going on here. But shouldn’t it be much simpler? All we really need to do is set the pin high or low in a register, right? Turns out that the Arduino creators decided it was more important to add safety checks and validation to the code than it was to make the code fast. After all, this is a platform targeted more towards beginners and education than it is to power users and CPU-intensive applications.
The first few lines use the
pinparameter to find the correspondingtimer,bit, andportfor the given pin. Theportis actually just a memory-mapped register, which controls multiple pins. To only turn on or off the pin we want, we need to determine which bit of the register our pin corresponds to, which is what thedigitalPinToBitMask()function does.Once we’ve found the
timer,bit, andport, we check to make sure it is in fact a valid pin. This line isn’t required fordigitalWrite()to do its job, but it acts as a safety net for more inexperienced programmers (and even experienced ones). We’d hate to be writing to the wrong memory location and corrupt the program.The
if (timer != NOT_ON_TIMER) …line is there to make sure we end any previous PWM usage of the pin before we write a “constant” high or low. Many of the pins on Arduinos can also be used for PWM output, which requires a timer to operate by timing the duty cycles. If needed, this line will turn off the PWM. So again, to ensure we don’t see any weird behavior, this is a safety check meant to help the user.And finally, in the last few lines we’re actually setting the given value to the given port.
The safety checks do slow down the execution quite a bit, but it also makes debugging much easier. This way when something goes wrong, you’re less likely to get weird behavior that will leave you scratching your head. There is nothing more frustrating to have seemingly logical code and to not get the expected result. Programming microcontrollers is much different than programming desktop or phone apps (although they have their fair share of difficulties too). Since you’re working directly with hardware and don’t have an operating system to keep you safe, problems can be hard to find.
If speed isn’t your goal, then I’d highly recommend you continue to use these method provided by Arduino. There is no point in exposing yourself to unnecessary risk if it doesn’t help you reach your end goal.
You should also know that the method calls aren’t always slow because of the amount of code it executes, but a contributing factor could be because of the physical limitations of the device. For example,
analogRead()takes about 100 microseconds per call due to the resolution it provides and clock it’s supplied. A lower ADC resolutions would decrease the time each call takes. However, even then, while the hardware is ultimately the limiting factor here, the Arduino code does conservatively set the ADC max sample rate to only 9600Hz (while capable of around 77Khz). So, while Arduinos are much slower than they need to be, it isn’t always because of design choices and trade-offs. There is a good discussion about this here, and documentation here.How to Speed up Arduino
To be clear, we aren’t actually making Arduino faster, rather, we’re making the code more efficient. I point out this distinction because using these tricks won’t give us a faster clock (although we can speed up the clock, which I’ll touch on later), it will just execute less code. This is an important distinction because having a faster clock provides us other benefits, like having more precise timers, faster communication, etc.
Also, keep in mind that by using the code below you’re making some trade-offs. The programmers who developed Arduino weren’t just lousy coders who couldn’t write fast code, they consciously made the decision to add validations and safety checks to methods like
digitalWrite()since it benefits their target customers. Just make sure you understand what can (and will) go wrong with these kinds of trade-offs.Anyway, on to the code.
Digital Write
Now, I’m not going to show you how to speed up every method, but many of the same concepts from here can be applied to other methods like
pinMode(). The minimum amount of code you need to write to a pin is:define CLR(x,y) (x&=(~(1<<y))) define SET(x,y) (x|=(1<<y))
Yup, that’s it.
As you can see, we get right to the point in these macros. To use them, you’ll have to reference both the port and bit position directly instead of conveniently using the pin numbers. For example, we’d be using the macro like this:
SET(PORTB, 0);
This would end up writing a
HIGHvalue to pin 8 on your Arduino Uno. It’s a little bit rough, but much faster. This also means we’re more prone to doing something wrong, like reference a non-existent port, write over an active PWM, or a number of other things.The macro gives us quite a boost, using up an estimated 2 cycles (8Mhz frequency), whereas
digitalWrite()uses up a whopping 56 cycles (285Khz frequency).Serial
Unfortunately for some tasks, like if you need to use serial communication, there isn’t a whole lot you can do to improve the speed, but there are some optimization you can watch out for.
Serial communication is commonly used for sending debugging or status information to the desktop IDE, which means you probably have
Serial.println()statements all throughout your code. It’s easy to forget about these statements after development, so if you’re looking for a speed boost and don’t need to debug anymore, try removing all theprintln()calls and removingSerialfrom the code altogether. Just having it initialized (and not even usingSerial.println()) means you’re wasting a lot of cycles in the TX and RX interrupts. In one case, it was measured that just havingSerialenabled slowed down thedigitalWrite()s by about 18%. That’s a lot of wasted cycles due to dead code.Clock Speed
Although I’ve mostly focused on the software improvements you can make, don’t forget that there is always the “simple” improvement of speeding up the clock. I say it this way because it isn’t really a simple plug-and-play improvement after all. In order to speed up the clock on an Arduino, you need to insert a new crystal in to the board, which may or may not be difficult depending on your soldering skills.
Once you’ve put in a new crystal oscillator, you still need to update the bootloader to reflect the change, otherwise it won’t be able to receive code over the serial port. And lastly, you’ll need to change the
F_CPUvalue to the proper clock speed. If you upped the clock to 20Mhz (the fastest clock the ATmega is rated for), for example, then you’ll need to modify a few files in the Arduino IDE:- In
preferences.txt, change- from:
build.f_cpu=16000000L - to:
build.f_cpu=20000000L
- from:
- In the
makefile, change- from:
F_CPU = 16000000 - to:
F_CPU = 20000000
- from:
According to this post, the ATmega328 can be overclocked to 30Mhz, but I don’t recommend it =)
Conclusion
Hopefully you found something in this post that you can easily apply to your projects, or at least I’m hoping it will encourage you to browse the Arduino source code to find optimizations of your own. The Arduino is a very capable microcontroller, but it can be capable of so much more.
Have any optimizations of your own you’d like to share? Let us know in the comments!
-

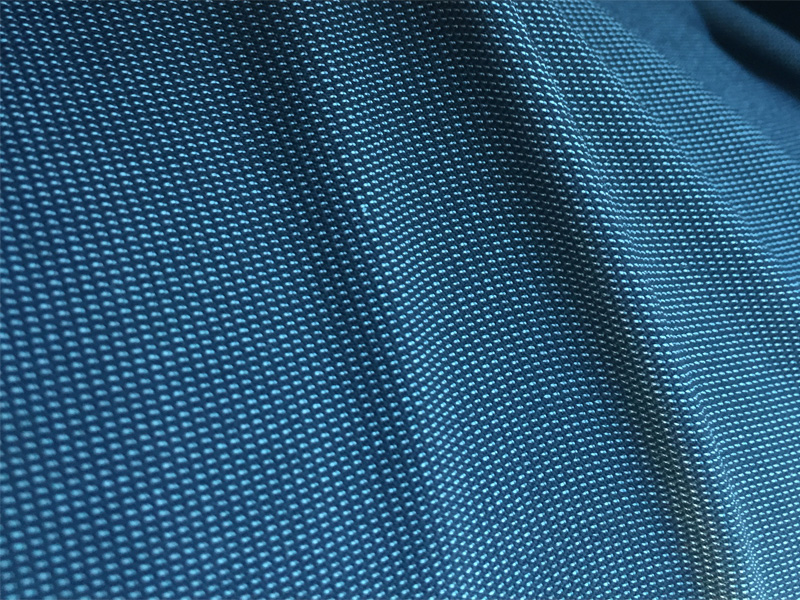
12 Jenis Bahan Satin dan Tips Memilih Busana Satin yang Tepat!
Kain satin adalah salah satu jenis produk tekstil yang sangat populer di Indonesia. Berbagai macam busana maupun aksesori dari bahan satin bisa dijumpai dengan mudah di mana saja, dari yang murah meriah hingga yang super mahal.
Mengapa harganya bisa sangat bervariasi? Jawabannya, karena satin memiliki banyak jenis dengan kualitas yang berbeda pula. Tulisan ini akan mengulas jenis-jenis satin yang ada di Indonesia, ciri-cirinya, dan cara memilih kain satin yang tepat.
Karakteristik dan Kelebihan Satin

Bahan Satin Duchesse Tenun satin berasal dari Kota Zayton atau Zaitun di Cina, yang kemudian diekspor ke berbagai belahan dunia. Pada mulanya, satin hanya dibuat dari benang sutra. Keindahan kain ini membuat Italia melakukan impor besar-besaran selama abad ke-12 dan ke-13.
Penggunaan benang sutra dan penenunan secara tradisional membuat kain satin menjadi sangat mahal. Di Italia, bahan satin hanya dikenakan oleh kalangan bangsawan.
Namun, berkat penemuan alat tenun listrik pada masa revolusi industri, kain satin bisa diproduksi secara massal dan lebih murah.
Kain satin memiliki kemiripan dengan sutra, tetapi dibuat dari serat yang berbeda. Satin ditenun dengan serat buatan, seperti poliester, sedangkan sutra dibuat dari serat alami. Hasilnya, kedua sisi kain sutra bersifat licin dan glossy, sedangkan kain satin hanya pada salah satu sisinya.
Bahan satin memiliki banyak kelebihan, terutama jika dibuat menjadi pakaian.
- Permukaan yang mengilap membuat busana dari satin terlihat glamor, mewah, dan feminin.
- Saat menyentuh kulit, permukaan satin terasa halus dan lembut sehingga nyaman saat dikenakan.
- Saat ini, kain satin diproduksi dengan beragam jenis sehingga Anda bisa memilih yang paling sesuai dengan gaya yang ingin ditampilkan dan tentu saja bujet.
Cara merawat kain satin relatif kurang lebih sama dengan cara merawat bahan wollycrepe. Selalu cuci busana satin dengan tangan, gunakan air dingin dan detergen lembut.
Pakaian satin cukup dikeringkan dengan cara diangin-anginkan dan saat menyetrika, gunakan suhu yang tidak terlalu panas.
Jenis-Jenis yang Bagus

Bahan Satin Untuk Sandal Mengetahui beberapa jenis kain satin akan membuat Anda lebih bijak sebelum memutuskan untuk membelinya, berikut diantaranya:
Satin Duchesse (Satin Bridal)
Kain ini disebut satin duchesse (bangsawan) karena sering digunakan untuk membuat gaun pengantin mewah layaknya seorang bangsawan. Sifat bahan ini agak berat dan kaku.
Satin Faconne (Satin Jacquard)
Memiliki berat dan kualitas bervariasi, kain ini lebih lembut dibanding duchesse. Biasanya, satin faconne memiliki motif, seperti garis-garis, paisley, atau lainnya.
Satin Slipper
Stin slipper sering digunakan untuk membuat sepatu balet. Ciri khasnya adalah kainnya cukup unik dan bisa dicelup.
Satin Delustered
Berbeda dari jenis lainnya, satin delustered atau peau de soie tidak berkilau dan memiliki tekstur yang ringan.
Satin Damask
Keunggulan kain ini adalah adanya pola-pola rumit nan indah, selain karena dibuat dari sutra dan memiliki pola timbul dari bahan velvet.
Satin Cloth
Karena diproses dari wol Perancis yang ditenun dengan teknik satin, kain ini disebut juga satin de laine atau “satin wol”. Bahannya kuat, awet, dan bercahaya.
Sateen
Satin berbeda dengan sateen. Satin menggunakan serat filamen seperti sutra, sedangkan sateen menggunakan serat katun atau shord-stap. Namun, keduanya ditenun dengan teknik yang sama.
Satin Kahatex
Karena sifatnya sedikit kaku dan tebal, satin kahatex lebih tepat digunakan untuk dekorasi furnitur, hiasan, atau aksesori.
Satin Clarisa
Kain ini sangat laku karena harganya murah. Dengan karakter tipis dan tidak kaku, satin clarisa digunakan untuk berbagai macam keperluan.
Satin Silk (Satin Sutra)
Berharga relatif murah, kain ini sangat lembut, tipis, dan dingin. Warna-warninya pun sangat beragam dan biasanya berjenis doff.
Satin Velvet (Double Satin)
Karena dibuat dari kombinasi bahan-bahan kaos, satin velvet dua kali lebih tebal dari satin biasa dengan karakter jatuh dan berat.
Satin Roberto Cavali
Inilah jenis satin yang paling mahal dan dibuat dari dua bahan, yaitu satin silk dan double hycon. Selain jatuh, tebal, dan menyerap keringat, dua sisi kain ini memiliki warna sejenis, tetapi sedikit berbeda.
Tips Memilih Baju Satin
Jika Anda ingin tampil menarik dan elegan, busana dari satin, baik gaun, blus, maupun gamis, adalah pilihan yang paling tepat.
Namun, dengan begitu banyaknya jenis pakaian yang ada di pasaran, Anda perlu berhati-hati agar tidak mendapatkan produk berkualitas rendah, apalagi palsu.
Berikut adalah beberapa hal yang wajib Anda teliti sebelum membeli baju satin.
Permukaan Kain
Ciri khas satin adalah satu sisi permukaannya licin, mengilap, dan tidak mudah kusut. Jadi, saat memilih busana, cek permukaan kain, apakah memiliki ciri seperti itu, karena tak jarang ada penjual yang mengatakan bahwa baju tersebut berbahan satin, padahal bukan.
Kualitas Tenunan
Satin dibuat dengan cara ditenun sehingga helaian seratnya rentan terlepas dan terurai. Hal ini tentunya akan membuat pakaian Anda mudah rusak. Karena itu, telitilah apakah ada helaian yang terlepas pada busana yang hendak dibeli.
Kekuatan Jahitan
Kekuatan jahitan harus menjadi perhatian utama saat memilih pakaian, terlebih lagi pada busana yang dibuat dari kain hasil tenun seperti satin. Pastikan seluruh jahitan rapi dan kuat agar pakaian lebih tahan lama.
Kenyamanan
Ada baiknya Anda mencoba memakai baju yang hendak dibeli dan rasakan saat kain menempel di kulit. Seperti halnya bahan monalisa, kain satin asli akan terasa nyaman, tidak panas, dan halus saat dipakai.
Memilih jenis kain dari sebuah produk pakaian memang harus dilakukan dengan cermat agar tidak menyesal karena membeli busana berkualitas rendah.
Mengetahui jenis-jenis bahan satin membantu Anda memilih dengan tepat sehingga tidak hanya bisa tampil “wah”, tetapi juga nyaman.
Sumber: https://notepam.com/bahan-satin/
-
Bahan Taiga: Populer Karena Dipakai Louis Vuitton, Mau Tau?
Anda pasti kenal Louis Vuitton (LV). Brand fashion favorit sosialita dan selebriti papan atas dunia ini begitu populer lewat produk-produk tasnya. Bukan hanya tas Speedy, produk terpopuler mereka, tetapi juga bahan taiga yang banyak ditiru produsen aksesori dunia.
Jajaran produk taiga khusus diperuntukkan bagi pria. LV menggunakan bahan tersebut dalam produksi koper dan berbagai aksesori travelling lainnya. Contohnya, seperti tas jinjing, tas slempang, dompet, sepatu, sabuk, dan aksesori pria lainnya.
Apa Itu Taiga?
Sebenarnya Taiga adalah nama sebuah hutan yang berada di wilayah Siberia Timur, Rusia. Daerah tersebut dikenal ekstrem dengan suhu dingin yang membekukan. Temperatur selama musim dingin bisa mencapai minus 62 derajat Celsius.
Sementara, kulit taiga merupakan jenis kulit semisintetik dari kulit sapi pilihan. LV meluncurkan lini produk Taiga Leather pada 1993 dan popularitasnya masih bertahan sampai sekarang. Bahkan varian kulit ini pun diadopsi oleh banyak produsen aksesori lainnya di dunia.
Kulit taiga yang beredar di Indonesia memiliki karakteristik hampir serupa dengan kepunyaan LV, tetapi dengan kualitas berada di bawahnya. Ibaratnya seperti pada bahan wolfis premium dan standar, di mana kulit taiga dari Louis Vuitton adalah premiumnya.
Jika bahan balotelly dibuat menggunakan campuran antara serat alami dan buatan, taiga terbuat dari campuran polivinil klorida (PVC) atau poliuretan (PU) dan diolah sedemikian rupa agar mirip dengan kulit asli.
Cirinya lembut dan cukup lentur, mudah diwarnai, awet, serta memiliki daya tahan terhadap panas tinggi sehingga tak mudah leleh.
Kulit sintetik dari polimer ini mempunyai karakter berbeda di kedua sisinya. Permukaan luarnya bertekstur kasar, bergaris-garis atau tampak seperti serat-serat halus yang menonjol, dan mengilap.
Sementara di sisi dalamnya padat, seperti serat-serat untuk membuat bahan twiscone, dan cenderung lebih halus.
Sifatnya yang kokoh dan tidak mudah menyerap air membuat kulit sintetik taiga banyak dipakai dalam pembuatan tas. Saat ini, bukan hanya LV yang memiliki lini produk taiga, tetapi juga produsen-produsen tas dan spesialis kulit lainnya di dunia, termasuk di Indonesia.
Jika dibandingkan dengan taiga asli milik Louis Vuitton, harga bahan taiga yang banyak beredar di pasaran lokal berada jauh di bawahnya. Sebut saja salah satu varian tas LV, Taiga Leather Moskova Briefcase RI0052, yang dibanderol sekitar $995 atau hampir Rp 14 jutaan.
Sedangkan di sini, kulit taiga berkualitas A berkisar mulai Rp 35 ribuan saja per yar (91 cm). Sementara, untuk produk tas lokal dari taiga asli paling mahal hanya dibanderol di angka sekitar Rp 4 jutaan. Benar-benar selisih harga yang cukup fantastis, bukan?
Membuat Tas dari Taiga
Untuk membuat tas dari bahan taiga ada beberapa tahap yang mesti Anda lakukan, berikut diantaranya:
Persiapan
Pertama-tama siapkan peralatan dan bahannya. Anda akan membutuhkan bahan taiga dan flanel sesuai ukuran tas yang diinginkan, misalnya 100×50 cm untuk masing-masing bahan tersebut.
Anda perlu mempersiapkan juga bahan untuk tali tas. Bisa dengan memakai dua potong kulit taiga berukuran 4×25 cm, atau jenis tali lain yang biasa dijual sebagai sparepart tas. Lalu, mata ayam berdiameter maksimal 1 cm dan tang keling untuk memasangnya.
Terakhir, siapkan peralatan menjahit, seperti mesin jahit, jarum pentul dan jarum khusus untuk kulit, serta benang. Jangan lupakan penggaris dan kapur jahit untuk menandai pola, serta gunting untuk memotong bahan yang digunakan.
Menjahit Bahan
Lipat kulit taiga dan kain flanel tadi menjadi ukuran 50×50 cm, lalu lekatkan keduanya dengan jarum pentul, masih dalam bentuk lipatan. Kain flanel berfungsi sebagai pelapis bagian dalam tas agar lebih lembut saat disentuh.
Anda akan mendapatkan kantung kulit berlapis flanel yang tampak di bagian dalamnya. Kemudian jahitlah sisi kanan dan kirinya, meninggalkan satu lubang di bagian atas agar kantung tersebut mulai dapat berfungsi. Pastikan jahitan menutup kuat kedua sisinya.
Membuat Tali Tas
Potongan kulit taiga dilipat mengikuti lebarnya. Jadi, Anda akan mendapatkan bentuk lipatan dengan ukuran 2×25 cm. Jahit memanjang pada sisi di mana ujung kain saling bertemu, untuk membuat tali tas yang cukup tebal dan kuat.
Pasang mata ayam di lokasi yang dinginkan untuk menempatkan tali. Biasanya, berada di sekitar lubang kantung tas, beberapa sentimeter di bawah pucuk tas. Pastikan posisinya benar-benar presisi, gunakan kapur dan penggaris untuk menentukan letaknya secara tepat.
Kemudian, selundupkan ujung-ujung tali tas ke dalam lubang mata ayam yang telah Anda pasang tadi. Masukkan dari sisi luar, lalu kunci dengan membuat simpul mati pada setiap ujungnya agar tali tidak mudah copot. Tas taiga simpel siap Anda pakai bepergian.
Langkah-langkah di atas masih bisa Anda aplikasikan meski tanpa menggunakan kulit taiga. Ada banyak material kain yang bisa Anda pakai untuk membuat kerajinan tas sendiri di rumah. Bisa kanvas, katun, atau bahkan bahan linen, tergantung kebutuhan dan kreativitas Anda.
Tips Perawatan Tas dari Kulit Taiga
Apa artinya punya barang bagus jika tak bisa merawatnya dengan baik? Meski taiga terkenal dengan keawetannya, material ini juga mudah rusak jika dipakai serampangan dan dirawat apa adanya.
Perawatan kulit sintetik tergolong gampang. Jika tas Anda kotor, bersihkan hanya dengan menggunakan kain lembut, tanpa perlu detergen atau zat keras penghilang noda lainnya. Sebagai penggantinya, gunakan air hangat bercampur sabun bayi untuk noda membandel.
Anda dapat menjaga tas dengan bahan taiga kw agar berumur lebih lama. Sehabis dipakai seharian, istirahatkan selama 1–2 hari sebelum menggunakannya lagi.
Lindungi permukaannya dengan lapisan silikon wax dan simpanlah di tempat tersendiri, terpisah dari tas dengan bahan taiga asli. Dengan demikian, Anda dapat menggunakan tas-tas tersebut dalam jangka waktu yang lama.
-
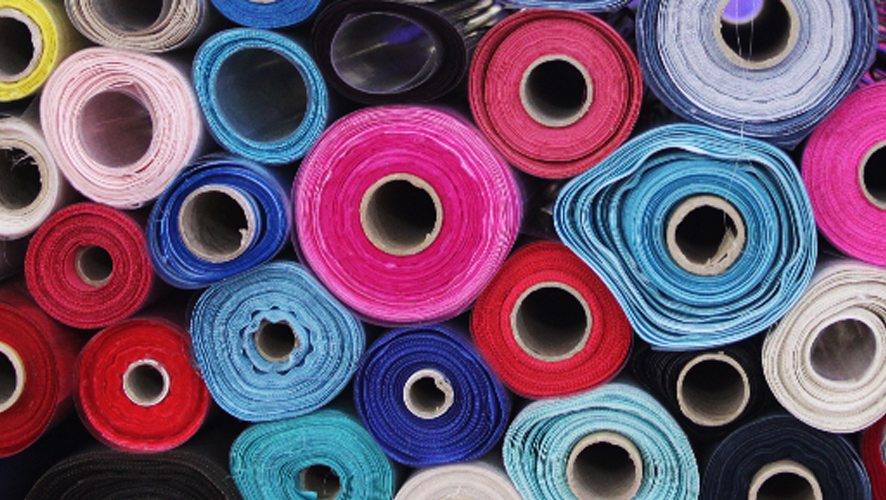
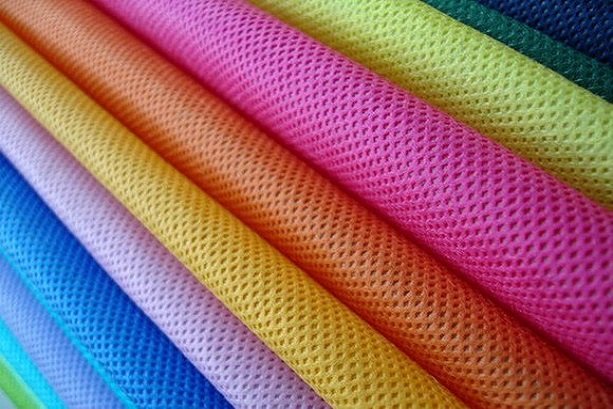
Bahan Polyester: 6 Fakta Menarik Mengapa Banyak Orang Menjualnya
Tentu Anda sudah sangat sering mendengar tentang bahan polyester. Ya, bahan ini seolah ada di mana-mana dan bisa didapatkan dengan mudah. Yang tidak banyak orang sadari adalah bahan ini sebenarnya ada hampir di seluruh barang berkain di sekitar.
Bahan polyester bisa dipakai untuk membuat apa saja, mulai dari baju, celana, rok, selimut, sofa, bahkan tirai jendela sekalipun. Polyester bukanlah merupakan bahan yang diproduksi secara alamiah. Lalu, dengan cara apa?
Proses dan Makna Polyester
Polyester dibuat melalui proses kimiawi yang dilakukan oleh manusia. Polyester sendiri berasal dari dua kata, yakni polimer yang berarti plastik dan ester yang berarti campuran antara asam karboksilat, alkohol, serta minyak bumi.
Karena bisa dibuat dengan proses kimiawi, kain polyester ini sangat mudah untuk diproduksi dan tentu saja hal ini memengaruhi harganya. Harga polyester sangatlah terjangkau dan bahannya pun tidak langka alias mudah ditemukan.
Jenis-Jenis
Seperti bahan jersey, ada beberapa tipe polyester yang beredar di pasaran.
PET
Tipe PET atau polietilena tereftalat merupakan polyester yang paling banyak digunakan sebagai bahan utama pakaian, bahan dasar botol air, bahan dasar minuman bersoda, serta botol-botol plastik lainnya.
Supaya PET bisa menjadi kain, ia harus divakum dalam ruangan hampa yang bersuhu tinggi. Proses ini cukup rumit dan hanya bisa dilakukan oleh pabrik-pabrik besar.
PCDT
PCDT (poly-1,4-cyclohexylene-dimethylene). Bahan yang satu ini memiliki struktur yang lebih elastis apabila dibandingkan dengan PET. PCDT sering digunakan sebagai bahan dasar untuk taplak, tirai jendela, atau untuk karpet tipis.
Filamen
Benang filamen dapat diproses menjadi kain polyester yang unik. Kain polyester dengan bahan filamen ini adalah kain yang seolah terlihat seperti berasal dari bahan yang alami, sehingga terasa lembut.
Kelebihan
Ada beberapa kelebihan kain polyester bila dibandingkan dengan kain lainnya, seperti bahan crepe, misalnya. Berikut adalah beberapa kelebihan dari kain polyester yang bisa menguntungkan Anda.
- Terjangkau dan mudah ditemukan. Lantaran terbuat dari bahan kimia, beragam pabrik bisa memproduksi kain ini dengan mudah. Jadi, keberadaan kain ini jelas tidak langka dan bisa ditemukan di mana saja, sama seperti bahan polycotton.
- Tahan lama. Bahan kimia sebagai material-material dasar pembuat polyester menjadikan bahan yang satu ini lebih tahan lama dan awet apabila dibandingkan dengan kain-kain lain yang murni terbuat dari kapas. Jadi, meskipun Anda mencucinya berkali-kali dan menggunakannya dalam jangka waktu lama, baju dengan bahan dasar polyester tidak akan mudah rusak.
- Tidak gampang berkerut. Kelebihan lain dari kain polyester adalah tidak mudah berkerut dan juga tidak mudah kusut seperti bahan crepe. Jadi, Anda tak perlu ragu atau bingung saat akan menyimpan kain ini di dalam lemari. Proses penyetrikaan kain ini pun juga mudah. Dengan menggunakan suhu sedang, maka kain polyester pun bisa menjadi halus dalam waktu yang cepat.
- Cepat kering. Anda tidak perlu menunggu kain polyester kering dalam waktu lama. Pasalnya, kain yang satu ini amat cepat kering dan cenderung tahan air. Maka dari itu, selain bahan spandek, bahan baju renang pun juga menggunakan polyester.
Kekurangan
Polyester juga memiliki beberapa kekurangan. Beberapa kekurangan polyester antara lain sebagai berikut.
- Mudah terbakar. Lantaran bahan-bahan dasar dari polyester adalah plastik, maka sudah tentu kain ini akan mudah sekali tersulut api. Maka dari itu, baju-baju berbahan polyester sebaiknya dijauhkan dari api dan bahan-bahan lain yang mudah terbakar.
- Panas. Polyester adalah bahan yang mudah yang panas dan juga tidak memiliki sirkulasi udara yang bagus. Pori-porinya kecil dan juga tidak menyerap keringat.
Jadi, ketika menggunakan pakaian yang berbahan dasar polyester, Anda akan merasa lebih panas. Baju berbahan polyester memang sebaiknya dikenakan di ruangan yang tidak pengap.
Perawatan
Secara umum, polyester tidak membutuhkan perawatan rumit. Maklum, karena dibuat melalui proses kimia, polyester bukanlah bahan yang mudah rusak dan juga usang. Proses perawatan baju polyester adalah sebagai berikut.
- Pertama, cuci busana, baik secara manual maupun dengan mesin. Keduanya sama-sama tidak akan merusak polyester.
- Kedua, gunakan detergen standar yang bisa Anda temukan di supermarket terdekat. Kain polyester tidak rentan terhadap jenis detergen tertentu dan mudah untuk beradaptasi.
- Yang ketiga, gunakan panas sedang saat menyetrika baju polyester. Ya, baju polyester mudah terbakar sehingga sebaiknya tidak menggunakan suhu tinggi di mesin setrika.
- Dan yang terakhir, lipatlah polyester dengan cara biasa, bahan ini tidak mudah kusut. Meski begitu, jangan menyimpannya dengan asal-asalan, karena hal ini berpotensi membuat polyester lebih mudah rusak dan rapuh.
Bisnis dengan Polyester
Kalimat “you gotta have style” dari Diana Vreeland nampaknya mampu menggambarkan fleksibilitas dari polyester.
Ada banyak bisnis yang bisa Anda lakukan dengan kain polyester. Misalnya, bisnis baju kasual, bisnis seragam reuni, bisnis goodybag, bisnis tas tote bag murah, atau bisnis kardigan.
Polyester adalah bahan yang sangat mudah dijadikan apa saja. Lagipula, kain ini harganya murah. Jadi, Anda bisa mendapatkan keuntungan yang berlipat ganda saat berbisnis pakaian dan aksesori yang berbahan dasar polyester.
Selain itu, amat mudah mencetak berbagai macam desain dan warna di atas baju dengan bahan dasar polyester.
Dilihat dari segi ekonomi, polyester akan membawa keuntungan banyak. Pasalnya, bahan ini mudah diolah dan harganya pun amat terjangkau. Maklum, polyester memang bukan barang langka dan harganya tidak akan pernah naik secara drastis.
Kini Anda sudah tahu kelebihan, kekurangan, dan serba-serbi lain terkait bahan polyester. Nah, bila tertarik, Anda bisa mencari bahan ini di toko kain terdekat.
-

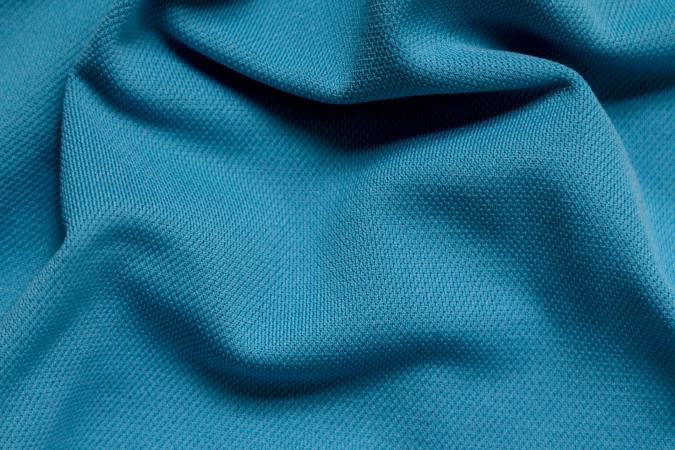
Bahan Cordura: 6 Fakta Menarik Tentang Waterproof!
Jika Anda adalah seorang awam di dunia bisnis kain dan busana, bahan cordura mungkin terdengar asing. Ya, bahan yang satu ini memang sering disebut, tetapi tak banyak yang benar-benar paham seperti apa dan bagaimana kegunaan bahan ini.
Nah, apa yang dimaksud dengan kain cordura? Apakah bahan ini bermanfaat untuk Anda? Kenali serba-serbi bahan cordura waterproof di sini, mulai dari kelebihan, kekurangan, hingga untuk apa bahan ini biasa digunakan dalam keseharian.
Pengertian
Kain cordura awalnya diproduksi oleh perusahaan yang bernama E.I du Pont de Nemours and Company pada tahun 1929. Nah, dibuat dari apakah kain yang satu ini?
Cordura dibuat dari campuran berbagai jenis bahan seperti nilon, kapas, serta bahan polyester. Melihat rumitnya proses pembuatan kain cordura, maka tak mengherankan apabila kain ini dianggap berkualitas dan juga merupakan kain yang kuat.
Pemanfaatan

Kain cordura bisa dimanfaatkan menjadi berbagai macam hal, seperti misalnya jaket, baju, dan tentu saja tas. Kain cordura memiliki serat-serat yang rapat dan juga mampu menahan beban berat.
Tas yang terbuat dari kain cordura pun mampu menampung banyak barang di dalamnya, tetapi tetap ringan.
Cordura memberikan kesan yang sporty dan juga modern. Tas berbahan cordura biasanya adalah tas untuk keperluan goodybag berkelas, tas olahraga, atau tas ransel sekolah.
Sementara itu, baju yang terbuat dari bahan kain cordura biasanya merupakan jaket yang memang diperuntukkan di cuaca yang dingin, berbeda dengan bahan polycotton yang bisa dipakai di cuaca panas sekalipun.
Kelebihan
Kelebihan banyaknya produk yang menggunakan bahan dasar kain cordura menunjukkan betapa baik kualitas dari kain yang satu ini. Untuk lebih jelasnya, berikut beberapa kelebihan dari kain cordura yang sebaiknya Anda ketahui.
Kuat
Seperti yang sudah disebutkan sebelumnya, bahan cordura sangatlah kuat dan juga tidak mudah sobek. Kekuatan bahan ini berasal dari serat-serat rapat dan juga bahan nilon yang amat kuat dan berkualitas tinggi. Maka, tali pada tas outdoor juga dibuat dari cordura.
Mampu menampilkan warna cerah
Kain cordura mampu menampilkan warna dengan cerah, sehingga, barang-barang yang dibuat dari kain cordura terlihat mampu menarik perhatian banyak orang. Tidak mengherankan apabila tas sekolah dibuat dengan bahan ini.
Ringan
Meskipun mampu menampung banyak barang dan tidak mudah sobek, tetapi tas berbahan dasar cordura ini sangat ringan. Jadi, jika membawa tas cordura, Anda tidak akan merasa keberatan. Ini tentu berbeda dengan tas yang terbuat dari kulit.
Antiair
Mengapa ada banyak peralatan outdoor yang menggunakan cordura? Tentu saja ini karena sifat cordura yang antiair. Jadi, hujan ataupun hal lainnya tidak akan mudah menembus kain ini dan hal tersebut tentu sangat menguntungkan bagi petualang.
Memang ada begitu banyak kelebihan yang bisa anda dapatkan dari cordura. Maka dari itu, tidak mengherankan apabila kain ini senantiasa laris manis dan diproduksi dalam jumlah banyak.
Kekurangan

Meskipun kain ini merupakan salah satu kain primadona, tetapi ada beberapa kekurangan dari kain ini yang sebaiknya Anda perhatikan. Nah, apa sajakah kekurangan dari kain berbahan dasar cordura?
Yang pertama adalah penampilannya yang kurang mewah. Cordura tidak pernah memberikan kesan mewah, melainkan kesan sporty dan kasual.
Maka dari itu, sulit menemukan tas mewah yang dibuat dari cordura. Kebanyakan tas mewah akan menggunakan kulit sebagai bahan dasarnya. Cordura sendiri biasanya dipakai untuk jaket sport, tas olahraga, serta tas-tas bernuansa kasual.
Yang kedua, bahannya yang panas. Cordura tidak menyerap keringat dan tentu saja cukup pengap. Itulah alasan mengapa tidak ada banyak baju yang dibuat dari kain cordura, tidak seperti bahan lain, seperti bahan spandek, misalnya.
Cordura biasanya dipakai untuk membuat jaket atau membuat rompi yang bisa menahan angin khusus untuk para pengendara sepeda motor.
Yang ketiga, permukaan kain cordura kasar. Hal ini membuat cordura tidak bisa sepenuhnya dijadikan bahan pembuat pakaian. Perlu tambahan furing yang halus supaya kain ini bisa dipakai.
Pemanfaatan untuk Bisnis

Bila Anda ingin bisnis tas yang laris manis, cordura bisa dijadikan bahan utama. Sifatnya yang kuat tidak akan mengecewakan pelanggan.
Selain itu, desain dan warna yang tercetak di atas kain cordura akan menimbulkan kesan yang unik, sehingga membuat produk Anda terlihat menawan.
Cordura bisa juga dimanfaatkan sebagai bahan dasar sabuk. Ini merupakan alternatif dari sabuk kulit yang memang terkenal mahal. Sabuk cordura cocok dikenakan oleh anak muda dan juga cukup kuat.
Anda juga bisa berbisnis peralatan outdoor, seperti tali untuk naik gunung, tali rompi, dan sebagainya. Sungguh luas peluang bisnis dari kain cordura ini, bukan?
Perawatan
Kain cordura memang tidak mudah kusut dan tidak perlu disetrika. Meski begitu, harus diakui bahwa kain cordura sulit untuk dibersihkan.
Bila ada noda yang menempel, maka segera bersihkan cordura. Bila Anda menunda hal tersebut, kotoran akan meresap dan semakin sulit dihilangkan. Ini tentu membuat aksesori cordura Anda menjadi tidak enak dilihat.
Gunakan detergen yang keras untuk menghilangkan noda membandel pada kain cordura. Bila perlu, gosok kotoran dengan menggunakan sikat gigi.
Selain itu, menjemur kain cordura memang membutuhkan waktu yang lebih lama. Kain cordura cenderung menahan air di sela-sela seratnya.
Bagaimana? Menarik bukan kain yang satu ini? Bahan cordura memang bukan bahan yang mudah dicari di mana-mana. Hanya toko kain tertentu yang menjualnya. Meski begitu, kain ini cukup unik dan tentu punya manfaat spesifik yang bisa dijadikan peluang bisnis.